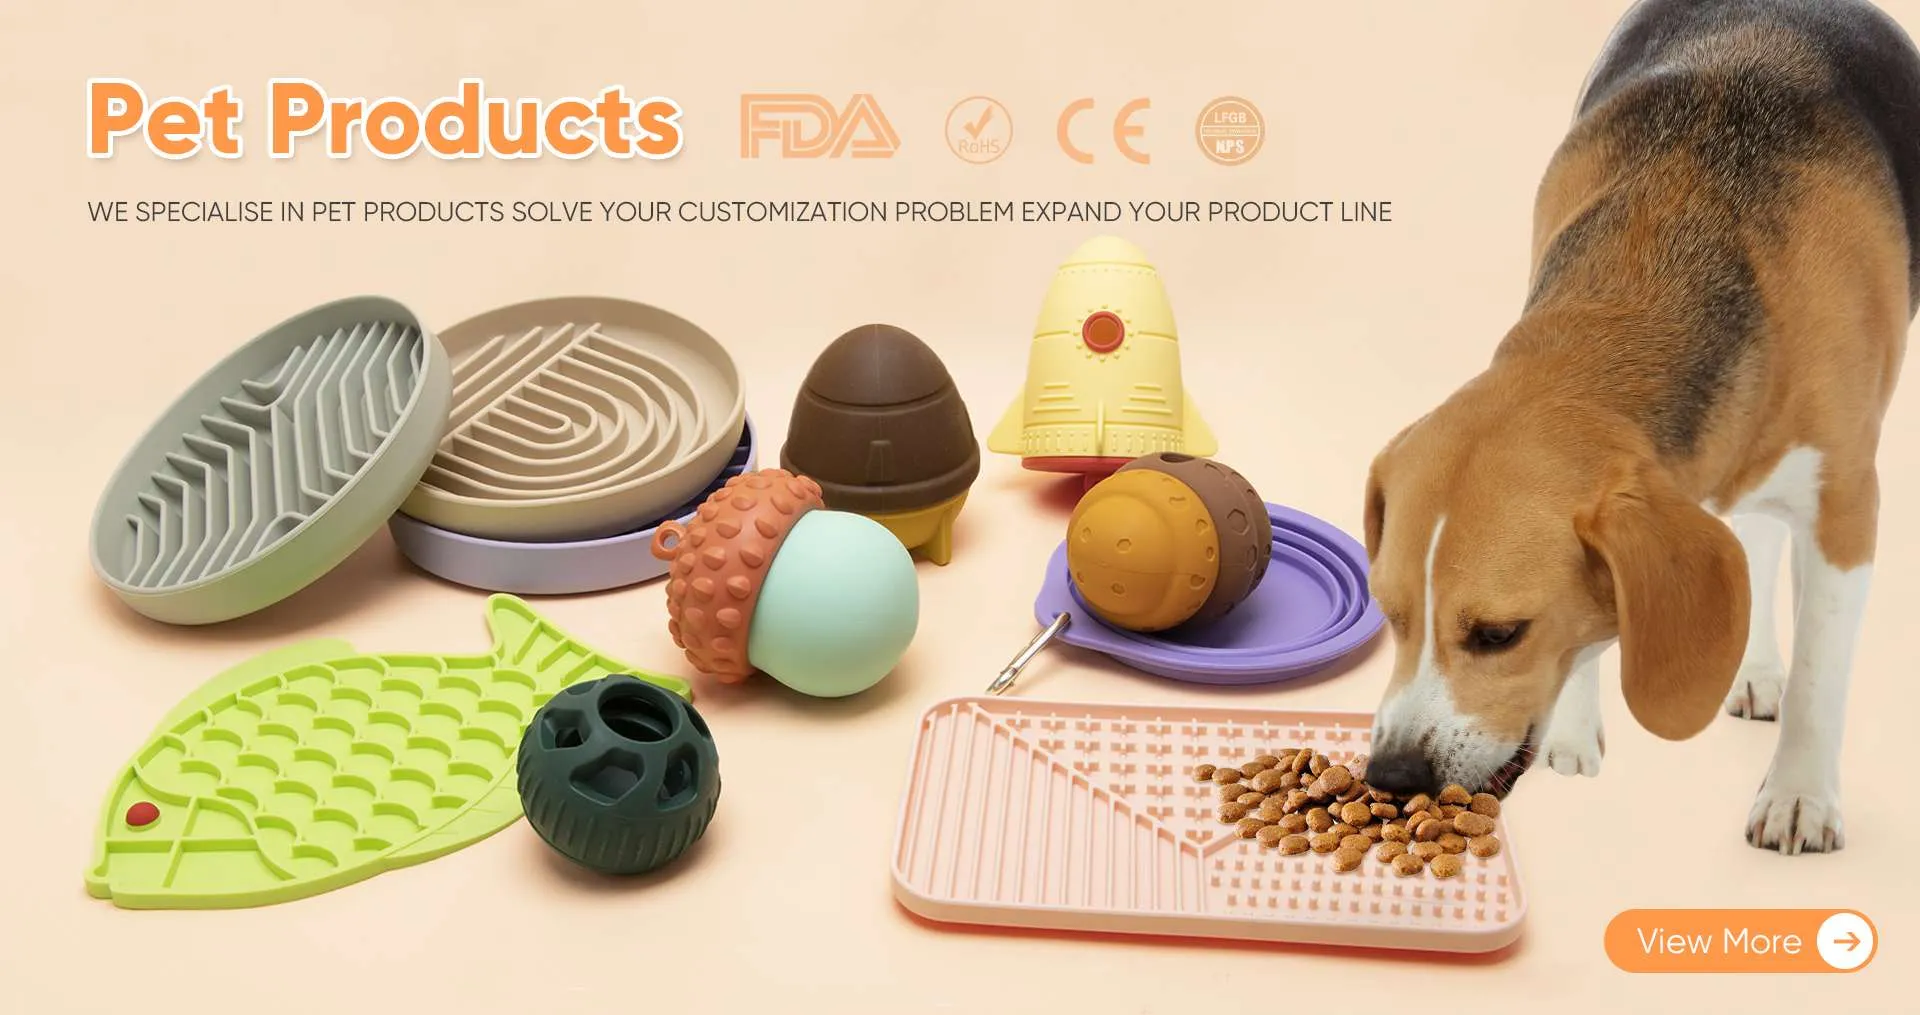
Introduction Feeding a baby is a joyful yet messy adventure, and having the right tools can make all the difference. In recent years, silicone plates and silicone baby bowls have surged in popularity among modern parents – and not just parents, but also baby product brands and retailers are taking notice. The appeal is easy to see: silicone baby dinnerware offers a winning combination of safety, durability, and convenience that aligns with today’s parenting trends. From food-grade safety to suction-cup bases that thwart spills, these products solve many mealtime challenges in a simple, kid-friendly way. Below, we explore the reasons why silicone plates and bowls have become a go-to choice in modern baby feeding and why both families and businesses are embracing this trend.
Key Benefits at a Glance:
Safe & Non-Toxic: Made from food-grade silicone free of BPA, phthalates, and other harmful chemicals. No leaching of toxins into food, even when heated.
Durable & Baby-Proof: Virtually unbreakable – won’t crack if tossed or dropped – and built to endure years of use.
Easy to Clean: Smooth, non-porous surfaces that don’t harbor bacteria or odors, and are dishwasher-safe for quick cleanup.
Mess-Free Feeding: Strong suction bases keep bowls and plates in place, preventing spills and tantrum-induced messes.
Baby-Led Weaning Friendly: Soft, flexible material is gentle on teething gums and allows little ones to self-feed safely, with divided plates for food exploration.
Fun & Functional Designs: Comes in playful shapes and bright colors, with lightweight, easy-grip designs that encourage babies’ independence at mealtime.
Eco-Conscious Choice: Reusable and long-lasting, reducing the need for disposable or frequently replaced dinnerware, which helps cut down on waste.
Now, let’s dive deeper into each of these advantages and see why silicone dinnerware has become a must-have for modern baby feeding.
Safety First: Food-Grade and Non-Toxic Materials
When it comes to babies, safety is paramount, and silicone feeding products excel here. High-quality silicone plates and bowls are made from 100% food-grade, FDA-approved materials, meaning they meet strict standards for food contact safety. Unlike some plastics, they contain no BPA, PVC, phthalates, or other toxic chemicals that could leach into your child’s food. In fact, silicone is an inert, hypoallergenic substance – it won’t react with foods or cause irritation for babies with sensitive skin. This gives parents peace of mind that every bite their baby takes is free from unwelcome chemicals.
Silicone’s safety credentials are backed by experts and regulators. It has a long track record of use in infant products like bottle nipples and pacifiers, proving its reliability. Health Canada, for example, concluded that silicone is safe for baby products since it’s stable and does not leach chemicals or fumes into food. For parents, this means you can warm up food in a silicone bowl or plate without worrying about toxins – a stark contrast to certain plastics which can release harmful substances when heated. Choosing FDA-grade silicone feeding gear is essentially choosing a non-toxic, baby-safe solution that aligns perfectly with modern parents’ focus on healthy, clean feeding environments.
Durable and Long-Lasting for Baby Chaos
Babies are anything but gentle with their dinnerware – plates get thrown, bowls get banged, and cups hit the floor routinely. Durability is a major reason silicone feeding products have become so popular. Silicone is shatterproof and toddler-tough. Unlike glass or ceramic, it won’t break or crack if flung from a highchair or dropped on the ground. Even compared to traditional plastic, which can warp or split over time, silicone stands up to wear and tear. It’s soft yet amazingly strong: even the most rambunctious little one can’t easily chew through or damage a good silicone bowl or plate. For parents, this means fewer ruined dishes and a safer dining area (no sharp broken pieces to worry about).
This robustness also makes silicone dinnerware cost-effective and reusable over the long run. A quality silicone plate can survive through multiple stages of your child’s development – from infancy to toddlerhood – and even be passed down to younger siblings without much wear. Many silicone products are also temperature-resistant. They can go from the freezer to the microwave without warping or melting, so you can freeze homemade baby meals and then thaw or reheat them in the same container. This resilience to extreme cold and heat further extends their usable life. In short, silicone baby plates and bowls are built to withstand the chaos of babyhood. They won’t need constant replacing, which is a win for parents’ wallets and an appealing quality for retailers aiming to offer reliable, high-quality products.
Easy to Clean and Hygienic
Ask any parent and they’ll confirm: ease of cleaning is a big deal when it comes to baby gear. Here again, silicone shines. Thanks to its smooth, non-porous surface, food residues don’t cling stubbornly to silicone plates and bowls. Purees, oatmeal, or yogurt – all the sticky messes of baby feeding – rinse off with minimal effort. Silicone doesn’t stain or absorb odors either, so that orange carrot puree won’t leave a lingering tint or smell. This non-porous quality also means bacteria and mold have a hard time sticking around on silicone, keeping things more sanitary.
Most silicone dinnerware is completely dishwasher-safe, which is a lifesaver for busy parents. You can simply toss the used bowls and plates on the top rack of the dishwasher, and they’ll come out clean and sterile for the next meal. Even hand washing is a breeze – a quick soapy scrub and rinse, and it’s clean. Unlike plastic, which can develop scratches or pores that trap food and germs over time, silicone remains scratch-resistant and easy to sterilize (you can even boil it occasionally for deep cleaning). By cutting down on cleanup time and hassle, silicone feeding items let parents spend more time enjoying mealtime with their little ones and less time scrubbing dishes. For retailers, highlighting this easy-clean advantage is key, as convenience is a top selling point for modern families.
Mess-Free Meals with Suction Power
One of the most parent-loved features of silicone baby plates and bowls is the option of an integrated suction base. Anyone who’s fed a toddler knows how quickly a bowl can become a projectile! Silicone suction plates stick firmly to highchair trays or tables, keeping the dish in place no matter how enthusiastic your baby’s arm flails are. The result? Significantly fewer spills and less cleanup for you to worry about. A strong suction base can prevent an “upside-down bowl of applesauce” scenario before it ever happens. This not only saves your floors (and sanity), but also helps babies focus on eating instead of knocking things over.
By minimizing the mess, suction plates create a more positive feeding experience for both child and parent. Babies quickly learn that the bowl isn’t going to budge, which can actually aid their self-feeding development. With the dish staying put, little ones can concentrate on scooping up food with their spoon and getting it to their mouth, rather than chasing the bowl around. This encourages fine motor skill development and lets infants and toddlers practice eating independently in a controlled way. For these reasons, suction cups have become a defining feature of modern baby dishware. Baby product brands often incorporate suction feet or bases into their silicone plate designs, knowing that spill-proof functionality is a major selling point. It’s a simple innovation that directly addresses one of parents’ biggest pain points at mealtime, making silicone bowls with suction a staple in many households.
Perfect for Baby-Led Weaning and Independence
The rise of baby-led weaning (BLW) – an approach where babies skip purees and feed themselves finger foods from the start – has influenced many product choices for new parents. Silicone plates and bowls are particularly well-suited for BLW and have ridden the wave of this modern parenting trend. How do they help? First, silicone dishes are safe for babies to handle directly. The material is soft and flexible, so infants can grab their plate or bowl without risk of sharp edges or it shattering. It’s even gentle on gums and emerging teeth, effectively doubling as a teether in those early stages. Parents can place a silicone spoon or a few steamed veggie sticks on a suction plate and let the baby explore – the plate won’t slide around and the baby can’t break it or hurt themselves with it.
Many silicone baby plates also come with divided sections, which is a boon for BLW families. Those little compartments allow parents to offer a variety of foods and textures side by side (for example: soft fruits in one section, steamed veggies in another, pasta or cereal in another) without everything mixing into one pile. This lets babies explore different flavors and food groups at their own pace. It makes the meal more engaging and allows the child to pick and choose, fostering a sense of independence and curiosity about food. In essence, silicone feeding products support BLW by being child-friendly and encouraging self-feeding. As one baby gear brand notes, silicone spoons and suction bowls are designed to help infants develop hand-eye coordination and fine motor skills while being gentle on their gums – perfect for babies “just starting on solids”.
Modern parents who embrace BLW appreciate how silicone plates empower their little ones to participate actively in mealtime. For retailers and brands, highlighting the “BLW-friendly” nature of silicone dinnerware (safety, suction, sections, easy grip) can resonate strongly with this growing segment of moms and dads looking to raise independent eaters.
Fun, Flexible Designs that Babies (and Parents) Love
Another reason for silicone’s popularity in baby feeding is the design flexibility the material allows. Silicone can be molded into all sorts of creative shapes and colors, giving designers free rein to make baby tableware that is both fun and functional. Today’s parents can find silicone plates shaped like adorable animals, bright multicolored bowls, and coordinating spoons and cups in trendy palettes. These playful designs aren’t just cute – they can actually make mealtime more enjoyable and stimulating for the child. Babies and toddlers are naturally drawn to vivid colors and interesting shapes, so a butterfly-shaped plate or a bear-face bowl can grab their attention and make them eager to eat. Mealtime becomes a bit of playtime too, which can encourage picky eaters to participate more willingly.
Beyond aesthetics, silicone baby dinnerware is often ergonomically designed for little hands. The flexibility and softness of silicone mean cups can have easy-grip surfaces, spoons can have soft tips, and plates can have curved edges that help with scooping. Many silicone bowls and plates are lightweight (yet sturdy), so a toddler can practice holding and carrying their dish without it being too heavy. All these thoughtful design touches give babies more confidence and independence during meals. Modern parents, in turn, appreciate products that not only look stylish in their kitchen but also support their child’s development. This blend of style and function is very much in line with contemporary parenting values.
For baby product brands, silicone opens up a world of design possibilities that traditional materials might limit. We’ve seen an explosion of innovative products – from divided plates shaped like buses and dinosaurs to suction bowls with funny faces – made possible by silicone molds. Manufacturers are investing in creative designs knowing that attractive, engaging products appeal to both parents and kids. In fact, the integration of features like cute shapes, bright colors, and even educational elements (like alphabet or animal graphics on mats) is a key trend in this space. Silicone’s popularity owes a lot to how well it marries child-friendly creativity with practical functionality.
Eco-Friendly and Sustainable Choice
Sustainability is a modern parenting priority, and here too silicone gets a big thumbs up. By choosing silicone over disposable plastics or easily breakable dishes, families are making a more eco-conscious choice. Silicone baby plates and bowls are reusable and extremely durable, which means they significantly reduce the need for throw-away items or frequent replacements. A single set of silicone dinnerware can last through multiple childhood stages (and even multiple children), cutting down on waste and saving resources in the long run. This longevity is in stark contrast to cheap plastic plates that might crack after a few uses, or paper plates that go straight to the trash. In addition, when a silicone product does reach the end of its life, it’s recyclable under the right conditions, unlike most mixed plastics.
Silicone is often made from silica (derived from sand), and while it’s not biodegradable, its reusability makes it a greener option for eco-minded parents. There’s also the benefit of health and eco-friendliness overlapping: by avoiding plastics (which can produce microplastics and chemical waste), silicone users contribute to a healthier environment for their kids. More and more parents today actively seek out baby gear that is sustainable, non-toxic, and planet-friendly, and silicone feeding products tick all those boxes. This is reflected in the marketplace: consumers are increasingly preferring these kinds of solutions, effectively making silicone baby tableware “a staple in modern parenting” due to its alignment with both safety and sustainability values.
From a business perspective, focusing on silicone products can also support corporate sustainability goals. Many baby product companies highlight the eco-factors of their silicone lines (reduced waste, no harmful plastics, long-lasting quality) to appeal to conscientious customers. In summary, silicone plates and bowls are popular not just because they’re good for individual families, but because they fit into a larger trend of eco-friendly living that many young parents and forward-thinking brands are eager to support.
A Growing Trend and Opportunity for Brands & Retailers
The boom in silicone baby feeding products isn’t only changing family kitchens – it’s also reshaping the baby products industry. For retailers and baby brands, the demand for silicone plates and bowls represents a significant market opportunity. Modern parents are more informed and particular than ever, often seeking out items that are BPA-free, phthalate-free, and meet high safety standards, which has led to a clear shift away from traditional plastic feeding wares. In response, countless companies have launched or expanded silicone product lines to meet these expectations. We’ve seen established brands introduce complete silicone feeding sets, and new startups emerge focusing solely on silicone baby gear – from plates and bowls to bibs, spoons, and snack cups.
Market research underscores how strong this trend has become. The global market for baby silicone feeding accessories (such as placemats, bowls, etc.) was valued around $410 million in 2024 and is projected to reach $890 million by 2033, growing at roughly 8.9% annually. This robust growth is driven by rising parental awareness of hygiene, safety, and convenience – exactly the benefits that silicone products provide. In short, consumer preferences are rapidly shifting toward silicone, and savvy businesses are taking note. Manufacturers are pouring R&D into innovative features (for example, plates with better suction and fun educational designs) to differentiate their products in this growing market. Retailers, from big-box stores to boutique baby shops, are stocking more silicone options because that’s what customers are looking for.
If you’re a baby product brand or retailer, now is an excellent time to embrace the silicone trend. By sourcing high-quality, food-grade silicone items – or even developing your own line – you can cater to the modern parent’s desire for safe, stylish, and eco-friendly feeding tools. Remember to highlight key features that parents love (non-toxic materials, suction base, dishwasher-safe, etc.) and secure relevant safety certifications (FDA, LFGB) to build trust. Given the projections and current consumer enthusiasm, adding silicone plates and bowls to your product offerings can help drive sales and demonstrate that your business is in tune with contemporary parenting needs. In essence, it’s not just a fad; silicone baby tableware is becoming the new norm, and businesses have a ripe opportunity to be part of that movement.
Conclusion: Embracing the Silicone Revolution
Silicone plates and bowls have earned their popularity in modern baby feeding for all the right reasons. They address parents’ biggest concerns – safety, mess, durability, and health – all while fitting seamlessly into a busy, child-friendly lifestyle. For parents, switching to silicone means mealtimes are a little less stressful and a lot more fun: you know your baby’s dish won’t shatter, their food stays toxin-free, and cleanup is a snap. The kids benefit too, gaining independence and enjoyment from colorful, easy-to-handle dishes that encourage them to explore food safely. And as an added bonus, you’re making a choice that’s gentler on the environment by reusing these long-lasting items.
For baby brands and retailers, silicone feeding products represent a convergence of multiple trends – from health and safety to sustainability and modern design – making them a smart addition to any product lineup. The continued growth in this sector suggests that silicone dinnerware isn’t just popular now, but is poised to remain a staple for the foreseeable future. In other words, embracing silicone is a win-win for everyone: happy, healthy babies and satisfied, confident parents, alongside thriving businesses meeting a clear market demand.
In closing, whether you’re a parent searching for the best gear or a business considering your next product move, silicone baby plates and bowls are worth the investment. They truly combine innovation, practicality, and peace of mind in one package. Mealtime with little ones will always be a bit of an adventure, but with silicone feeding tools on hand, it’s an adventure you can approach with a smile (and far fewer spills!). So go ahead – consider making the switch or expanding your catalog – and join the many modern parents and providers who have discovered the benefits of silicone for baby feeding. Your baby, your floor, and even the planet will thank you.
https://www.newtopsilicone.com/wp-content/uploads/2025/06/silicone-mom-baby-products-banner.webp10001000Enriquehttps://www.newtopsilicone.com/wp-content/uploads/2022/06/newtop-logo-300x138-2.pngEnrique2026-03-24 11:27:402026-03-24 11:44:10Why Silicone Plates and Bowls Are Popular in Modern Baby Feeding
In a nutshell:Licking mats and slow feeder bowls are both interactive feeding tools that provide dog enrichment, but they serve different purposes. A licking mat (or “lick mat”) is best for calming and treating your dog with spreadable goodies in a slow, soothing way, making it great for dog anxiety relief and boredom-busting. A slow feeder bowl, on the other hand, is designed for slow feeding for dogs who gulp their food – it turns mealtime into a puzzle so your pup eats at a safer pace, helping digestion and preventing bloat. Many pet owners use both: a lick mat to occupy and relax their dog during stressful moments, and a slow feeder bowl to improve daily eating habits. Below, we’ll break down the differences, ideal uses, pros and cons, and how to choose the best option for your dog’s age, breed, behavior, and eating style.
Licking Mats for Dogs (Interactive Lick Pads)
What is a licking mat? A licking mat is a flat, textured mat (usually made of rubber or silicone) that you can smear with soft foods for your dog to lick off. The surface has grooves, ridges, and patterns which lock in spreadable treats – making your pup work a bit harder and longer to enjoy their snack. Instead of gulping down a treat in one bite, the dog licks persistently to get every last bit from the crevices. Lick mats come in various shapes (often square or circular) and some even have suction cups to stick on walls or floors. They’re generally flexible, food-safe, and easy to rinse clean. In short, a lick mat turns treat time into a slow, engaging licking activity.
Many lick mats can suction to surfaces. Here a dog calmly licks peanut butter from a mat stuck on the bathtub wall – a smart trick to distract and relax dogs during bath time.
Benefits of Licking Mats
Licking mats pack multiple benefits for dogs, addressing both behavioral and health needs. In fact, lick mats can “soothe, entertain, and enrich” your dog all at once. Here are some key advantages of using a licking mat:
Calming & anxiety relief: Licking is a naturally soothing behavior for dogs. As they lick, their brain releases pleasure endorphins that help them feel calm and comforted. Many pet parents use lick mats as dog anxiety relief tools – for example, to keep a nervous dog relaxed during fireworks, thunderstorms, grooming, or vet visits. Think of a lick mat as a tasty “pacifier” that can take the edge off stressful situations. Even energetic dogs can use a lick mat after exercise to bring their arousal down and settle calmly.
Mental enrichment & boredom-busting: Lick mats are a form of interactive dog enrichment. Your dog has to focus and problem-solve slightly to lap up every bit of treat from the textured surface. This engages their brain and can curb boredom or destructive behavior. Any such puzzle-like activity provides mental stimulation, giving your dog a job to do (even if it’s just “how to get the peanut butter out of the corners”). It’s an easy way to enrich your dog’s day, especially when indoor play is limited.
Slower eating (small portions): While primarily for treats, lick mats do slow down eating. Instead of inhaling a snack in seconds, a dog might spend 10-20 minutes working on a lick mat. If you have a fast eater, using a lick mat for treats – or even for part of their meal – can prevent gobbling and gulping. In fact, some lick mats double as slow feeders to help dogs not “wolf down” their food, reducing risks of choking or bloat from too-rapid eating. A frozen lick mat can slow a dog down even more than some slow feeder bowls, without causing the frustration some puzzles do. (However, note that lick mats typically hold smaller amounts, so they complement rather than replace a slow bowl for large meals.)
Dental health perks: The act of licking increases saliva production, which can help wash bacteria off the tongue and gums. The mat’s ridges and bristles also scrape gently against the tongue and maybe the front teeth. Some sources claim lick mats can “help clean their teeth” and promote dental health. Important: This is only a minor benefit – lick mats are not a substitute for brushing your dog’s teeth. At best, they can help a bit with freshening the mouth and reducing buildup on the tongue. Always continue regular dental care.
Positive training and quiet behavior: Lick mats can be used to create positive associations and reward calm behavior. For instance, to help with crate training, you can give a peanut butter-coated lick mat in the crate so the dog sees the crate as a happy, relaxing place. Similarly, you can use a lick mat to redirect a mouthy puppy’s biting habits – when a teething pup is getting nippy or destructive, offering a lick mat can give them a peaceful activity and give you a “few moments of peace”. This teaches puppies to settle down. Overall, having a lick mat in your toolkit is a must for dog enrichment, according to experts.
Ideal Foods to Use on a Lick Mat
One big advantage of lick mats is their versatility with different treats. What can you put on a lick mat?Almost anything that is dog-safe, spreadable or lickable! Here are some favorite options:
Peanut butter – This is a classic lick mat spread. Most dogs adore peanut butter. Use it in moderation and make sure it does not contain xylitol (an artificial sweetener toxic to dogs). A teaspoon smeared across the mat will go a long way. Choose natural, unsalted peanut butter if possible, and remember it’s a treat (high in calories).
Yogurt or purees – Plain, unsweetened yogurt (Greek or regular) is another great choice. It’s creamy, low-fat, and contains probiotics that can aid digestion. You can also use pumpkin puree, mashed banana, unsweetened applesauce, cottage cheese, or even baby food (as long as ingredients are dog-friendly). These soft foods spread easily and offer healthy variety.
Wet dog food – Lick mats aren’t just for treats; you can serve part of your dog’s regular meal on them too. Pâté-style canned dog food or a fresh dog food blend can be smeared into the mat’s grooves. Some people even soften kibble with water and press it into the mat. This effectively turns the lick mat into a slow-feeding plate for dogs who eat too quickly or need extra mental stimulation at mealtime.
Broth and frozen treats – To really extend the licking session, consider making a frozen lick mat treat. Pour a bit of low-sodium chicken or beef broth onto the mat and freeze it, or freeze a yogurt/PB spread for a couple of hours. The result is an ice-cold “dog popsicle” that can keep your pup busy for ages on a hot day. Freezing not only makes the fun last longer, but also adds a cooling element for teething puppies or summer afternoons.
Other creative ideas – You can experiment: try spreadable liver paste, dog-safe “squeezy cheese,” canned pumpkin, blended fruit, or even honey (in small amounts, as honey is sweet). Some lick mats are divided into sections, so you could put a different treat in each quadrant to create a tasting platter for your dog. Always ensure any food used is safe for dogs (avoid ingredients like onion, excessive salt, etc.). And remember to adjust meal portions if you’re giving a lot of extra treats on the mat to avoid weight gain.
Cleaning and Safety Tips for Lick Mats
Lick mats are designed to be reusable and easy to clean, but they do have lots of little nooks and crannies. Here’s how to keep things hygienic and safe:
Wash after each use: It’s best to clean the lick mat promptly once your dog has finished their treat. Even if it looks licked-clean, saliva and food residue can breed bacteria or mold if left sitting. Most quality lick mats are dishwasher-safe (especially those made of food-grade silicone). You can simply toss it on the top rack of the dishwasher. If hand-washing, use warm soapy water and a brush to get into the grooves. For stubborn dried-on bits (like peanut butter), soaking the mat in hot water for a few minutes helps.
Check material and temperature limits: Ensure your lick mat is labeled food-grade and non-toxic. Cheap off-brand mats might use materials that leach chemicals – so stick to reputable brands. Also verify whether it’s safe for dishwasher, microwave, or boiling. Some silicone mats can handle boiling water sterilization, but others might warp – always follow the manufacturer’s guidelines.
Supervise your dog:A lick mat is not a chew toy! Many are made of soft flexible rubber or silicone, which a determined dog could tear apart. Never leave a dog unsupervised with a lick mat if they are likely to chew it. Most dogs will be focused on licking the food, but if your pup starts gnawing on the mat’s edges or tries to rip it, intervene immediately. Vets advise that you only allow lick mat use under supervision so you can take it away once the food is gone. This prevents the dog from eating bits of the mat, which could cause choking or an intestinal blockage.
Replace when worn: Regularly inspect the mat for damage. If you notice pieces missing, deep tooth marks, or cracks, it’s time for a new one. A heavily chewed-up mat could shed bits that end up swallowed. When in doubt, throw it out – they’re not very expensive to replace, and your dog’s safety comes first.
Tip for heavy chewers: If your dog is a serious chewer (especially some puppies), you may need to take extra precautions or choose alternatives. Some lick mats come with a hard plastic frame or are designed to be more chew-resistant (e.g., with raised edges). You can also try freezing the mat with a thin layer of treat – the hardness of the frozen food sometimes dissuades dogs from biting, as they focus on licking the melt. If your dog consistently tries to chew up lick mats, you might reserve lick mat time for when you can closely watch, or consider using a more durable food puzzle (like a Kong or West Paw Toppl toy) for unsupervised enrichment.
Slow Feeder Bowls for Dogs (Maze Feeding Bowls)
What is a slow feeder bowl? A slow feeder dog bowl looks like a regular pet bowl with a twist – inside the bowl are built-in ridges, bumps, or maze-like shapes that create obstacles for your dog’s tongue as they eat. The goal is to make your dog eat more slowly by turning their meal into a little puzzle. Instead of scarfing down all the food in 10 seconds, the dog has to nudge kibble around the barriers, chasing food into corners or between prongs. This slows their pace of eating to a healthier rate. Slow feeders come in various designs – spirals, concentric ridges, paw-shaped mazes, etc. – and materials (plastic is most common, but some are stainless steel or silicone). They are used at mealtimes in place of a normal food bowl, particularly for dogs who eat too fast.
Benefits of Slow Feeder Bowls
Slow feeder bowls are more than a fad; they have real health and behavioral benefits for dogs who inhale their food. If your canine companion tends to be a “chow hound” or “vacuum cleaner” at dinner, a slow feeder can be a game-changer. Here are the main benefits:
Prevents choking, gulping & bloat: The primary purpose of a slow feeder is to stop dogs from gulping down food and air, which can cause gagging or even choking. By slowing intake, it also reduces the amount of air swallowed, helping to prevent bloat (gastric dilatation-volvulus) – a life-threatening condition especially in deep-chested breeds. Eating too fast is a risk factor for bloat, so slowing the dog’s eating with a special bowl can literally be lifesaving. Additionally, a slower pace means less regurgitation and vomiting; food has time to settle properly.
Improved digestion: When a dog wolfs down a meal, the food often isn’t chewed or salivated adequately. Slower eating gives the stomach and intestines time to process food better. Many owners find their dogs burp less and have less gas or post-meal discomfort when using a slow feeder. As one source puts it, “slower eating gives the stomach time to process food properly, reducing the risk of gas, bloating, and discomfort.”
Weight management: Interestingly, slow feeders can help with portion control and weight management. A dog who eats rapidly might consume their whole portion before their stomach realizes it’s full, begging for more. By stretching out mealtime, the dog’s brain has a chance to catch up with their tummy. They may feel full with the allotted amount of food and be less inclined to beg or overeat. Longer mealtimes can lead to a greater sense of satiety, helping prevent overeating and obesity. (Of course, you still need to measure your dog’s food; a slow bowl just ensures they don’t gobble it too quickly.)
Mental stimulation: A slow feeder doubles as a simple puzzle toy. Dogs get a mental workout figuring out how to chase kibble around the maze. It’s like turning dinner into a fun little game: “the puzzle-like design adds a layer of mental enrichment to mealtime – think of it as dinner and a game!”. This can make meals more engaging for your dog, providing some enrichment especially for high-energy or intelligent dogs who need extra challenges. It won’t tire them out like a long walk, but it does make them work a bit for their food, tapping into natural foraging instincts.
Slower, calmer eating habits: Overall, a slow feeder bowl transforms the eating experience from a race into a relaxed routine. Meals last longer – perhaps turning a 1-minute scarf-fest into a 5-10 minute calm dining experience. This can create a more zen-like eater over time. The dog might learn to chew more and not be so frantic at meals. If you have multiple dogs, using slow feeders can also reduce food competition issues, since each dog is focused on their own bowl and can’t finish so fast as to go after a sibling’s portion.
Better for certain medical conditions: Dogs with conditions like acid reflux may benefit from slower eating to avoid overwhelming the stomach. Also, breeds prone to GDV/bloat (e.g. Great Danes, German Shepherds, Labs) are often recommended by vets to use slow feeders as a preventive measure. While not a guarantee, it’s a simple step that can help lower the risk of a dangerous situation.
Best Foods to Use in Slow Feeder Bowls
Slow feeder bowls are primarily made for dog food – especially dry kibble – but they can actually accommodate a variety of diets:
Dry kibble: This is the most common use. Just pour your dog’s measured kibble into the slow feeder instead of a normal bowl. The pieces will distribute into the ridges and pockets. Your dog will have to nose and tongue around to get them out, significantly slowing down a kibble gulper. The designs are optimized for dry food to roll around within the maze.
Wet food: You can use slow feeders with canned food or raw food as well. For canned wet food (pâté or chunks in gravy), you might press it into the grooves or spread it around. Your dog will then lick and maneuver it out, which combines the slow feeding with a bit of licking mat action. Some slow feeder bowls are shallow and work almost like a lick mat for wet food, while others have deeper compartments you can fill. Pro tip: If the wet food is very slippery, a dog might cheat by picking up the whole bowl and trying to tip it – so look for a bowl with non-slip base or suction if using wet food, or be ready to supervise. But generally, yes, slow feeders work for wet food – it will certainly slow the dog compared to slurping from a normal bowl.
Mixed or soaked food: You can mix kibble with a bit of water or broth and put it in a slow feeder, or do half kibble, half wet. Some slow feeders (like the LickiMat “Slodog” tray) are designed to handle all food types – dry, wet, raw, even liquids – without mess. You can experiment with what works best for your dog. If your dog is on a raw diet (e.g. raw meaty chunks), there are slow feeders that look like muffin trays or have large pockets to place the pieces, forcing the dog to pick them out one by one instead of gulping.
Frozen meals: Just as you can freeze a lick mat, you can also freeze food in a slow feeder bowl. For example, mix kibble with some water or yogurt, or use a raw/wet mix, and freeze it into the bowl. This effectively turns the slow feeder into a giant ice block treat that the dog has to patiently work on. It’s another way to super-slow a meal and keep a dog busy (and cool on a hot day). Ensure the bowl is freezer-safe if you try this.
In summary, slow feeder bowls are quite versatile – anything you’d feed in a normal bowl can go in a slow feeder, as long as it’s not so liquid that it just spills out. Dry kibble is easiest, but wet and raw can be used too (it might just be a bit messier to clean up).
Choosing & Using a Slow Feeder Bowl (Cleaning, Size & More)
When selecting a slow feeder, consider your dog’s size, face shape, and eating style. Here are some tips to get the most out of it:
Size & shape for your dog: Pick a slow feeder bowl that suits your dog’s breed and muzzle shape. For example, if you have a short-nosed breed like a Bulldog or Pug, choose a slow feeder with shallow grooves or a more open design; some slow bowls are specifically marketed as brachycephalic-friendly. A dog with a long snout (Collie, Doberman, etc.) can handle deeper maze patterns. Also ensure the bowl holds enough volume for your dog’s meals – large dogs may need an “XL” slow feeder so their full portion fits. Conversely, a tiny dog or puppy might do better with a smaller feeder (big mazes could frustrate a very small dog).
Material matters: Most slow feeders are plastic, which is lightweight and comes in fun colors/shapes. If choosing plastic, look for BPA-free, food-safe plastic and check that it’s durable (some cheap plastics can crack). There are also stainless steel slow feeder bowls (essentially a metal bowl with a dome in the middle or ridges) – these are very durable and good for dogs who might chew on plastic, and they’re often dishwasher-safe and sanitary. Silicone slow feeders exist too (they’re like floppy mats or bowls) which are quiet (no clinking) and safe but might be easier for a dog to flip or chew if unsupervised. No matter the material, dishwasher-safe is a big plus for convenience.
Difficulty level: Some slow feeders are very challenging (lots of tight crevices), while others are easier (simple ridges). Match the difficulty to your dog. If your dog has never used a slow feeder, start with a moderately easy design so they don’t get too frustrated or give up. You can even make it easier initially by not filling the bowl completely – let some kibble be more accessible. As they get used to it, you can introduce more complex feeders later if needed. The goal is to slow them down, not to make eating impossible. If you notice your dog getting stressed or whining at the bowl, the design might be too hard – try a simpler one. Dogs that are easily frustrated may do better with a basic slow bowl (just a couple of large ridges) rather than an intricate puzzle.
Cleaning the bowl: Because of all the crevices, you’ll want to clean the slow feeder after each meal or at least daily. Most are top-rack dishwasher safe, which is the easiest method. If hand washing, use a bottle brush or sponge to get into all the nooks where wet food or slobber might stick. Leftover gunk can spoil the fun fast – residue might mold or attract ants, so keep it clean. If you feed wet food in it, definitely wash promptly as it can get pretty gross if left sitting.
Non-slip and stability: A common issue is dogs pushing the slow feeder bowl around or flipping it in an attempt to get food out faster. To avoid this, choose one with a non-slip rubber base or suction cups. Some heavy-duty slow feeders even come in a wedge shape or have suction to the floor. You can also place the bowl on a non-skid mat. Supervise initially – if the dog is trying to pick up and drop the bowl to dislodge food, correct that behavior. You may need a heavier or more stable design.
Patience and training: Introduce the slow feeder when you have time to observe. Encourage your dog as they figure it out – a little cheerleading or a tasty topper (like a drizzle of broth or a few treats) can motivate them. Most dogs get the hang of it quickly, but a few might be resistant at first (“Why is my food trapped?!”). With patience, they’ll adapt. If you truly have a dog that refuses a slow feeder, you can consider other slow-feed methods (like spreading food on a flat pan, using a snuffle mat, or food-dispensing toys). But usually, after a few tries, dogs will use the slow bowl without issue – and some end up loving the challenge.
Now that we’ve covered each tool separately, let’s compare licking mats and slow feeders head-to-head on the key factors that matter to pet owners.
Licking Mat vs Slow Feeder: Feature Comparison
To make your decision easier, here’s a side-by-side comparison of licking mats and slow feeder bowls on important features and uses:
Feature
Licking Mat
Slow Feeder Bowl
Primary Purpose
Enrichment & calming treat activity (notably dog anxiety relief by licking). Often used for treats or distractions rather than full meals.
Slow down meal consumption to promote healthy, slow feeding for dogs that eat too fast. Primarily used at mealtimes for portion control.
Feeding Speed
Slows eating somewhat – takes a few minutes to lick up a small treat; a frozen mat can extend to 15–30 min for modest food amounts. Great for snacks or partial meals, but may not hold a large meal for big dogs.
Significantly slows eating – can turn a 30-second gulper into a 5-10 minute eater. Designed to handle a dog’s full meal and prevent rapid gorging. Ideal for dogs that otherwise inhale food.
Enrichment & Mental Stimulation
High – Licking stimulates soothing endorphins and satisfies foraging instincts in a low-stress way. Offers sensory enrichment and a “task” for the dog (especially if you vary foods or freeze it).
Moderate/High – Eating becomes a puzzle; dog engages problem-solving to navigate the maze. Provides mental challenge, though can be a bit repetitive. Not as inherently soothing as licking, but still enriching especially for food-motivated dogs.
Anxiety/Calming Benefit
Excellent – Licking has a self-soothing effect that can calm an anxious dog. Lick mats are frequently recommended to help with anxiety, boredom, and hyperactivity. They’re great during stressful events (thunder, grooming, etc.) to keep a dog relaxed.
Low – The slow feeder’s main aim is not calming but slowing eating. While it engages the dog, it doesn’t specifically soothe anxiety. A nervous dog might benefit indirectly if the slow feeding prevents tummy upset (an anxious fast-eater can get nauseous), but generally slow bowls are for physical health, not emotional relief.
Typical Food Types
Spreadable treats and soft foods. Best with things like peanut butter, yogurt, wet food, purees, baby food, or soaked kibble that will stick to the mat. Can freeze liquids (broth) or spreads for longer enjoyment. Not ideal for plain dry kibble (it would just fall off, unless embedded in a mat with pockets).
Dry or wet dog food. Optimized for kibble or any small pieces that can move around the maze. Also works with wet food or raw – you can pack it in the grooves – but may be messier to handle. Can add a bit of water/broth and even freeze the whole bowl for extra challenge. Essentially, any food you feed normally can go in a slow feeder.
Ease of Cleaning
Moderate: Most lick mats are dishwasher-safe or easy to hand wash. Being flat, they have no deep interior, but the tiny grooves need thorough cleaning. Sticky foods like peanut butter can cling in crevices – a bottle brush helps. Silicone mats won’t rust and usually clean up well. Tip: Soak after use or dish-wash to avoid dried residue.
Moderate: Many slow bowls are dishwasher-safe plastic or metal, which makes cleaning convenient. The maze patterns can trap bits of food (especially wet food), so you may need to scrub corners. No electronic or moving parts to worry about. Overall similar effort as cleaning a normal bowl, just with extra nooks.
Durability
Good, but can be chewed. High-quality rubber/silicone mats are durable for repeated licks, but not for chewing. A determined dog can rip a mat, so longevity depends on supervising use. No moving parts to break. If used properly (for licking only), a mat can last a long time.
Good, generally chew-resistant. Hard plastic slow feeders are sturdy for normal eating, though a very strong chewer could potentially damage one by gnawing edges. Stainless steel versions are virtually indestructible. Overall, slow feeders tend to hold up well; just prevent dogs from treating them like a toy.
Dog Size & Breed Fit
Available in different sizes, but many mats are relatively small. Large dogs may empty a standard mat very quickly (or try to fold/chew it), so you might need an XL lick mat or multiple mats for big breeds. Flat-faced breeds (pugs, bulldogs) usually do fine with mats since they just lick the surface.
Comes in sizes for small to giant dogs. Choose shape wisely: Short-nosed dogs might struggle with deep, narrow slow feeders – better to use a flatter design for them. Long-nosed breeds excel at deep mazes. Puppies or toy breeds need shallow mazes their little tongues can reach. There’s a slow feeder out there for virtually every size/breed (even “XL” ones for big dogs and special designs for brachycephalic dogs).
Portability & Use Cases
Very portable and versatile. Mats are lightweight and can be used horizontally or stuck vertically (with suction) on surfaces – great for distracting during grooming, car rides, vet visits, etc. Easy to pack for travel (some even come with lids). Can double as a makeshift slow feeder in a pinch.
Generally used at home for meals. Slow bowls are bulkier than mats and meant to stay on the floor. Some have rubber bases to not slide. Not really for travel or on-the-go feeding, though you could bring one on a trip if needed. Primarily a kitchen/dining item.
Price Range
$10–$15 on average for a good quality lick mat (generic ones may be under $10). They are inexpensive, so having a couple isn’t a big investment. Even fancy ones with suction or different patterns are typically <$20.
$15–$30 for most slow feeder bowls. Simple plastic ones on the lower end, larger or branded ones on the higher. Stainless steel slow feeders can be ~$30+. Still, they’re affordable and often a one-time purchase (unless your dog manages to damage it).
When to Use
Use anytime you want to occupy your dog calmly: after a high-energy play session, during fireworks/storms, when company arrives (to divert excited jumping), at bath time (spread something yummy to make baths positive), or just as a boredom buster on a rainy day. Not typically for unsupervised use due to chewing risk. Also great for small snacks or part of a meal to slow a fast eater or add enrichment.
Use at mealtimes if your dog is a fast eater or prone to digestive issues when eating quickly. It replaces a normal food bowl for breakfast/dinner. Also useful if you need to keep a food-aggressive or greedy dog occupied longer so others can eat in peace. Not usually needed for dogs who naturally eat slowly. You can also use a slow feeder to feed snacks or treats more slowly, but its main role is during regular feeding.
As the table shows, lick mats excel in calming enrichment, flexibility, and treating anxiety or boredom, whereas slow feeder bowls are specialized for slowing down food intake and improving physical health aspects of eating. Next, let’s consider which might be better for your specific dog, because age, personality, and habits matter.
Pros and Cons for Different Dog Types
Every dog is unique. Here we’ll discuss how licking mats vs slow feeders stack up for certain categories of dogs – puppies, seniors, fast eaters, and anxious dogs – including the pros and cons of each product for these groups.
Puppies
Lick Mat for Puppies: A lick mat can be a wonderful tool for puppies. Pros: it provides a quiet, soothing activity to help an overactive or teething puppy calm down. If your puppy is biting everything in sight, redirecting that energy to a yummy lick mat (spread with a little wet food or peanut butter) can keep them occupied and out of trouble. It’s also great for crate training – pup learns to settle in the crate with a lick mat reward, associating the crate with positive, relaxed feelings. Cons: many puppies are enthusiastic chewers, so they might be tempted to chew or pick up the mat. You must supervise; a pup could quickly turn a soft silicone mat into confetti if left alone. Another con is that some very young puppies might not “get” the concept of licking for reward immediately – you may need to guide them or start with an easy spread (something really tasty) to spark their interest. Also, a small lick mat with rich treats could upset a very young pup’s tummy if overused, so introduce slowly.
Slow Feeder for Puppies: If you have a puppy that gulps down kibble like there’s no tomorrow, a slow feeder can be introduced early to encourage better eating habits. Pros: It will prevent the choking/gagging that sometimes happens when puppies eat too fast, and reduce the chance of digestive upset from rapid meals. Slowing a puppy’s eating can also diminish hiccups and burping. It mentally engages a curious pup and can keep them busy a bit longer – helpful if you want to tire them out just a tad. Cons: Some slow feeders might be too difficult for a young puppy with a small mouth. If the ridges are high and the pup is small, they could struggle to reach the food and get frustrated. You may need to get a slow feeder specifically sized for puppies or start with a simple design. Another con is mess: puppies can be messy eaters, and with a slow feeder they might flip the bowl or tip kibble out if they get overly excited. Choose one with a non-slip base and be ready to teach them how to use it. Lastly, if your puppy is actually a grazer (some nibble slowly already), a slow feeder bowl may be unnecessary and could even dissuade them from eating enough – so use it only if you notice speed-eating behavior.
Verdict for Puppies: If your puppy is hyper or anxious at times, a licking mat is fantastic for calming them and teaching self-settling (just watch they don’t chew it). If your puppy eats way too fast and chokes or vomits, a slow feeder bowl is the better choice to slow down mealtime. Many puppy owners find value in both tools: for example, a lick mat to occupy pup during their humans’ dinner time or grooming, and a slow feeder for the pup’s own mealtimes to prevent bad habits. Always supervise puppies with any feeding tool until you’re confident they’re using it safely.
Senior Dogs
Lick Mat for Seniors: Older dogs often have less energy and may not chew hard toys due to dental issues. A lick mat can be a low-impact enrichment that a senior dog finds enjoyable without strain. Pros: It’s gentle – seniors can lick at their own pace without needing to chase or chew. This can be great for a dog with missing teeth or sensitive gums who can’t handle hard chews or kibble as well. It also provides mental stimulation to keep their brain active (cognitive enrichment is helpful for senior dogs to possibly ward off cognitive decline). And it can be calming if a senior is getting anxious in certain situations (some older dogs can get anxious due to vision/hearing loss or dementia; a lick mat might refocus them). Cons: Bending down to the floor might be a bit uncomfortable for a senior with arthritis. You can remedy this by placing the mat on a slightly raised surface or even sticking it to a wall at head height. Another con is if the senior has very reduced appetite; they might not bother with a lick mat unless the food is extra enticing or aromatic. Also, seniors can sometimes be set in their ways – if your old dog has never seen a lick mat, they might be confused by it at first. Generally, though, there are few downsides aside from making sure the ingredients are senior-friendly (for example, moderate the rich peanut butter if weight is a concern).
Slow Feeder for Seniors: For an older dog, you’ll want to decide if slowing their eating is beneficial. Pros: If your senior dog still scarfes food and perhaps is at risk of bloat (common in older large breeds), a slow feeder is certainly useful. It can help their digestion, which might be slower in old age, by preventing overeating too quickly. If your senior tends to throw up from eating fast, this bowl could stop that. Also, some seniors get a bit overweight from lack of exercise – a slow feeder can assist with weight management by making them feel satiated with the proper portion. Cons: Some senior dogs naturally slow down their eating as they age; if that’s the case, a slow bowl might frustrate them or make them eat too little. Dogs with arthritis or neck/spine issues might find it hard to get food out of a deep slow feeder at floor level. You can accommodate this by getting an elevated feeder stand or a shallow maze pattern. Another con is cognitive: if an elderly dog has canine cognitive dysfunction (doggie dementia), they could find a complicated feeder confusing or anxiety-inducing. Always observe – if a senior is struggling or seems upset by the slow feeder, revert to a normal bowl or a simpler solution. Finally, seniors often have more brittle teeth; if the slow feeder is plastic, ensure they don’t try to bite at it and risk a tooth. Most just use their tongue, so it’s usually fine.
Verdict for Seniors:Lick mats are generally a senior-friendly enrichment, as long as the dog shows interest. They’re easy on old mouths and can provide calm engagement. Slow feeders should be used if needed – many older dogs might not need one if they’re already slow eaters or have portion-controlled diets. But for a food-obsessed senior who gulps, the slow bowl can continue to protect them from bloat and indigestion. Consider any physical limitations: for severe arthritis or mobility issues, keep feeding tools simple and accessible (maybe even hand-feed or use a raised dish). In some cases, a lick mat on the wall (so the dog can stand or sit and lick without bending) could be a great solution for arthritic dogs who can’t crouch to eat from a puzzle bowl.
Fast Eaters (Gulpers)
If your dog is known to be a fast eater, you likely already suspect the answer here:
Lick Mat for Fast Eaters: A lick mat can help slow a fast eater only for very small servings or treats. Pros: If you put part of their meal or a snack on a lick mat, it will indeed force them to lick and take more time than just crunching kibble down. In fact, if you feed, say, a few tablespoons of your dog’s kibble by blending it with some wet food and smearing it on a lick mat, it will take longer to consume than the same amount in a bowl. Frozen lick mats in particular can really stretch out eating time, as noted earlier (they “will slow a dog down significantly more than a slow feeder bowl” in some cases). Cons: Lick mats simply do not hold a large volume. If your goal is to slow down a dog’s entire meal (especially for a medium or large dog), a single lick mat likely can’t fit all their food unless you have multiple mats. Also, a very determined fast eater might get frustrated with a lick mat’s limited yield and start chewing or give up once the easy parts are gone. Lick mats are best as an addition, not the sole solution, for a dog that devours meals. They’re awesome for slowing the dog’s treat intake or giving a pre-meal “appetizer” that calms them before the main course, but on their own they may not entirely fix a chronic speed-eating habit if the dog still gets most food in a normal bowl.
Slow Feeder for Fast Eaters: This is really where slow feeder bowls shine. Pros: For a dog that bolts down food, a slow feeder bowl is often the number one recommendation by vets and trainers. It directly tackles the problem by introducing obstacles that force the dog to eat at a measured pace, dramatically reducing gulping. This prevents the cascade of issues (choking, vomiting, farting, bloat, etc.) that come from speed-eating. Most owners of “food gulpers” see an immediate improvement – their dog might go from finishing a meal in 30 seconds to taking 5 minutes or more. That slower pace allows the dog to chew a bit, take breaths, and gives their stomach a chance to fill gradually. Over time, the dog often learns to be a calmer eater in general. Cons: Hardly any, for a fast eater. The main “con” is initial annoyance – some dogs will paw at or flip the slow bowl out of frustration. But with a stable design and a little encouragement, they usually adapt. Another potential con is if the slow feeder is too effective and the dog leaves food because they got bored or frustrated; if that happens, try a slightly easier design so they still get their nutrition. But compared to the risks of fast eating (which include life-threatening bloat in large breeds), these are minor issues.
Verdict for Fast Eaters:Slow feeder bowl, 100%. If your dog scarfs food, start with a slow feeder bowl to immediately mitigate health risks. You can still use a lick mat in addition – for example, as a dessert or a special treat – but it shouldn’t replace a slow feeder for the main meals of a true gulper. One strategy is to use the slow feeder bowl for the bulk of the meal and spread a little of the food on a lick mat or snuffle mat to the side. This gives both enrichment and paced feeding. But if choosing one, go with the slow feeder for fast eaters. It’s a “win-win…easy to use, and can seriously improve your dog’s health, happiness, and quality of life” according to experts when you have a chowhound.
Anxious or High-Energy Dogs
Lick Mat for Anxious/Hyper Dogs: Lick mats are often nicknamed “calming mats” for good reason. Pros: For anxiety, the lick mat is one of the best tools. As discussed, the repetitive licking behavior can help a dog self-soothe and relax. If your dog gets anxious during specific triggers (thunder, fireworks, guests, car rides), giving them a lick mat can redirect their focus to something positive and yummy, thereby lowering their stress. Trainers even use lick mats during behavior modification – e.g., at the vet’s office or during grooming sessions, to create a positive association. Lick mats provide distraction power: the dog is so busy licking that the scary background noise or event is less overwhelming. For high-energy dogs, a lick mat is a good way to simmer them down after exercise. Think of it as a cool-down routine: after a vigorous walk or play, a 10-minute lick mat session in their bed can transition them from high excitement to a calmer state. This is valuable for dogs that have trouble “turning off” after play. Cons: If a dog’s anxiety is extremely high (e.g., severe thunderstorm phobia), sometimes even a favorite food won’t distract them. You might find the dog ignores the lick mat if their stress is off the charts – at that point, additional calming strategies or professional help may be needed. Another con is that not all anxious dogs take to a lick mat automatically; you may need to teach them or experiment with different treats that truly motivate them under stress. In rare cases, an anxious dog could guard a high-value lick mat resource, but that’s more of a training/management issue. Overall, there are few downsides – it’s a low-effort, high-reward tool for calming and occupies the dog in a non-destructive way (versus an anxious dog chewing the couch, for instance).
Slow Feeder for Anxious/Hyper Dogs: A slow feeder bowl isn’t primarily intended for anxiety, but it can play a supporting role. Pros: If part of your dog’s anxious or hyper behavior is related to food (like food obsession, or gulping due to stress), a slow feeder will regulate their eating and could prevent any GI discomfort that might add to anxiety. Also, using a slow feeder is a form of enrichment that can take a little energy or focus, which might help tire out a high-energy dog a bit. For a hyper dog that always seems hungry or dives into meals, the slow feeder ensures they don’t immediately finish and then pester for more food – it occupies them longer, giving you some peace. Cons: On its own, a slow feeder bowl won’t calm an anxious dog during a thunderstorm or help a hyper dog learn to settle. It addresses eating speed, not overall anxiety levels. In fact, if an anxious dog is also a picky eater or has a poor appetite when stressed, making their feeding more challenging could backfire – they might eat even less. Typically, though, if a dog is anxious and a fast eater, you can still use a slow bowl; just pair it with other calming techniques (like a lick mat or calming treats) for the anxiety aspect.
Verdict for Anxious/Easily-Stressed Dogs: The licking mat is the clear winner for directly managing anxiety and hyperactivity. It’s intentionally soothing; many trainers consider it a first line of defense for mild anxiety issues. For interactive dog anxiety relief, a lick mat is often recommended because “licking is said to have a self-soothing effect… ultimately calming them down in stressful situations.” If your dog tends to be anxious or very excitable, start with a lick mat. Meanwhile, use a slow feeder bowl if that same dog also scarfs food or if you want to give them a bit more mental challenge at mealtimes. They address different needs: one emotional, one physical. You can absolutely use both for an anxious dog – for example, a slow feeder at breakfast to keep them busy, and a lick mat later when anxiety triggers happen. But if anxiety is the primary concern, a lick mat should be in your arsenal for sure.
Having weighed the pros and cons for different types of dogs, we can see there’s no one-size-fits-all answer. Both licking mats and slow feeders have unique strengths. In many cases, you might benefit from using both in different scenarios. In the next section, we’ll tackle a few frequently asked questions that dog owners have when deciding between a lick mat and a slow feeder.
Frequently Asked Questions
Q: Can I use both a licking mat and a slow feeder bowl for my dog? A: Absolutely, yes. Lick mats and slow feeders aren’t an either/or proposition – they actually complement each other wonderfully. Each serves a different primary purpose (calming enrichment vs. slowing meals), so using both can give your dog the best of both worlds. For example, you might use a slow feeder bowl every day at dinner to help your dog eat at a healthy pace, and offer a lick mat as an occasional treat or during stressful times for extra enrichment. In fact, experts note that the two tools engage different natural behaviors – “lick mats encourage the sole behavior of licking, while a slow feeder encourages foraging and problem-solving”. Dogs benefit from both types of activity. There’s no conflict in using one at some times and the other at others. Many pet owners keep a slow feeder as their dog’s regular food bowl and also have a couple of lick mats in the cupboard for boredom busters, training aids, or special snacks. So if you can, consider having both on hand. You might even combine them by giving a portion of the meal in the slow bowl and a small portion on a lick mat – turning mealtime into a multi-stage enrichment event!
Q: What if my dog just chews the lick mat instead of licking it? A: This is a common concern, especially for puppies and heavy chewers. The first thing is always supervise your dog with the lick mat. If they start chewing the mat itself, redirect them to licking the food. You can gently hold the mat or use a mat with suction cups to keep it in place – sometimes mats slide around and dogs try to grab them, so securing the mat can curb the chewing impulse. If a dog continues to try to gnaw, end the session and take the mat away. It’s important they learn that chewing doesn’t get them more reward. Also, consider the type of mat: some lick mats have a firm plastic border or are made of tougher material which can deter dogs from getting an edge up to chew. You could try those if your current mat is too flimsy. Another tip is to freeze the lick mat with the treat on it; a frozen mat takes more focused licking and is harder to chomp on (plus a dog is less likely to view a frozen block as a chew toy). If despite all this your dog still treats the lick mat like a chew toy, you might need to hold off on using it until they’re a bit more mature or use alternative enrichment toys. As Whole Dog Journal suggests, “puppies or dogs who tend to chew should avoid lick mats and opt for Kongs or West Paw Toppl instead”. Those are made of rubber designed to be chewed. You can always reintroduce the lick mat later to see if they’ve learned to just lick. And remember, never leave a dog unsupervised with a lick mat if they are prone to chewing – pieces of torn mat could be swallowed and cause harm. With consistent guidance, many dogs will learn the licking mat routine and stop trying to munch it, but always err on the side of safety.
Q: When should I avoid using a lick mat or slow feeder? A: For the most part, these tools are very dog-friendly, but there are a few situations where they might not be appropriate:
Avoid lick mats with unsupervised heavy chewers: As discussed, if your dog is likely to destroy and ingest a lick mat, don’t give it to them in situations where you can’t supervise. In such cases, a durable chew toy might be better for alone time. Also, if your dog has shown zero interest in lick mats (some rare dogs aren’t food-motivated enough to bother), forcing it isn’t necessary.
Avoid slow feeders for dogs who don’t need them: If your dog naturally eats slowly or is a very picky eater, a slow feeder could further reduce their food intake or frustrate them. Forcing a poor eater to work for food might cause them to eat less. Also, extremely small or young puppies who haven’t learned to eat kibble well might struggle with a slow feeder – wait until they’re a bit bigger or more adept at eating. In short, don’t use a slow bowl “just because” if your dog is fine with a regular bowl and has no issues. Use it when there’s a problem to solve (fast eating, etc.).
For Brachycephalic (flat-faced) breeds: Avoid slow feeders that are too intricate or deep. These breeds (e.g., Pugs, Bulldogs, Shih Tzus) can have a hard time getting food out of tight corners due to their short snouts. If you notice your flat-faced dog struggling or scraping their face, switch to a more shallow slow feeder or even use a lick mat or large platter-style feeder which is easier for them. The goal is to slow them, not torture them! Many flat-faced dogs do well with slow feeders designed for them (with wide channels).
When a dog is extremely hungry or low on patience: If your dog is overly hungry (maybe you’re feeding a bit late) and gets panicky or aggressive when eating, a slow feeder could initially trigger some frustration or resource guarding. In such cases, you might avoid the slow feeder at that moment or use a gentler design to prevent any food aggression incidents. Similarly, if your dog is ill or low energy and needs easy access to food, a slow feeder might be too much work – a simple bowl might be kinder while they recover.
Messy or outdoor scenarios for lick mats: If you’re in a situation where a messy treat would be a problem (say, at a carpeted friend’s house or in the car without protection), a lick mat with smearable food could cause a mess if the dog picks it up or drags it. You might avoid using it there unless you have a way to secure it (like suction to a car window or using it in a crate).
In summary, avoid using either tool if it clearly causes your dog frustration, stress, or physical difficulty. Always observe how your dog responds. Most dogs adapt well, but if yours shows signs of anxiety or anger with a slow feeder (growling at it, etc.) or tries to eat the actual lick mat, reconsider your approach. There’s always another method or a different design that might suit your pup better.
Conclusion: Buying Guide Summary – How to Choose the Best Option for Your Dog
Both licking mats and slow feeder bowls can improve your dog’s life in different ways, so the choice ultimately depends on your dog’s age, breed, behavior, and eating style. Here’s a quick summary to help you decide:
If your dog is a voracious, fast eater (the type who finishes a meal in seconds and might gag or bloat): Start with a slow feeder bowl. This is the best tool to immediately slow down their eating for health reasons. Look for one sized appropriately (bigger dogs need larger bowls) and with a maze design that isn’t too easy (you want to significantly stretch their eating time, but not so hard they give up). A slow feeder will promote better digestion and could save your dog from serious issues like bloat. You can always get a lick mat as an extra for treats, but the slow feeder should be your go-to for daily meals.
If your dog struggles with anxiety, stress, or boredom (e.g., gets nervous during storms, has separation anxiety, or is overly hyper): Incorporate a licking mat. Lick mats are an inexpensive, effective way to provide dog anxiety relief and enrichment. Use it to distract and calm your dog during triggering events – many owners see their anxious dog visibly relax when engaged with a lick mat. For a high-energy dog, give a lick mat after exercise or in the evening to help them wind down. While you might also use a slow feeder for such a dog (especially if they eat fast too), the lick mat is the star for emotional well-being.
For a puppy: You might want both, used judiciously. Use a slow feeder bowl if your puppy is eating too quickly and/or to teach good habits from the start. Use a lick mat for crate training, quiet time, or during puppy’s first baths to make them positive (smear something tasty so pup associates the bath with yummy licking). Remember to supervise and choose puppy-safe designs (shallow slow feeder, durable lick mat). Many puppy owners report that a lick mat was a sanity-saver for keeping a young pup occupied for a few minutes. Just be ready to intervene if chewing starts.
For a senior dog: Consider their specific needs. If your senior has become a picky or slow eater, a slow feeder bowl might be unnecessary – in fact, give them whatever bowl makes eating easiest. But if your senior still woofs down food and has a risk of bloat or indigestion, absolutely keep using a slow feeder. For enrichment, a lick mat can be wonderful for a senior – it’s low effort and enjoyable, and can encourage water intake if you use moist foods (great for seniors who need hydration). Make sure the design is accessible (maybe elevate it or use a mat with larger grooves). Many senior dogs, even with some cognitive decline, find simple pleasure in a lick mat treat.
Breed considerations: Large, deep-chested breeds (Great Dane, German Shepherd, etc.) – slow feeder is highly recommended due to bloat risk. Brachycephalic (Bulldog, Pug) – lick mat or specialized slow feeder; avoid deep mazes that their short snouts can’t navigate. Smart working breeds (Border Collie, Poodle, etc.) – they might love the challenge of a slow feeder and benefit from the calming lick mat, so having both to alternate could keep them nicely occupied. Tiny breeds (Chihuahua, etc.) – a lick mat might double as a slow feeder for them since their meals are so small, or get a mini slow feeder.
If your goal is purely enrichment and keeping your dog busy (and they have no eating speed issues): You could lean towards a licking mat or other puzzle toys first. Slow feeders do provide enrichment, but if your dog doesn’t need slower eating, a treat puzzle or lick mat might be more exciting for them. Some people use slow feeders as easy puzzles regardless – that’s fine, just ensure your dog actually enjoys it and isn’t bored by it.
If your goal is primarily health (digestion, weight): Go with the slow feeder bowl. For dogs on diets, making them eat slower can help them feel fuller, and it ties directly to physical health improvements (less gas, less reflux, etc.). Lick mats are more of a bonus in the health department (except maybe dental minor benefits and stress reduction).
Finally, remember that both products are relatively inexpensive and widely available, so you don’t have to limit yourself to one if your dog could use both types of stimulation. Many dogs will get the most benefit from having a slow feeder and a lick mat in their routine – one to make mealtimes safer and one to enrich their down time. As one dog enrichment specialist put it, providing novel ways for dogs to “work” for their food is extremely beneficial to their well-being. Lick mats and slow feeders are easy ways to do just that.
Buying tip: Read reviews and consider your dog’s personality when choosing a specific product. Some lick mats have different textures (soft vs. firm), and some slow bowls are more complex than others. If possible, start with simpler designs and graduate to more complex if needed – ensuring your dog always has fun and stays safe using them.
In conclusion, choose a licking mat if you want a versatile tool for treats, training, and calming enrichment – it’s great for anxious, bored, or chew-prone dogs that need a gentle activity. Choose a slow feeder bowl if your dog eats too quickly and you want to protect their health and improve their digestion – it’s a must for any dog prone to gulping or bloating. And if those both describe your dog, go ahead and get one of each. Your furry friend will enjoy the tasty challenge, and you’ll enjoy seeing them happier, healthier, and more satisfied. Happy feeding time, and here’s to wagging tails and calmer tummies!
https://www.newtopsilicone.com/wp-content/uploads/2025/12/6.jpg10001000Enriquehttps://www.newtopsilicone.com/wp-content/uploads/2022/06/newtop-logo-300x138-2.pngEnrique2026-02-26 18:07:542026-02-26 18:15:11Licking Mat vs Slow Feeder Bowl: Which Should You Choose?
Finding the best nipple covers for large busts (D cup and above) means looking for options that offer extra coverage, strong yet skin-friendly adhesive, and all-day comfort. Large-busted individuals face unique challenges like slippage, insufficient coverage, and sweating. The right covers should have a generous diameter, ultra-thin tapered edges, and medical-grade materials to stay invisible under clothing. In this guide, we’ll explain how to choose nipple covers that meet the needs of fuller busts – covering materials, shape, size, thickness, adhesion strength, reusability, and outfit compatibility – so you can go braless with confidence and support. We also address common pain points (slippage, coverage, sweat) and what brands should consider when designing nipple pasties for D+ cups, along with FAQs for boundary cases (like when covers aren’t enough).
Why Large Busts Need Special Nipple Covers
Choosing nipple covers for a larger bust requires special consideration. People with fuller figures often struggle with regular pasties because of issues like slippage, inadequate coverage, or weak bonding on a bigger chest. A D-cup or larger breast has a greater surface area and weight, which can challenge standard nipple covers. Here’s why a large-bust solution is different:
Larger Coverage Area Needed: Standard-size covers may create a visible outline or “halo effect” on fuller breasts. The nipple and areola might not be fully covered, or the edges might show through clothing. Opting for wide-diameter covers is key – they extend well beyond the nipple, creating a smooth look under fabric.
Support Needs vs. Coverage: Nipple covers are designed for modesty (hiding the nipple) not support. Unlike bras, they typically do not lift or hold the weight of a larger bust. This means a large bust will get coverage from pasties, but not the structural support to prevent bounce or sag. (We’ll discuss solutions for when covers alone aren’t enough later.)
Movement and Slippage: With more mass, larger breasts move more during activity. Sweat and motion can weaken adhesives, leading to pasties sliding off if they’re not strong enough. Thus, stronger adhesive and proper application are critical to avoid embarrassing slippage for D+ cups.
Comfort & Skin Sensitivity: The nipple area is sensitive for everyone, and larger busts sometimes mean larger nipples or more skin contact area. Harsh adhesives can cause irritation or even damage delicate skin. Features like hypoallergenic materials and adhesive-free center zones (to avoid tugging on the nipple itself) are especially beneficial for comfort.
In short, fuller-bust nipple covers must provide greater coverage, stronger hold, and gentler skin care than standard pasties. Now, let’s break down what to look for.
Key Factors When Choosing Nipple Covers for D Cup and Up
Choosing the right nipple covers comes down to several key factors. Below we discuss each factor in detail – material, shape & size, thickness & edges, adhesive strength, reusability, and outfit compatibility – with a focus on large-bust needs.
Material Type and Quality
The material of a nipple cover affects its feel, look, and performance, especially for larger busts. The most common types are silicone, fabric, and foam pasties:
Silicone Covers: Widely considered the gold standard for nipple covers. They are made of 100% medical-grade silicone which is flexible, durable, and hypoallergenic. Silicone warms to your body temperature and molds to your breast’s shape for a second-skin feel. For large busts, silicone covers offer high coverage and a natural appearance. They also tend to be reusable and have built-in adhesive or a naturally tacky surface. Tip: Look for medical-grade silicone labeled as safe for sensitive skin – these are less likely to irritate and often pass rigorous testing.
Fabric Covers: Usually made of a satin or cotton blend with an adhesive backing. They are very thin and breathable, often coming in various skin-tone colors. Fabric pasties can be comfortable in hot weather since they allow some air flow. However, they are typically single-use or disposable and provide only moderate coverage. On a large bust, fabric covers may not stick as securely through sweat, and their smaller size can be an issue. They’re best for one-off uses or layering (for instance, under a bra that’s slightly sheer).
Adhesive Foam Covers: These pasties have a thin foam padding with adhesive. They add a bit of extra padding to conceal nipple protrusion and are also usually disposable. The padding might help blend the nipple area, but foam pasties are often smaller and not as flexible, which can be problematic on larger breasts. They can work in a pinch for coverage, but expect only moderate hold and coverage area.
For D+ cups, silicone nipple covers are usually the top choice. They combine a natural look with sturdy adhesion and reusability. Medical-grade silicone is also gentle: it’s used for things like scar therapy, indicating how skin-friendly it can be. Some innovative silicone pasties (e.g. Cakes Body or Go Nipless) even skip harsh glue entirely – using the natural tack of silicone and body heat to “grip” the skin without adhesive irritants. This improves comfort for sensitive skin and makes removal painless, which is a big plus for larger-busted users who may have experienced nipple pain from peeling off adhesive covers in the past.
As the table shows, silicone covers check the most boxes for fuller busts: reusable, skin-like, and high coverage. Fabric or foam can work for quick fixes, but for reliable all-day wear on a larger chest, invest in quality silicone covers.
Shape, Size (Diameter) and Coverage Area
Size matters when it comes to nipple covers for large busts. The diameter of the cover determines how much area it conceals and whether the edges will lie flat on a broader chest. Many standard nipple covers are about 6–8 cm (2.5–3 inches) in diameter, which might be fine for A–C cups. But for D cups and beyond, you’ll want wider pasties:
Experts suggest choosing covers with at least a 3-inch (7.5 cm) diameter for fuller busts. Larger sizes (10–13 cm) are even better for DD+ to ensure no part of the areola or a contour of the breast is left exposed.
For example, the brand CAKES Body offers a large CAKES (+) size at 13 cm diameter – meant for DDD cups and up – to provide “larger-than-life” coverage. Similarly, Niidor’s L/XL covers are about 4.72 inches (12 cm) across, tailored for women with larger busts.
This wide diameter coverage prevents that telltale edge ring or “halo” under clothes. It also distributes the cover’s weight and adhesive grip over a bigger area, making it less likely to peel or pop off during the day.
Beyond size, consider the shape of the cover:
The classic shape is circular, which works for most cases and provides even coverage. Many large-bust specific covers are round, just in bigger diameters.
Petal or flower-shaped covers are also common. These have scalloped edges which can help diffuse the edge line. Petal designs can be quite large too (some D+ covers use this shape). They tend to blend nicely, but ensure the diameter is still sufficient in the widest part.
Contoured (3D) vs. flat: Some high-end nipple covers are slightly domed or contoured to mimic the curve of a breast. An anatomical shape that curves with your body yields a gap-free fit that moves with you. This is useful for larger busts because a flat sticker on a rounded surface can sometimes wrinkle or not adhere at the edges. Contoured silicone pasties (sometimes called “molded” covers) solve that by hugging the curves.
Lift-enhancing shapes: A few nipple cover designs include an extension or tab meant to provide a bit of lift. For instance, Nippies “lifting” covers or Nood’s Extra Lift pasties have thin adhesive tabs you pull up and stick above the breast to lift the tissue slightly. These hybrid designs are useful if you want some support. They work best up to a certain size (one tester noted Nood’s lift covers helped for sizes ~36D). If you are much larger, these may still not give a significant lift, but they can improve the overall hold and security of the cover on the breast.
Key tip: When in doubt, size up on the nipple cover. It’s often recommended to choose the larger size if a brand offers two options, to ensure full coverage and a smooth look. A slightly larger cover than you think you need is better than one that’s too small (which could peek through or not stick well).
Thickness and Edge Design
For nipple covers to be invisible, especially on a large bust, thickness and edge design play a crucial role:
Thickness Distribution: The ideal cover is thicker in the center (directly over the nipple) and ultra-thin at the edges. The thicker center ensures complete nipple concealment – so no color or texture shows through, even if you have very “perky or dark nipples”. Meanwhile, paper-thin, tapered edges blend into your skin, preventing a noticeable outline.
Tapered Edges: Look for products advertising “feathered” or “tapered” edges. These gradually thin out to nothing at the border, which eliminates visible lines under clothing. Tapered edges are essential for wearing covers under tight or silky tops where any ridge would show. Many of the best nipple covers for large breasts have this design – for instance, B-Six Nippies are praised for an “ultra-thin tapered edge, so the outline can’t be seen beneath clothing”.
Edge Adhesive vs. Full Adhesive: Some covers only have adhesive near the edges and a non-sticky center (to protect the nipple). Others have adhesive throughout. For thicker, large covers, having most of the stick on the border can be effective to keep edges down. The adhesive-free center (like the “nipple nook” in Cakes covers) also makes removal gentler. This kind of design gives you the best of both worlds: strong grip around the perimeter but no painful tug on the nipple upon removal.
Matte, Non-Reflective Finish: Another aspect of design is whether the cover has a matte finish or shiny surface. A matte skin-like finish is preferable, especially if you might be photographed (flash photography can reflect on a shiny pastie!). Many silicone covers now have a matte, velvety surface to avoid any shine. For example, Nippies Skin covers boast a light-reflective shield that actually blocks flash and is virtually undetectable even under bright lights. This is a nice feature if you plan to wear them under thin light-colored fabrics or for events.
Overall Diameter vs. Thickness: Generally, larger covers might be slightly thicker at the very center (since they cover more area, they ensure even a larger nipple is concealed). But overall, you still want a low-profile thickness. Quality silicone pasties tend to be around ~2mm thick at center and feather to nearly 0mm at edges. If the edges are too thick or blunt (like some cheaper pasties), they might create a visible ridge on the breast – avoid those for a big bust, because any slight bulge is magnified on a larger surface.
In summary, choose pasties with a thin, blended edge design and a matte finish for the most seamless results. When you run your fingers over a good nipple cover on your skin, you shouldn’t feel a sudden step at the edges – it should feel smooth and natural. This ensures that under a slinky dress or a fitted tee, nobody can tell you’re wearing them.
Ultra-thin, seamless nipple covers (like NEWTOP Nippies Skin) use tapered silicone and come in multiple skin tones, making them virtually undetectable under clothing.
Adhesion Strength and Sweat-Resilience
A common pain point for large-busted users is nipple covers that slip off – often at the worst times. The culprit is usually a weak adhesive combined with body heat or sweat. So, adhesion quality is paramount:
Medical-Grade Adhesive: Look for medical-grade silicone adhesive or similar descriptions. High-quality adhesives “that hold through humidity, sweat, and a full day of movement” are a must for larger breasts. Powerful stickiness ensures the covers won’t peel at the edges or shift around. For instance, Go Nipless emphasizes a powerful, sweat-proof hold on their covers specifically engineered for fuller busts. Many top-rated covers (Nippies, Nood, etc.) highlight that they stay put even during activity or hot weather.
Gentle Removal: Strong doesn’t mean harsh. The adhesive should also be formulated to peel off without ripping skin or causing pain. Products with “no painful removal” or features like an adhesive-free nipple center help in this regard. You want a balance: adhesive strong enough to last all day, but gentle enough to not require you to grit your teeth when peeling off. Medical-grade adhesives are designed for skin contact and usually meet this need (still, if you’re very sensitive, test a small area first).
Sweat-Proof and Waterproof: If you plan to wear nipple covers for outdoor events, workouts, or dancing, check if they are labeled sweatproof or waterproof. Some silicone pasties are waterproof (e.g., Nood’s No-Show covers are noted to be waterproof and held up even through gym workouts). Waterproof pasties also come in handy if you’ll use them under a swimsuit or at the beach (though be cautious with hot tubs or very long swims, as even the best adhesive can loosen eventually in water).
Adhesive Longevity: Over multiple wears, adhesives can attract dust or lose stickiness. Good reusable covers advertise something like 10+ wears or even up to 20–30 uses. In practice, how you care for them determines longevity (more on care in Reusability). Still, a quality product should not be “one and done.” If a cover loses all stick after just one or two uses on a larger bust, it likely wasn’t high quality to begin with. Investing in a reputable brand might cost more upfront ($20-$30 range), but pays off as you can reuse them dozens of times.
Full Coverage Adhesive vs. Rim Only: As mentioned earlier, some designs only have adhesive around the edges. Others are sticky throughout. For large busts, a rim-only adhesive with a non-sticky center can be ideal – you get a strong seal on the periphery but the center doesn’t yank on your nipple. This design is found in products like Cakes Sticky Circles (with a “nipple nook”) and Go Nipless’s Nipple Shield Technology. It’s highly recommended if you’ve experienced pain from peeling covers off before.
Preventing Slippage: Even with great adhesive, how you apply and use nipple covers can affect their hold. Always start with clean, dry skin (no lotion or oil on the breasts) before sticking them on. Press firmly and smooth out the edges. If you anticipate heavy sweating, you can carry a spare pair or some double-sided fashion tape for emergencies. In extreme cases (like a long wedding day in heat), applying a thin strip of body tape along the edges of the covers can give extra reinforcement – this tip effectively double-secures them so you won’t have to worry about any curling up.
Reusability and Care
For frequent use, reusable nipple covers are both cost-effective and more eco-friendly than disposables. Most silicone nipple covers are reusable – some claim up to 30 wears or more – but you need to care for them properly:
Washing: Clean them after each use with mild soap and warm water (unless the manufacturer specifies otherwise). This removes body oils and sweat that can degrade the adhesive. Gently rub the adhesive side with your fingers (no nails, as you can scratch the glue layer) and rinse.
Drying: Let them air dry completely before storing. Do not use a towel or tissue on the adhesive side, as lint will stick. Just leave them adhesive side up on a clean surface until dry.
Storing: Place them back on their plastic film or in the case they came with. Many good covers include a storage case to keep dust off. Storing them properly ensures they don’t collect lint, which would reduce stickiness next time.
Restoring Stickiness: Often washing is enough to restore tack. However, over many uses, adhesive naturally wears out. Some brands sell adhesive rejuvenator sprays or you can use a bit of medical-grade adhesive if needed to extend life. But generally, if you follow the steps above, your covers should last through many outings.
Reusable silicone covers might cost a bit more initially than a pack of disposable fabric pasties, but since you can use them dozens of times, they are usually worth it. For example, one user reported her silicone covers “remained invisible and stayed on all day long,” and with proper care she could wear them all day (up to 12 hours) and reuse them dozens of times.
If you only rarely need nipple covers, you might opt for cheaper disposables. But for anyone regularly going bra-free or needing them weekly, invest in quality reusables – your wallet and the planet will thank you, and you’ll get better performance too.
Outfit Compatibility and Use Cases
Think about when and with what outfits you’ll wear your nipple covers. The ideal choice can depend on your wardrobe needs:
Tight or Fitted Tops: If you love form-fitting T-shirts or bodysuits, look for covers with skin-tone shades and thin edges. A seamless, well-matched cover will ensure no outline or color difference shows under your top. Many brands offer multiple skin tone options (light to dark) – Nood, Nippies, and Cakes, for instance, each have several shades to help the covers “disappear” on different skin colors. Choose the tone closest to your skin or slightly lighter for white shirts.
Sheer or Lace Fabrics: When wearing sheer blouses or lace dresses that might reveal what’s beneath, you need covers that are truly invisible. A matte, flesh-toned silicone cover is best here (shiny ones could catch the light through sheer fabric). Because flash or bright light can make a sheer top see-through, ensure your covers are opaque enough (those “extra coverage” versions with more silicone thickness can help for very sheer outfits).
Backless and Strapless Dresses: This is where nipple covers shine – letting you go braless without showing anything. For backless gowns or strapless summer dresses, pick high-quality adhesive covers that you trust to stay on, since you won’t have a bra at all. Many women with larger busts successfully use just large silicone pasties under backless dresses for events. If additional lift is needed, consider combining with breast tape (more on that later) or using the specialized lift pasties. Pro Tip: Some covers like Nood’s No-Show come with a separate skin prep wipe; using such skin prep (essentially it cleans and slightly “primes” the skin for adhesion) can really help them stay put through a long night.
Workout Gear: Can you exercise with nipple covers on a large bust? Surprisingly, yes – if you have the right kind. One plus-size fashion creator shared that she wears Nood’s pasties to the gym and they “do not budge an inch” even during high-impact movement. The key is sweat-resistant adhesive and a supportive sports top over them. While you might not replace a sports bra entirely (most larger-busted individuals prefer some support for high impact), for low-impact workouts or yoga, silicone covers under a tight workout tank can provide nipple coverage without an extra bra layer. If you find bras uncomfortable for casual exercise, test your covers during a home workout first to see if they stay put through movement and sweat.
Swimwear and Summer Wear: If you have a bikini or swimsuit that’s unpadded and you want a little modesty, you can try silicone covers that are labeled waterproof. Some adhesive pasties will stay on for a short swim, but salt water, chlorine, and sweat can all shorten the wear time. Non-adhesive silicone covers (the kind that just stick by suction) won’t work in water unless they’re held in by a tight swim top. For beach or pool days, many opt for a one-piece or bikini with built-in shelf – but if not, use waterproof adhesive pasties (and maybe test in the shower first). Always have a backup in case they slip in water!
Overall, match your nipple covers to the occasion: ultra-thin and matte for fancy events, reliable sticky ones for all-day wear, and perhaps fabric ones for a quick fix under layers. With a large bust, it’s wise to choose high-performance covers for any critical outfit (wedding dress, gala gown, etc.) – you want confidence that they will stay invisible and in place the whole time.
Addressing Common Pain Points (Slippage, Sweating, Coverage, Comfort)
Even the best nipple covers can come with challenges, especially for fuller figures. Here we tackle common pain points and how to solve them:
Slippage or Falling Off: The nightmare scenario – your pastie peeling off halfway through the party. To avoid this, prep is everything: clean, dry skin (no lotion) before application, and press firmly from center outward to get rid of air bubbles. If you know you’ll sweat, choose a cover known for strong adhesive (many explicitly say “sweat-proof”) and carry spares. For extra insurance, use body tape on the edges or a couple of strips of fashion tape across the cover to anchor it (just make sure it’s not visible). Proper sizing also prevents slippage – a cover that’s too small has less area to stick and is more likely to come loose on a large breast.
Sweating and Heat: Hot weather or dancing can break down adhesives. Some modern nipple covers are specifically designed to be humidity and sweat resistant, using adhesives that don’t turn gooey with heat. Additionally, look for covers that are breathable – e.g. some silicone covers claim to have a porous design or micro-ventilation to reduce sweat build-up. If you sweat heavily, a trick is to apply a touch of antiperspirant (spray) around (not on) the breast area beforehand to reduce sweat, or use a body powder around the outside of the cover to keep the area dry (avoid getting powder on the adhesive itself). In extreme cases, taking a break to replace the covers mid-event (if possible) can help – not ideal, but better than one slowly sliding off. One D-cup user noted that on “hot days she needed something with stronger adhesive power” for her covers, underscoring that sweat can challenge even good pasties. So plan accordingly for very sweaty scenarios (maybe tape up, or wear a bralette for backup).
Insufficient Coverage (Nip Slip or Outline): If your pasties are too small, parts of your areola or the shape of your nipple might still show. The solution is to choose larger diameter covers or those labeled “extra coverage”. For very prominent nipples, some covers come with double layers or foam insert for more opacity. Ensure the cover fully masks any change in skin tone (some people have a darker areola that could “halo” through a thin cover – a thicker center as discussed will fix that). And always smooth the edges down flat so no part of the cover is folded or sticking up.
Edge Visible Under Clothes: This usually means the edges are too thick or the wrong shape for the outfit. High-quality tapered edges are the fix – if yours don’t have them and you’re seeing an outline, consider upgrading to a better design. Additionally, color matching helps; a dark nipple cover under a thin white shirt can sometimes create a faint outline just from color. Using a pale nude cover for light outfits and a brown or black cover for dark skin under dark outfits can make the edges practically vanish. One more hack: if the edges are slightly loose, you can use a tiny bit of eyelash glue or body adhesive glue to secure an edge down flat – but this usually shouldn’t be necessary with good pasties.
Comfort During Movement: Larger breasts move more, and if the covers are stiff or sticky in the wrong places, it can be uncomfortable. Silicone covers generally move with you because they’re flexible. If you feel restricted, you might be using a cover that’s too small or too thick at the edges. Switching to a softer silicone with an anatomical shape can make a world of difference. Also, some women find non-adhesive “grippy” silicone covers (like Cakes Grippy version) more comfy for activities – they rely on the pressure of a tight top to stay in place rather than glue. If you wear a snug sports bra or cami over them, these non-sticky covers can actually work and you avoid any adhesive at all (no stick = no chance of skin pulling).
Skin Irritation or Pain: Red, itchy circles on your breasts after using covers means either an allergic reaction or mechanical irritation. Solve this by seeking out hypoallergenic, latex-free, medical-grade products. Silicone is usually inert and safe, but adhesives can have acrylates that some are sensitive to. Doing a patch test on your inner arm with the adhesive can be wise if you have known sensitive skin. Pain on removal is common if the pasties stick too well – again, adhesive-free center designs help here, as does peeling slowly and holding your skin down with the other hand as you lift the cover. In a pinch, you can use a bit of olive oil or silicone-based makeup remover around the edges to help loosen a stubborn adhesive when removing (just don’t get oil on them earlier in the day or they’ll fall off!).
Remember, the goal of going braless with nipple covers is freedom and comfort. If your current covers are causing more pain or worry than they solve, switch to a better-suited product. With the right covers, you should forget you’re even wearing them – as some users say, “so good, you’ll forget you have them on.”
When Are Nipple Covers Not Enough? (Support and Alternatives for Large Busts)
Nipple covers excel at coverage, but what about support? For many with big busts, there are times when pasties alone might not give the lift or security you need. Here’s when you might need to go beyond nipple covers, and the options available:
Needing More Support/Lift: If you’re above a D cup and plan to be active (dancing, etc.) or just feel uncomfortable without any support, nipple covers won’t prevent bounce or sag. They “should never substitute for bras” in terms of structural support. If you attempt to wear just pasties for long periods daily, you could even experience slight sagging over time since the breast tissue isn’t supported. So for extended wear or higher-impact activities, consider combining covers with other solutions:
Adhesive Bras (Sticky Bras): These are bra cup-shaped adhesives that stick to your breasts and sometimes clip together in the middle. Quality adhesive bras (like silicone bras) can provide some lift and shape by encapsulating the breast tissue. There are versions specifically for larger chests – for example, the Nood “Game Changer Lift & Shape Bra” is marketed for large breasts, providing a bra-like lift with adhesive wings. An adhesive bra typically has more surface area than a nipple cover, thus offering a bit more hold. They often have side wings or an under-bust adhesive strip that gives upward support. If your outfit can accommodate an adhesive bra (i.e., not too plunging on the sides), this can be a better choice than nipple covers alone for, say, an evening gown when you want some lift.
Breast Lift Tape (Boob Tape): This is a popular hack for big busts. Using wide strips of medical-grade body tape, you can lift and secure your breasts in a desired position. The tape is usually applied from underneath or the side of the breast up to the shoulder or around the back in creative ways, acting like an invisible bra. Fashion tapes or body tape can hold up larger busts when applied correctly. Always use nipple covers with tape – place the pasties on first to protect your nipples, then tape over/around as needed. Many larger-busted celebrities rely on this trick for red carpet looks. The downside: it takes practice (and sometimes a buddy) to tape correctly, and removal can be a bit uncomfortable. Also, tape is usually single-use. But for a special occasion outfit that normal bras and covers can’t accommodate, it’s a lifesaver.
Bralette or Bandeau Combination: If completely braless is not working, you can use nipple covers in combination with a soft bralette, bandeau, or built-in shelf bra for a bit of lift. For example, under a strapless dress, you might wear big silicone covers for nipple concealment, and on top a stretchy bandeau for a touch of support (there are clear-strapped or very low-profile bandeaus that might still hide under many outfits). This way, you maintain a smoother look (no hard bra lines) but aren’t relying solely on the pasties for support. It’s a middle ground that some find helpful, especially if dancing or if just psychologically you feel better with some support.
Very Large Busts (G cup, etc.): If you’re at the upper end of bust sizes, you likely know that even many “stick-on bras” don’t hold you up fully. Nipple covers can still be used for modesty in outfits where a bra is impossible, but be realistic: pasties won’t defy gravity for an H cup. In these cases, taping is the most effective method to lift and secure the breasts in a specific shape. There are lots of tutorials online for taping large breasts for strapless dresses – many involve forming a supportive harness with strips of tape (like criss-crossing the chest or vertical taping). Always put on nipple covers first to avoid painful tape removal on the nipple itself.
Post-Surgery or Nursing Considerations: If someone has had a breast surgery (augmentation or reduction) or is nursing, the need for support can vary. Right after surgery, you likely can’t use nipple covers (you’ll have medical bras to wear). For nursing moms, nipple covers are not a replacement for nursing pads (they don’t absorb leaks), but some new moms might use covers when going out braless post-weaning. Just ensure the skin is fully healed and not overly sensitive. If support is needed (e.g., post-surgery heavy bust without underwire), consult with a specialist – sometimes a custom solution or a supportive garment might be necessary rather than just adhesive covers.
Bottom line:Nipple covers provide coverage, not lift. As one lingerie expert plainly put it, they “cannot replace bras as a structural support piece” for larger busts. If you find that covers alone aren’t giving you the confidence or comfort you want, don’t force it – incorporate other solutions like adhesive bras or tape to bridge the gap between going braless and fully supported.
Tips for Application and All-Day Comfort
To get the best results from your nipple covers, especially on a large bust, follow these application tips and tricks:
Prep Your Skin: Clean your breast area with soap and water, and dry it thoroughly. No lotions, oils, or perfume on the skin where the cover will stick. Any oils will dramatically weaken the adhesive.
Warm Them Up: Some users find that warming the silicone covers in your hands for a minute improves stickiness. Also, ensure the ambient temperature isn’t too cold when applying – adhesives adhere better to warm skin than cold skin.
Mirror & Positioning: Stand in front of a mirror. Peel off the protective backing, and center the cover over your nipple. For larger breasts, a handy tip is the “lean forward” method – lean forward a bit so your breasts fall naturally, then apply the cover. This can help avoid wrinkles and catch the breast in a more lifted state before sticking.
Slight Lift in Placement: Some recommend placing the nipple cover just slightly above the actual nipple center (like covering the nipple but the top of the adhesive is a little higher on the breast). This can provide a very gentle lift by pulling the nipple upward when you smooth it on. It’s not a dramatic difference, but every bit helps if you’re trying to counteract gravity.
Smooth Outward: Once you place it, use your fingers or the palm of your hand to press firmly from the center out to the edges. Make sure to eliminate any air pockets and get the edges flush with the skin. Go around the edges a few times, pressing and warming them to ensure a good seal.
Clothing Check: After application, put on your outfit and check in the mirror from different angles. Ensure no edges are peeking and everything looks smooth. If you see a ridge, you might need to reposition or you may need a larger cover. It’s better to adjust or reapply before you leave the house than to fiddle with it later.
During Wear: Avoid touching or adjusting the covers once on – every pull can loosen the adhesive’s grip. If you feel an edge coming loose and you’re in a safe spot (like a bathroom), you can try pressing it back or using a tiny piece of fashion tape to tack it. But if it’s fully coming off, it’s best to replace with a fresh one (which is why carrying a spare set in your bag is a good idea for events).
Removal: Take your time removing. Peel slowly, and if it’s strongly stuck, peel a bit from one side, then the other, alternating sides to let the skin ease off. Never rip it off like a bandage – this isn’t good for your skin, especially delicate breast skin. If it’s stubborn, a few drops of warm water or oil at the edge can help release it.
Post-Wear Care: Wash the covers gently soon after removal (dried sweat can be harder to clean later). And let your skin breathe – if you’ve had them on for many hours, maybe moisturize the area after to rehydrate the skin (since adhesive occludes the skin).
Following these tips will maximize both the longevity of your nipple covers and your comfort wearing them.
Designing Nipple Covers for Busts Over D Cup (Advice for Brands and Manufacturers)
For beauty brands and lingerie manufacturers looking to serve customers with larger busts, it’s crucial to design nipple covers that truly address their needs. Here are key considerations for designing nipple covers for D+ cups:
Offer Multiple Sizes:One size does NOT fit all. Brands like CAKES Body have proven the value of size options – e.g. offering 8 cm, 10 cm, and 13 cm diameters to cover AA/A, B-DD, and DDD+ respectively. Providing at least a “large” size (around 10–13 cm) for fuller busts is essential. This ensures customers can choose a cover that fully covers and blends on their breast size. It also prevents the scenario of a customer using two overlapped small pasties because one wasn’t enough.
High-Quality, Skin-Safe Materials: Prioritize medical-grade silicone and adhesives in manufacturing. Large-bust customers are often willing to pay more for something that works and feels comfortable. Using premium silicone that is soft, hypoallergenic, and passes safety tests (like Cakes does) will set your product apart. Avoid cheap adhesives that can cause rashes. Consider offering an adhesive-free option as well (like non-adhesive silicone covers) for the ultra-sensitive segment.
Strong Adhesive Formulation: Work with adhesive technologists to develop or use an adhesive that can handle sweat and movement. Larger covers mean more weight, so the adhesive needs to hold that up. Some research in intimate-wear adhesives shows new polymers that maintain stickiness under moisture. Incorporate those advances. Also, test the adhesive on multiple skin tones and types – some adhesives don’t work as well on oily skin, etc., so you want a broadly effective formula.
Edge Engineering: Invest in molds or cutting techniques that produce feather-light tapered edges. This might mean multi-layer pouring of silicone (thicker center, thinner edge) or using ultra-thin silicone films at edges. It’s worth it: large diameter covers absolutely need thin edges or the edges will show. User feedback consistently favors covers that “disappear” at the edges.
Matte Finish and Skin Tones: Ensure the outward surface of the cover is matte, not shiny. A matte, textured finish (sometimes called “skin finish” or “velvet finish” silicone) prevents reflection and feels more like skin. Offer a range of inclusive shades – at minimum light, medium, and dark nude tones. Stephanie Yeboah, a content creator, praised Nood’s covers for having shades for darker skin, calling it “incredibly important”. When a cover is large, if it’s the wrong color, it’s like wearing a big patch – so get the colors right.
Innovative Features: Differentiate your product with thoughtful features:
Adhesive-Free Center: Many women (not just large bust) love this feature for comfort. Having a center without adhesive or with a soft gel pad can protect the nipple. Go Nipless’s Satin Comfort Shield is one implementation, which creates an adhesive-free zone.
Lift Assist: Consider designing a nipple cover that comes with a separate lifting strip or attachable tape. Not exactly a full bra, but maybe a kit where you have two large pasties plus optional lifting tape that can be used above or to the side to give a lift for those who need it. This way, your product can appeal to those who sometimes need more than coverage.
Reusability & Care: Emphasize durability. Use materials that maintain stickiness over many uses. In production, that might mean a slightly thicker adhesive layer that can be “recharged” by washing. Provide a nice storage case with each pair – it’s a small cost that adds huge perceived value and encourages customers to care for the product (hence extending its life). A sturdy case is especially useful for larger covers which can get misshapen if tossed loosely in a drawer.
Testing and Quality Control: To win trust (especially among B2B buyers like lingerie retailers), demonstrate that your nipple covers have been tested on real people with large busts. ThirdLove’s chief creative officer mentioned that Nippies was the only brand to pass their stringent testing – this kind of endorsement is powerful. Conduct sweat tests, movement tests (have users do jumping jacks or wear them through a hot day) and iterate based on feedback. Ensure consistency in manufacturing so each batch has the same adhesive strength and thickness.
Educational Marketing: When selling to general consumers, especially those with D+ cups who may be skeptical (with reason) about nipple covers, include guides and tips. Brands should provide instructions for application (possibly with visuals) and specific tips for fuller busts (like those we’ve discussed: e.g., “for best results on D+ cups, apply slightly above the nipple for a bit of lift, and ensure edges are fully adhered”). Educating users increases satisfaction and reduces misuse complaints.
Feedback Loop: Encourage reviews and listen to what larger-busted customers say. Maybe some want an even larger size, or a different shape (perhaps an oval pastie for more coverage toward the sides for side-boob?). Being responsive and possibly creating a new product variant to address that can capture a niche (for example, a teardrop shape cover that covers more below the breast could help those worried about under-boob showing in deep plunge outfits).
By focusing on these aspects, brands and factories can create nipple covers that truly serve women with fuller busts. The market is growing as more people embrace going braless occasionally, and those with large breasts shouldn’t be left out of the braless trend due to subpar products. Designing with their needs in mind builds loyalty (and good word-of-mouth in the community when a product finally “works” for them).
Real Examples and Testing Insights
To ground all this advice, here are a few real-world insights from testing and users:
A Business Insider test of popular nipple covers found that Cakes Body Sticky Covers stayed in place all day in hot, humid weather, thanks to a strong medical-grade adhesive, and the testers loved the painless removal due to the adhesive-free center. This shows that with the right design, even challenging conditions (heat, humidity) aren’t a problem.
In the same testing, they recommended Nood’s Extra Lift covers for those who “want nipple covers that give a slight boost” (suitable up to around D cup) – these come with pull tabs to help position and lift. It highlights an innovation specifically making covers more useful for larger busts.
Many users on forums mention layering techniques: one Reddit user suggested COCONIPS covers which are slightly bigger than a standard brand “so you don’t get that bump under your top” – indicating that size/edge difference solved the edge bump for her. She also noted they are really soft.
A case study from SlickNipps blog: Emily, a woman with DD cup, reported that the SlickNipps covers were effective under fitted clothing (no show-through) and “stayed on all day,” but on very hot days she felt she needed a stronger adhesive product. This reinforces that for extreme conditions, even a good cover might have limits and one might opt for backup solutions like tape.
Fashion influencer Stephanie Yeboah (a plus-size advocate) shared that Nood’s covers blend so seamlessly and come in inclusive shades that she felt completely confident wearing them, even noting zero movement during high-impact gym sessions. That’s a strong testimonial that good covers can handle more than we assume (gym with nipple covers on a larger bust – who knew!).
ThirdLove’s CCO Ra’el Cohen’s endorsement of Nippies is telling: she said it’s the only nipple cover that passed their tests and thus the only one they sell. ThirdLove is known for bras, including plus sizes, so their standards are high. Nippies passed tests for longevity and invisibility – which gives confidence that it’s a proven choice across sizes (their large size fits D+).
An interesting startup example: Go Nipless engineered their nipple covers specifically for fuller busts – including features like a “Satin Comfort Shield” (adhesive-free center) and a truly generous diameter. By focusing on the details (like a travel case, anatomical shape, etc.), they show that understanding the pain points leads to a better product.
All these examples underline a common theme: the details matter for nipple covers, and when done right, they really can work for large busts.
FAQs: Nipple Covers for Large Breasts
Q: What size nipple covers are best for larger busts? A: Choose extra-large diameter covers specifically marketed for D cups and up. Ideally 4 inches (10+ cm) or more in width. The cover should fully cover your nipple and a good margin of surrounding skin. If between sizes, go larger for seamless coverage.
Q: Can nipple covers replace a bra for large busts? A:Not for support. Nipple covers provide coverage/modesty by hiding the nipple, but they do not offer structural support or lift. For short periods or certain outfits, you can go braless with just covers. But for daily wear or high movement, you may need additional support (tape or a bra) to be comfortable.
Q: How do I stop nipple covers from slipping off when I sweat? A: Use high-quality, sweat-resistant covers (medical-grade adhesive) and apply them to clean, dry skin. Avoid lotion on your breasts. If you expect heavy sweat, consider applying an antiperspirant around (not on) the breast area beforehand, and carry spares. Some people also use a bit of dress tape on the edges for extra hold in extreme conditions. Choosing a cover with a stronger adhesive formulated for larger busts is key – they’re designed to hold through humidity and movement.
Q: Are there reusable options that work well for larger busts? A: Yes, most definitely. In fact, the best nipple covers for large busts are reusable silicone ones. Medical-grade silicone covers can be worn, washed, and re-worn many times. They’re made to last and maintain their stickiness if cared for. Brands like Nippies, Nood, Go Nipless, Cakes, etc., all offer reusable covers in larger sizes. Always follow the care instructions to get maximum reuses.
Q: How many times can I reuse nipple covers? A: It varies by product, but many silicone covers can be reused 20–30 times or even more. Proper care is crucial: gently wash after each use and store them in the case. Eventually the adhesive will diminish, but you should get numerous wears. (If a product says reusable but only lasts 2-3 wears, something’s wrong – either care issues or it’s poor quality.)
Q: Will nipple covers show under tight or sheer clothing? A: Good ones won’t. Look for ultra-thin edges and skin-matching color for tight clothes. Under sheer tops, use matte finish covers that match your skin tone so they disappear. When properly applied (edges fully flat), quality covers are virtually invisible under even form-fitting or thin fabrics. For example, users report going braless in white tees and nobody could tell because the covers were so seamless.
Q: Do nipple covers work for very large nipples or larger areolas? A: Yes, but you need the extra coverage style. Some covers are made specifically with more diameter or thicker centers to hide “particularly perky or dark nipples”. If you have a larger areola, definitely get a bigger diameter cover so the entire area is covered plus some margin. You can also layer two covers (a small one directly on nipple, larger one on top) if needed, but usually one large, opaque silicone pastie does the job.
Q: Can I wear nipple covers while exercising? A: If they are high-quality and sweat-proof, you can for low to medium impact workouts. As mentioned, some large-bust individuals even did high-impact training with the right covers (e.g. Nood’s) and reported no slippage. The covers must have strong adhesive and you should wear a snug sports top over them to minimize jiggle. However, if you require significant support for comfort during exercise, you might still want at least a shelf bra or a light sports bra in addition to the covers.
Q: How do I clean my nipple covers and make them sticky again? A: Gently wash them by hand with mild soap and lukewarm water after each use. Do not use alcohol or harsh cleaners. Rinse and let them air dry adhesive side up. Once dry, store them on the original backing or in a case to keep dust off. This routine usually restores the tackiness. If they start losing stickiness after many wears, it might be time to replace them or look into an adhesive renew spray sold by some brands.
Q: Will using nipple covers frequently cause sagging or hurt my breasts? A: There’s no evidence that occasional use causes any harm. Just remember they don’t provide lift, so wearing them daily instead of a supportive bra means your breasts are free – which in the long run is fine for many, but if you already have sagging concerns, you might want to alternate with support. One source suggested not wearing only nipple covers every day if you need support, to avoid any potential impact on skin elasticity. Also, always remove them gently to avoid skin trauma, and don’t apply to broken or irritated skin.
Q: What if my nipple covers still won’t stay on? A: If you’ve tried high-quality large-bust-specific covers and they consistently fail, consider that pure nipple covers might not be the right solution for that outfit or activity. You might need to use boob tape or an adhesive bra for more support in conjunction with covers. Also double-check that your skin prep is good (no oils at all). Lastly, ensure the product isn’t defective – occasionally, a bad batch of adhesive could be the culprit, so maybe try a different brand to compare.
Conclusion
Choosing nipple covers for a large bust comes down to finding coverage, quality, and comfort. By focusing on bigger sizes, strong adhesives, soft silicone, and smart design features (like thin edges and non-stick centers), you can get nipple covers that work brilliantly even for D, DD, DDD cups and beyond. These covers won’t replace a bra’s lift, but they offer a freeing alternative for those times you want to go braless under a tricky top or dress. And as the latest products and user experiences show, when you pick the right nipple covers for large breasts, they can stay put through hours of wear – even workouts – while staying invisible and comfortable.
Whether you’re a consumer looking for the best nipple covers for D cup and up or a brand aiming to serve curvier customers, the recipe for success is the same: generous coverage, reliable adhesion, and skin-friendly design. With these in hand, you can confidently rock backless dresses, plunging outfits, and everyday tees without a bra, knowing you’re covered (literally) and supported in your choice. No more nip slips or discomfort – just smooth, seamless style for every bust size.
https://www.newtopsilicone.com/wp-content/uploads/2025/06/Silicone-Nipple-Cover-Manufacturers-5.webp20002000Enriquehttps://www.newtopsilicone.com/wp-content/uploads/2022/06/newtop-logo-300x138-2.pngEnrique2026-02-26 17:17:342026-02-26 17:25:47How to Choose Nipple Covers for Large Busts – Ultimate Guide
Silicone has become the material of choice for reusable nipple covers because of its unique combination of comfort, durability, and skin safety. High-quality silicone nipple covers are soft and flexible, molding to the skin for a natural feel while remaining virtually invisible under clothing. Unlike disposable fabric pasties, silicone covers can be washed and worn multiple times, providing long-term value and reducing waste. Additionally, medical-grade silicone is hypoallergenic and non-toxic, meaning it won’t irritate sensitive skin when used properly. These advantages have made silicone nipple covers a popular no-show solution among consumers and a trusted product category for beauty brands and B2B buyers alike.
Silicone nipple covers allow women to wear backless or strapless fashions confidently without a bra, providing invisible coverage over the nipples. These reusable covers stick to the skin securely and blend in so that nothing shows through or slips out of place. They are made of soft silicone gel that conforms to the breast’s shape, creating a smooth silhouette under fabric. Unlike traditional bras, they leave the back and shoulders free – enabling outfits with low backs, cut-outs, or thin straps.
What Are Silicone Reusable Nipple Covers?
Silicone nipple covers (often called silicone pasties) are small round or petal-shaped skin-toned coverings made from soft silicone gel. They are designed to cover the nipple and areola area, creating a smooth look under clothing when going braless. Most silicone nipple covers use either the material’s natural tackiness or a medical-grade adhesive backing to stick gently to the skin. Quality silicone covers are typically thin with tapered edges, so they lay flush against the breast and disappear under outfits. They come in various sizes and shades to match different skin tones and busts. Because silicone is waterproof and heat-resistant, these covers stay put through perspiration or even a dip in the pool. Crucially, they are reusable – with proper care, one pair can often be worn dozens of times, making them an economical and eco-friendly choice compared to single-use nipple stickers.
Key Benefits of Silicone Nipple Covers
Silicone has risen to prominence for reusable nipple covers due to several clear benefits:
Soft, Comfortable Fit: Silicone is a soft, gel-like material that feels gentle on the skin. It conforms to the body’s curves without edges that dig in or cause discomfort, unlike stiff bras or stick-on fabric patches. Many women find silicone pasties more comfortable than even an underwire bra for nipple coverage. The material warms to body temperature and moves with you, so you can forget you’re wearing anything.
Invisible Under Clothing: A top reason silicone rules the nipple cover market is that it creates a virtually invisible look. High-quality silicone covers are ultra-thin (often ~0.5–1mm) with tapered, feather-light edges that blend smoothly into the skin. Medical-grade silicone also often has a matte finish that avoids light reflections, so there’s no tell-tale “shine.” The result is seamless coverage – no bumps, outlines, or color showing through, even under sheer or tight tops. This discretion makes them ideal for fashion situations like strapless dresses, silky blouses, or gym wear.
Reusable & Durable: Unlike paper or fabric nipple covers that are usually disposable, silicone nipple covers are designed for reuse. The silicone material is inherently durable – it doesn’t tear easily and retains its shape. With proper care, a single pair of silicone covers can be worn dozens of times (often 20–50+ uses) before needing replacement. They can be gently washed and will maintain their stickiness over many uses. Silicone pasties are also waterproof and sweat-proof, so they hold up during hot weather, workouts, or even swimming, without losing adhesion. This long lifespan makes them cost-effective – while the upfront cost is higher than disposables, the cost per wear is much lower over time. Reusability also means less waste, an eco-friendly perk for those looking to cut down on single-use products.
Secure yet Gentle Adhesion: Silicone covers stick securely but kindly. Many use a medical-grade silicone adhesive that strikes a balance between staying put and peeling off without pain. Some newer designs are adhesive-free, relying on the natural tack of silicone and a suction effect to “grip” the skin (activated by body heat). Either way, quality silicone pasties won’t fall off easily – they can stay on for 6-12 hours of wear even through dancing or exercise. Yet removal is typically painless and doesn’t leave residue. This reliable stickiness gives users confidence that their nipple covers won’t slip out of place, while the gentle removal protects the delicate skin. (Tip: With adhesive styles, slowly peeling them off or using a bit of oil can prevent any discomfort.)
Hypoallergenic & Skin-Safe: One of silicone’s biggest advantages is that it’s safe for sensitive skin. High-grade silicone is non-toxic, non-irritating, and hypoallergenic. In fact, “medical‐grade” silicone is used in healthcare (for example, in wound dressings and implants) because it’s biocompatible – it doesn’t react with our body or release harmful chemicals. Reputable nipple cover manufacturers use medical-grade silicone that meets FDA standards and ISO 10993 biocompatibility tests. This means the material has been evaluated for prolonged skin contact. Silicone covers are also typically latex-free, BPA-free, and phthalate-free, avoiding common allergens found in some plastics. Many brands have their nipple covers dermatologist-tested to ensure they won’t cause irritation on most people. The bottom line: for the vast majority of users, silicone pasties are very gentle on the skin. They won’t clog pores or cause breakouts in normal use – in fact, concerns that quality silicone “suffocates” skin are largely unfounded. (Of course, if you have a specific silicone allergy or extremely sensitive skin, you should be cautious – more on that in the FAQ.)
Cost-Effective & Sustainable: Although a pair of silicone nipple covers costs more upfront than a pack of disposable covers, it pays for itself with extended use. You might spend, say, $20–$30 on a good set of silicone covers, but use them 30 or 40 times – whereas you’d otherwise buy many packs of one-use covers to get the same wear. Over time, reusable silicone covers are the more budget-friendly choice. Additionally, choosing reusables cuts down on waste. With millions of disposable pasties ending up in landfills, switching to a long-lasting silicone version is an eco-conscious decision. This is a selling point for both consumers and brands in an age of sustainability awareness.
In summary, silicone brings an ideal mix of comfort, invisibility, longevity, and safety that other materials have trouble matching. It’s no surprise that one industry guide flat-out states “Silicone nipple covers are the best choice for reusable nipple covers” due to their durability and reusability.
Comparison: Silicone vs. Fabric Nipple Covers
To understand silicone’s popularity, it helps to compare it with the main alternative – fabric (usually satin or cotton) nipple covers, which are often disposable. Below is a quick comparison:
Feature
Reusable Silicone Covers
Disposable Fabric Pasties
Reusability
Yes: Can be worn dozens of times with proper care. Washable and retains adhesion over multiple uses.
No: Intended for one-time use; must be discarded after wear.
Adhesion Strength
Strong & Waterproof: Uses medical-grade adhesive or self-adhesive silicone that stays put even when sweating or swimming.
Moderate: Rely on peel-and-stick glue that may loosen with sweat or movement. Not water-resistant – can peel off if wet.
Thickness & Look
Ultra-thin & Invisible: Typically ~0.8mm thin with tapered edges for a seamless blend into skin. Matte finish avoids shine, virtually undetectable under clothes.
Slightly Visible: Fabric can’t be as thin at the edges, so pasties may show an outline or texture under clingy fabrics. Often have a matte finish but edges can still imprint.
Comfort
Soft, Flexible: Gel-like silicone molds to your shape and moves with you. No stiff materials. Feels like a second skin. However, silicone is less breathable than fabric for very long wear.
Breathable, Light: Fabric pasties (often cotton or satin) are breathable and soft. Good for short-term comfort, but the adhesive on them can sometimes tug skin. They also don’t provide the “skin-like” molding that silicone does.
Skin Safety
Hypoallergenic: Made of inert silicone; usually latex-free and irritation-free for most. Medical-grade adhesives are gentle and tested for skin safety.
Generally Safe: Often made with cotton/poly and a skin-safe glue. However, those with very sensitive skin might get irritation from the adhesive side, especially if worn for long durations.
Water/Sweat Proof
Yes: Silicone is waterproof. Great for hot climates, workouts, or the beach – they won’t come off with moisture.
No: Fabric pasties are not waterproof. Excess sweat or swimming will compromise the adhesive, causing them to slip.
Maintenance
Requires Care: Should be washed after each use and kept clean to maintain stickiness. Needs a bit of effort (air-drying, storing properly).
Low Maintenance: No cleaning needed – you throw them away after use. Convenient but creates waste.
Cost
Higher upfront, lower long-term: A quality silicone cover costs more per pair, but each pair replaces many disposables, making it cheaper in the long run. More sustainable and eco-friendly.
Low upfront, higher long-term: Each pair is cheap, but if you use nipple covers frequently, buying repeated disposables adds up in cost. Also, continuous waste generation.
As shown above, silicone covers outperform fabric pasties in most categories important for nipple coverage (invisibility, reusability, hold, and water resistance). Fabric or paper pasties might be fine for occasional, short-term use, or for those who truly cannot tolerate any adhesive silicone. But for a premium, reliable solution, silicone is the clear winner – hence its popularity in the reusable nipple cover market.
The Science and Safety of Medical-Grade Silicone
Beyond practical benefits, silicone’s popularity is underpinned by technical strengths and safety credentials that give both consumers and brands peace of mind.
Biocompatibility: Medical-grade silicone is widely used in the healthcare and cosmetics industries because it’s biocompatible – meaning it doesn’t react adversely with our body. It’s nontoxic, non-carcinogenic (does not cause cancer), and hypoallergenic. In nipple covers, using medical-grade silicone indicates the material has been tested to high standards (such as U.S. FDA regulations and ISO 10993 tests for skin contact safety). Manufacturers often opt for a platinum-cured silicone, a purification process that avoids harmful residues, resulting in an even purer product. This contrasts with cheaper silicones that might use peroxides in curing (leaving trace irritants). The result is a clean, inert material ideal for prolonged contact with skin.
Certified Safe Materials: Reputable producers ensure their silicone nipple covers meet strict safety guidelines. Many advertise that their products are FDA-compliant, meaning the silicone and adhesive meet food-grade or medical-grade standards for safety. In Europe, compliant products adhere to regulations like REACH, guaranteeing they contain no harmful chemicals above allowed limits. Silicone itself is a stable polymer that doesn’t leach chemicals. Top brands also emphasize that their covers are free of latex, parabens, BPA, and phthalates – substances that some people might be allergic to or wish to avoid. This transparency in materials is especially important for B2B buyers (like retail brands or wholesalers) who must answer customer safety questions and pass regulatory checks.
Skin-Friendly Adhesives: Part of what makes silicone nipple covers work is the adhesive that keeps them on. High-quality covers use medical-grade adhesives formulated for skin contact. Commonly, a silicone-based adhesive is used around the edges of the cover; this type is known for being gentle and repositionable while still providing a secure hold. Some premium products use advanced silicone gel adhesives (for example, formulations by companies like DuPont™ specifically designed for delicate skin). These adhesives are often lab-tested and hypoallergenic, sometimes carrying certifications (like an SGS test report) to verify they won’t cause irritation. For users, this means minimal chance of redness or rash, as long as the covers are used as directed. It’s worth noting that even with great adhesive, proper use matters – skin should be clean and dry when applying nipple covers, and they should be removed gently to avoid any irritation.
No Impact on Breast Health: Some people have wondered if sticking covers on the breasts regularly could have any health risks (for example, affecting breast tissue or circulation). According to health experts, these fears are unfounded. There is no evidence that nipple covers cause any health issues like breast cancer – a myth that has been debunked by organizations like the American Cancer Society. Silicone pasties sit on the surface of the skin and do not interfere with breast tissue or lymph flow. They also do not contain hormones or any active chemicals. The primary health considerations with nipple covers are skin-level issues (allergies or irritation), not deeper health effects. So, users can feel confident that silicone covers are a safe product for regular use, provided they follow common-sense guidelines (like not wearing them non-stop 24/7).
Real-World Use Cases and Performance
One reason silicone nipple covers are so popular is that they perform reliably in a wide range of real-world situations. Here are some scenarios where silicone reusable covers shine:
Under Everyday and Formal Outfits
For daily wear or special events, silicone nipple covers provide invisible support that traditional undergarments cannot. They allow you to go braless under backless dresses, plunge-front gowns, crop tops, or sheer blouses while still looking polished. The covers give a smooth appearance with no nipple show-through, even under unforgiving fabrics like silk or satin. Women routinely use silicone pasties for weddings, proms, and evenings out – any time a bra isn’t suitable but coverage is desired. The confidence of knowing you’re covered (literally) without any fashion mishaps is a huge benefit. Because silicone pasties adhere securely, you can dance and move freely without worrying they’ll shift. Yet they’re undetectable, so all eyes are on your outfit, not on any bra lines or protrusions. As Dr. Shruti Tannan (a plastic surgeon) notes, many women even post-surgery prefer the comfort and discretion of silicone nipple covers, enjoying wardrobe freedom without a traditional bra.
During Exercise and Outdoor Activities
Silicone nipple covers also work great for active lifestyles. For instance, runners or yogis might use them to prevent chafing and discomfort during workouts. Silicone covers are sweat-proof and stay put through exercise, unlike fabric stickers that might fall off. If you’re heading to a hot yoga class or going for a hike on a warm day, silicone pasties can keep you covered without the extra layer of a sports bra (some athletes with smaller busts or those who find bras restrictive choose this option). Moreover, because they’re waterproof, silicone nipple covers are popular for beach days and pool parties – they won’t peel off in water, so you can swim in them. Many bikini-wearers favor silicone covers under swimsuits for modesty, since they won’t soak up water or show through a wet bikini top. The Masbond manufacturing experts highlight that these covers can even withstand high-intensity workouts and summer heat without losing their hold. Whether it’s a wedding on a hot summer afternoon or an outdoor festival, silicone reusable covers reliably handle sweat and humidity.
Travel and On-the-Go Convenience
For frequent travelers, silicone nipple covers are a suitcase essential. They take up almost no space and are a versatile solution for a variety of outfits. Instead of packing multiple bras (strapless, plunge, etc.), you can pack a pair of silicone covers and be prepared for anything. They’re particularly convenient on vacation – for instance, going from daytime sightseeing (when you might wear a bra) to an evening in a strapless dress, you can just stick on the silicone covers and you’re ready to go. They clean easily with a bit of soap and water in a hotel sink and air-dry overnight, making them low-maintenance on trips. Business travelers also appreciate the flexibility: one pair of covers can work under a conference outfit one day and a cocktail dress the next. Since they are reusable, there’s no worry about running out – one set can last an entire trip or longer.
Post-Surgery and Sensitive Situations
As mentioned earlier, women who have had breast surgery (augmentation or reconstruction) often turn to silicone nipple covers. Right after surgery, wearing a normal bra can be uncomfortable or not recommended. Silicone covers offer a gentle alternative – they shield the nipples (which may be extra sensitive) without applying pressure on the breasts. Dr. Tannan points out that many post-implant patients feel confident going braless with just nipple covers, changing their wardrobe choices accordingly. The soft silicone is kind to healing skin, and as long as hygiene is maintained, they pose little risk. Outside of surgery, even people with generally sensitive nipples (due to conditions or natural sensitivity) find silicone pasties helpful because they prevent chafing against clothing. Some new mothers, when they’re not nursing, use silicone covers to protect sensitive nipples in between feedings or to prevent showing through tops (keeping in mind that covers used during breastfeeding periods should be kept very clean). In fact, one brand even notes their silicone covers double as nursing pads to prevent leaks, thanks to the leakproof seal they create. Overall, silicone nipple covers serve anyone who wants coverage with minimal irritation.
Care and Maintenance of Reusable Silicone Covers
To get the most out of your silicone nipple covers (and to keep them skin-safe), proper care is important. Here are some tips for cleaning and maintaining reusable nipple covers:
Clean After Each Use: It’s recommended to wash your silicone covers after wearing them – or at least every few uses – to remove body oils, sweat, and dust. Use mild soap (or a designated silicone cleanser) and lukewarm water. Gently rub the surface (avoid scratching if there’s adhesive) and rinse thoroughly. This keeps the adhesive tacky and prevents any bacterial buildup.
Air Dry Only: After washing, let the covers air dry with the adhesive side up. Do not use a towel to rub them (this can lint up the sticky side). Just place them in a clean area and allow them to dry naturally. Ensure they are completely dry before storage or next use; any moisture can interfere with adhesion.
Protect the Sticky Side: If your covers have a sticky adhesive side, keep the original plastic film that came with them. Once dry, re-cover the adhesive side with that film (or any clean plastic liner) before storing. This prevents dust or lint from attaching and preserves the stickiness. For self-adhesive silicone (non-glue) types, storing them flat so they don’t get misshapen is key.
Store Properly: Store the nipple covers in a cool, dry place, ideally in a storage case or a zip-lock bag. Avoid exposing them to lint (store away from fabrics) or direct sunlight, which over time could degrade the material. Many products come with a convenient storage case – use it!
Handle Gently: When applying or removing, take your time. To put them on, skin should be clean and dry (no lotions or powders) for best adhesion. To remove, peel slowly from the edge – never rip them off quickly like a bandage. Gentle removal will not only save your skin from irritation but also keep the silicone intact longer. If you find removal tricky, you can apply a drop of baby oil or moisturizer at the edge to help release the adhesive.
Don’t Wear Overnight:Avoid wearing nipple covers for very extended periods or while sleeping. The skin under the cover needs a chance to breathe. Wearing any adhesive product too long (especially through sweat) can lead to irritation or even an increased risk of infection in rare cases. It’s best to use them for the day or event, then cleanse your skin and let it rest overnight.
Know When to Replace: Even the best reusable nipple covers won’t last forever. Over time, you might notice they lose their stickiness or don’t stay as well as before. Or they may develop a tear or edge nick. When this happens, it’s time to replace them with a new pair. Most users get somewhere between 20 and 50 wears out of good silicone covers (some high-end ones claim up to 100 uses). Keeping them clean and stored properly will maximize this lifespan. But if adhesion is failing and cleaning doesn’t revive it, or if the surface gets damaged, it’s safer and more effective to start with a fresh pair.
By following these care tips, you’ll ensure your silicone nipple covers remain clean, hygienic, and effective for as long as possible. Proper maintenance not only protects your skin (since you’re avoiding bacteria build-up and irritation) but also protects your investment in a quality product.
Frequently Asked Questions (FAQs)
Q: When is silicone not an ideal choice for nipple covers? A: While silicone nipple covers work for most situations, there are a few cases where they might be less ideal. If you need nipple coverage for extremely long stretches or continuous wear (12+ hours), silicone may not be the best – extended use can trap sweat and moisture under the cover, which can irritate skin if not given a break. For instance, wearing them overnight is not recommended. In very hot and humid conditions, some people find that silicone pasties, being less breathable, can make the area sweat more. In such cases, taking periodic breaks to let skin air out, or switching to a breathable fabric cover temporarily, might be wise. Additionally, if your outfit already provides coverage or support (e.g. built-in bra cups or thick padding), adding silicone covers might be unnecessary – a simple fabric liner could suffice. In summary, silicone covers are not ideal if you can’t periodically remove them to let your skin breathe, or if you have an alternative solution that makes them redundant.
Q: Who should avoid using silicone nipple covers? A:Most people tolerate silicone covers very well, but there are a few who might need to avoid or exercise caution. If you have a known allergy to silicone itself (which is rare, but possible) or to the adhesives used, you should avoid silicone nipple covers. Similarly, if you have a skin condition in the area – such as eczema, psoriasis, or a healing wound on the breast – you should be careful. The adhesive could irritate broken or ultra-sensitive skin. Dermatologists advise that if you have very sensitive skin, you might choose silicone covers that are adhesive-free (non-sticky) to minimize any potential reaction. Also, individuals with extreme skin sensitivity or a history of contact dermatitis might want to do a patch test first: apply the cover on a small area for 24 hours to see if any redness occurs. If you experience burning, itching, or rash, you should discontinue use. In short, avoid silicone nipple covers if you have an allergy or if your nipple area’s skin is in a compromised state, and when in doubt, consult a dermatologist.
Q: How long can I safely wear reusable silicone nipple covers in one go? A: It’s generally recommended to wear adhesive silicone nipple covers for somewhere around 6 to 8 hours at a time at most. Most brands cite ~8 hours as a safe limit for continuous wear. After that, you’ll want to remove them to let your skin rest and to clean the covers. If you’re in a situation where you must wear them longer (say, an all-day event), keep an eye on how your skin feels. The moment you feel any discomfort, itching, or irritation, it’s wise to take them off. Overnight wear is not advised – not only can it cause irritation from prolonged pressure and sweat, but the covers may also shift or come off while you sleep. Give your skin at least as much “free time” as cover time; for example, if you wear them for 8 hours, try to go cover-free for the next 8+ hours. This intermittent use keeps your skin healthy. Remember that proper application (on clean, dry skin) and timely removal are key to safe use. And always cleanse the skin after removing the covers to get rid of any trapped sweat.
Q: Are silicone nipple covers safe for regular use – do they affect the skin or breast health? A: When used as directed, silicone nipple covers are very safe for both skin and breast health. They do not cause any known long-term issues. There is no scientific evidence that wearing nipple covers leads to breast cancer or any disease – a concern some have, but which medical experts have debunked. Silicone covers sit externally on the skin; they don’t penetrate, compress internal tissue (like an underwire might), or release harmful substances. The main safety considerations are skin-level: if worn too long without breaks, they could cause mild irritation or a rash, especially in hot sweaty conditions. And as with any product, a small number of people could have a localized allergy. But these are temporary issues that resolve once the covers are removed and the skin is cared for. To ensure safety, stick to medical-grade products (for quality material), keep them clean, and follow the recommended usage times. If you do notice any unusual skin reaction, discontinue use and let the area heal. Overall, silicone nipple covers are considered a low-risk product – millions of women use them regularly with no problems, enjoying the freedom and comfort they provide.
Conclusion
Silicone’s popularity in reusable nipple covers is well-earned. It checks all the boxes: comfortable to wear, discreet in appearance, durable through many uses, and safe for skin. This winning combination has made silicone nipple covers a go-to solution for individuals who want worry-free coverage under any outfit. From a consumer’s perspective, they offer confidence and convenience – you can step out in that backless dress or hit the gym in a tank top without a second thought. From a brand or B2B perspective, silicone nipple covers represent a high-quality, in-demand product. Beauty and lingerie brands favor silicone because it carries strong consumer trust; shoppers know that “medical-grade silicone” means a reliable, tested material. Manufacturers (especially those with FDA, ISO, or REACH compliant materials) demonstrate credibility and care for end-user safety, which in turn builds brand loyalty.
In summary, silicone reusable nipple covers have become popular by delivering performance and peace of mind. They marry material science (in the form of advanced silicones and skin-safe adhesives) with everyday practicality. Whether you’re a fashion-forward consumer, a beauty brand product developer, or a wholesale buyer scouting the next hit item, the evidence is clear: silicone is the superior choice for nipple covers, offering an optimal blend of comfort, invisibility, reusability, and safety. By understanding these benefits and using silicone covers correctly, anyone can enjoy a smooth, confident, and worry-free experience. And that is exactly why silicone stands out as the popular favorite in the world of reusable nipple covers.
https://www.newtopsilicone.com/wp-content/uploads/2025/06/Silicone-Nipple-Cover-Manufacturers-4.webp20002000Enriquehttps://www.newtopsilicone.com/wp-content/uploads/2022/06/newtop-logo-300x138-2.pngEnrique2026-02-26 16:42:582026-02-26 17:01:47Why Silicone Is Popular for Reusable Nipple Covers
Natural rubber dog toys are a favorite for their safety, durability, and dog-friendly texture. Unlike plastic or nylon, natural rubber is non-toxic and tough, making it ideal for chew-happy pups. From classic balls to innovative treat dispensers, the shapes of these toys cater to different canine play styles and needs. In this listicle, we’ll count down the top 10 natural rubber dog toy shapes that are popular with consumers (and thus smart choices for retailers to stock). Each shape offers unique benefits – whether it’s satisfying a dog’s instinct to chew or providing hours of fetch fun – and we’ll highlight why they sell so well. Let’s dive in!
1. Ball – The Fetch Favorite
Nothing beats the classic ball when it comes to universal dog appeal. Dogs seem hard-wired to chase bouncing balls – it taps into their natural prey drive. A rubber dog ball’s high bounce and roll mimic the movements of small animals, triggering that instinct to chase, pounce, and retrieve. This makes fetch games endlessly engaging and a great energy burner for active pups. Natural rubber balls are also extremely durable and gentle on teeth (unlike abrasive tennis ball fuzz). They come in various sizes to suit every breed, from tiny Terriers to giant Great Danes. For retailers, rubber balls are a perennial bestseller – a staple toy that both casual pet owners and serious dog enthusiasts will buy repeatedly. Some creative variations (like spiky balls or jack-shaped balls) add unpredictable bouncing action, which further stimulates a dog’s interest and agility. Bottom line: A rubber ball is a must-have toy that provides exercise, excitement, and bonding through endless games of fetch.
2. Bone – Instinctual Chew and Comfort
The bone shape is an instinctive favorite for dogs. Canines are naturally drawn to bone-shaped toys – it’s practically hard-coded in their DNA. A natural rubber bone offers the familiar feel of a bone without the risks of splintering or breaking teeth. In fact, a quality rubber bone is much safer than real bones or rawhide, which can splinter or pose choking hazards. Dogs that love to chew (from teething puppies to anxious chewers) find satisfaction gnawing on the durable rubber, which helps relieve stress and curb destructive behavior. Many rubber bones have knobbed ends or textured surfaces, giving dogs good gripping points and a gum-massaging chew experience. This not only entertains them but can also support dental health by scraping plaque. For retailers, rubber chew bones are popular because they appeal to owners looking for a safe, long-lasting chew toy that keeps their dog busy. Whether it’s a mild chewer or a moderate chomper, most dogs will happily settle down with a rubber bone, making this shape a consistent seller.
3. Stick – Safe Version of a Dog’s Beloved Stick
Dogs and sticks are a classic combo – many pups can’t resist picking up a twig or branch during a walk. However, real sticks can be dangerous (wood splinters can injure the mouth or internal organs). Enter the natural rubber stick toy, which replicates the shape dogs love in a safe, splinter-free form. These toys often even float for water fetch, and some come with fun features like rope handles or glowing parts. A rubber stick is great for dogs who enjoy carrying or shaking objects; it gives that satisfying feeling of a “prize” in their mouth without the mess or risk of a real log. They’re also excellent for games of fetch – owners can throw a rubber stick in the yard or lake and let their dog romp without worry. The durable rubber material stands up to plenty of chewing and tossing. From a retailer perspective, rubber stick toys sell well to any pet parent who knows the struggle of their dog constantly picking up harmful wooden sticks. Highlighting the “no splinters, no choking” benefit can quickly convince shoppers to choose a rubber stick toy as a safer alternative. Dogs get the same stick-chasing joy, and owners get peace of mind.
4. Ring (Donut) – Versatile Tug and Chew Ring
The ring-shaped dog toy (often looking like a donut or hoop) has surged in popularity because of its versatility. Made of resilient natural rubber, a ring toy can serve as a chew toy, a fetch toy, and a tug toy all in one. Dogs love to chew on the thick rubber ring, which can help clean teeth and massage gums during solo play. The circular shape is easy for dogs to hold in their paws or mouths. When used for fetch, rubber rings can be rolled on the ground or tossed in the air – their round shape produces irregular, unpredictable bounces that keep dogs intrigued and excited. Many rings also float, making them great for water-loving pups. Additionally, a ring is perfect for tug-of-war: one side for the dog to grab, the other for their owner (or another dog). The sturdy rubber can handle the pulling and thrashing of a spirited tug game. Pet retailers find that natural rubber rings appeal to a broad range of customers – from owners of heavy chewers (who need a durable chew ring) to those with multiple dogs (who can play tug together). The ring shape’s ability to entertain in multiple ways means it offers excellent value and enrichment, which is a strong selling point. Overall, this “jack-of-all-trades” toy shape provides safe chewing, interactive play, and endless fun in one simple design.
5. Flying Disc (Frisbee) – Active Play for High Energy Dogs
For dogs that crave high-flying action, flying discs made of natural rubber are a go-to toy shape. Unlike hard plastic frisbees, rubber discs are softer on a dog’s mouth and teeth – they flex on impact, so dogs can catch them without gum injury. These discs can be thrown long distances, allowing energetic dogs to sprint and leap, burning off plenty of energy. Playing frisbee is not only great exercise (building endurance and agility), but also a fantastic way for dogs and owners to bond through training and teamwork. Many natural rubber frisbees have aerodynamic designs that make them easy to throw and capable of gliding far. They often float in water too, adding to their versatility for beach or poolside play. Importantly, rubber frisbees are durable and dog-safe: they won’t shatter if bent, and there are no sharp edges to harm a dog’s mouth. Retailers will find that active dog owners (especially those with breeds like Labradors, Shepherds, or Collies) frequently seek out a quality dog frisbee for outdoor play. Emphasize that a soft rubber disc is designed for dogs, as opposed to regular plastic discs – this highlights the safety and durability aspect. In a pet store, brightly colored flying discs often catch the eye, and their promise of healthy exercise for high-energy pups makes them a top-selling shape, particularly in spring and summer months when people are out playing with their dogs.
Tug-of-war is a game many dogs adore, and having a sturdy tug toy made of natural rubber is perfect for this rough-and-tumble play. These toys come in shapes like a figure-8, a double-ended bar, or a simple rubber loop with handles – all designed for a good grip on both ends. Natural rubber is an excellent material here because it can stretch and withstand pulling without snapping. Why are tug toys so popular? They provide an outlet for a dog’s energy and tap into natural instincts (in the wild, tugging mimics wrestling or tugging prey). More importantly, tug play is a cooperative game between dog and human (or between two dogs) that can strengthen their bond. Engaging in interactive play like this regularly helps build trust and understanding. Many trainers even use tug toys as rewards or tools to teach dogs impulse control (“take it” and “drop it” commands). Owners love tug toys because it’s plain fun and it tires out their pups both physically and mentally. For retailers, rubber tug toys are a hit especially with owners of strong, active dogs. Unlike rope toys that can fray (and come with the hazard of swallowed strings), rubber tugs are mess-free and long-lasting. When recommending a tug toy, you can mention the added benefits: they help dogs burn excess energy, boost confidence, and allow for valuable interactive playtime with people. Given these perks, it’s easy to see why tug-shaped toys hold a firm spot in the top-selling list.
7. Treat-Dispensing Puzzle Toys – Mental Stimulation on Tap
One of the most enriching shapes you’ll find is the treat-dispensing toy, often in forms like a rubber cone, ball, or other puzzle-like shapes (think of the classic beehive-shaped toy that you can stuff treats into). These toys have hollow centers or slots where treats or kibble can be inserted. Dogs then have to roll, bounce, or chew the toy to gradually release the goodies. This kind of toy is wildly popular because it turns snack time into play time. It challenges a dog’s mind – engaging their problem-solving skills and natural foraging instincts as they work to get the treats out. The benefit is twofold: dogs stay occupied (great for bored or anxious pups) and they eat treats more slowly, which can aid digestion and weight management. Natural rubber is the preferred material for these puzzle toys due to its toughness and safety; it can withstand lots of chewing as dogs figure out the puzzle. Many treat-dispensers also promote dental health, with grooves or ridges that scrape teeth as the dog chews. For pet parents, these toys are a sanity-saver – they can keep an active dog busy while providing significant mental stimulation. Retailers will notice these toys often fly off the shelves, especially with informed customers who understand the importance of enrichment. When discussing these toys, highlight how mentally stimulating treat dispensers can alleviate boredom and reduce destructive behavior. They’re a hit among both working dog owners and any dog owner who wants to give their pet a “job” to do. In short, treat-dispensing shapes offer entertainment with a reward, making them an easy sell and a repeat purchase item.
Sometimes the best way to entice a dog to play is with a fun shape that squeaks. Animal-shaped rubber toys (like a rubber pig, chicken, or dinosaur) and other novelty shapes fall into this category. These toys often contain a squeaker and are made of natural or latex rubber for a bit of chewable give. Dogs love squeaky toys because the sound mimics the high-pitched cries of prey, activating their hunting instincts and providing immediate feedback during play. Every chew or pounce produces a squeak, which to a dog is incredibly rewarding – it makes the toy “feel alive” and keeps them coming back for more. Whether it’s shaped like a little critter or a silly cartoonish object, the novelty factor also grabs the owner’s attention (who can resist a dog toy that looks like a rubber duck or a taco?). These shapes sell well because they’re engaging for dogs and often amusing for humans too. However, safety and quality are key: well-made natural rubber squeaky toys are durable enough to prevent the squeaker from popping out easily and use non-toxic materials. Savvy pet owners often stick to reputable brands for squeaky toys to ensure longevity and safety. As a retailer, you can advise customers that while dogs adore squeaky toys, they should supervise play and replace the toy if it gets damaged (to avoid any choking hazard from a dislodged squeaker). When stocked with high-quality options, the animal/novelty shape category tends to be a crowd-pleaser – perfect for adding a bit of whimsy to the toy aisle and for giving dogs a playful “prey” to chase that won’t cause any real mayhem in the house.
9. Tire Shape – Tough Toy for Power Chewers
The tire-shaped dog toy is exactly what it sounds like: a round rubber toy modeled after a car tire (often complete with tread patterns on the surface). This shape is extremely popular for owners of strong, determined chewers. Why? Tires are typically made of thick, high-density natural rubber that can stand up to serious gnawing. The circular shape gives dogs an easy way to grip and chew, and the textured tread can help scrub their teeth and gums. Many rubber tire toys also double as treat holders – you can wedge treats or peanut butter inside the tire’s inner rim, turning it into an engaging puzzle toy as well. Additionally, tire toys are fun for fetch games: you can roll a rubber tire along the ground and watch your dog chase after it (the rolling motion taps into that chase instinct in a novel way). Some even bounce erratically if thrown, adding to the fun. From a safety standpoint, natural rubber tires won’t splinter or break apart, and they usually come in sizes meant to prevent choking. Pet retailers often list tire toys in the “indestructible” or “power chewer” section – they’re a top-selling shape for heavy chewers because of their reputation for toughness. They appeal to customers who have tried other toys that didn’t last; a good rubber tire gives these folks hope for a toy that their “shark-tooth” dog can’t immediately destroy. Highlighting features like treat-stuffing capability, dental benefits, and durability can help convince a hesitant buyer. All in all, the tire shape has earned its place as a bestseller by being one of the most resilient and multifunctional dog toy designs on the market.
10. Dumbbell – Easy-to-Carry Fetch & Chew Toy
Shaped like a miniature barbell (with two large ends connected by a middle bar), the dumbbell toy is another popular natural rubber design. This shape essentially combines the best of a ball and a bone: the ball-like ends are satisfying for dogs to chew or catch, and the narrow middle makes it easy for dogs to carry around. Many rubber dumbbell toys have textured ends or ridges that can help clean a dog’s teeth and massage gums during play. The design also lends itself to unpredictable bouncing – when tossed, a dumbbell might bounce in a not-so-straight line due to its shape, keeping dogs on their toes (much like a jack or irregular ball). Dogs that enjoy fetch often take to the dumbbell shape quickly, as they can grab it in the center and run without it slipping from their mouth. It’s also a great shape for a game of toss and tug; an owner can hold one end while the dog grabs the other. Natural rubber dumbbells are usually quite durable and can withstand strong chewers, especially if sold as an “aggressive chewer” toy. They might even float, adding to their versatility. For retailers, the dumbbell shape is a solid seller because it’s a practical all-in-one toy: good for chewing, fetching, and moderate tugging. It’s the kind of toy a customer might buy for a puppy and still see it being used when the dog grows up, thanks to its lasting utility. When describing it, note how the design promotes dental health and relieves boredom (through chewing) while also being superb for active play. That mix of benefits resonates with pet owners, making the rubber dumbbell a wise stock choice.
Choosing the Best Natural Rubber Dog Toys
With so many shapes available, selecting the right dog toy comes down to knowing the dog’s play style and needs. The top 10 natural rubber dog toy shapes above are proven winners – they’ve earned their popularity by keeping dogs happy and safe. Whether it’s the timeless appeal of a bouncy rubber ball or the brain-teasing fun of a treat puzzle, each shape offers something special. For consumers, remember to pick a toy that matches your pup’s personality (a fetch maniac might love a frisbee, while an aggressive chewer will appreciate a tire or bone). Always choose high-quality natural rubber for durability and non-toxic safety. For retailers and suppliers, these popular shapes are smart investments – they cater to a wide audience of pet parents and address common desires like durability, enrichment, and safe play.
Ready to make tails wag? Consider adding a few of these top-selling shapes to your shopping list or store inventory. By choosing the best natural rubber dog toy shapes for your customers or pets, you’ll be providing hours of entertainment, healthy exercise, and satisfying chew time – all while prioritizing safety and quality. In the end, it’s a win-win for dogs and the people who love (and serve) them. Here’s to happy, waggy customers and endless play sessions! 🎉🐕🎾
FAQ: Natural Rubber Dog Toy
1) What is a Natural Rubber Dog Toy?
A Natural Rubber Dog Toy is made from natural latex rubber (from rubber trees) and designed for chewing, fetching, and enrichment. Natural rubber is valued for its flexibility, grip, and durability compared with many rigid plastics.
2) Are Natural Rubber Dog Toys safe for aggressive chewers?
They can be a good choice because natural rubber is tough yet slightly flexible, which helps reduce harsh impact on teeth. Always match the toy’s size and toughness to your dog’s chewing strength, and replace it if it shows deep cracks, missing chunks, or tearing.
3) Can dogs with latex allergies use Natural Rubber Dog Toys?
If your dog has a known or suspected latex sensitivity, consult your vet before use. Watch for signs like mouth irritation, itching, or swelling after contact and stop using the toy if symptoms occur.
4) How do I choose the right toy size to avoid choking?
Choose a Natural Rubber Dog Toy that’s too large to fit fully in your dog’s mouth. As a quick rule: the toy should be wider than your dog’s jaw width, and you should supervise play—especially for power chewers or dogs that try to swallow toys.
5) How do I clean a Natural Rubber Dog Toy?
Wash with warm water and mild dish soap, rinse thoroughly, and air-dry. For treat-dispensing toys, use a bottle brush to reach the inside. Avoid harsh chemicals that can leave residues or degrade the material.
6) Why does a Natural Rubber Dog Toy sometimes smell at first?
A light rubber smell can happen with new natural rubber products. It usually fades after airing out and washing. If the odor is very strong or chemical-like, consider switching to a different product and ensure you’re sourcing from reputable manufacturers.
7) Are Natural Rubber Dog Toys eco-friendly?
Natural rubber is plant-based and renewable. However, overall sustainability depends on factors like additives, durability (longer life = less waste), and manufacturing practices. Choosing a long-lasting toy and replacing it only when worn helps reduce waste.
8) Which shapes work best for enrichment and treat stuffing?
Hollow shapes (like cones) and treat-dispensing designs are best for enrichment because they encourage problem-solving and slow down snack time. For dogs who love fetch, balls and rings add movement and bounce; for chewing, bones and tires provide satisfying grip points.
https://www.newtopsilicone.com/wp-content/uploads/2025/12/640-2.jpg370640Enriquehttps://www.newtopsilicone.com/wp-content/uploads/2022/06/newtop-logo-300x138-2.pngEnrique2026-01-19 11:48:032026-01-19 14:21:33Top 10 Natural Rubber Dog Toy Shapes That Sell
Custom silicone slow feeder bowls are innovative pet products designed with raised maze-like patterns to naturally slow down a pet’s eating pace. By forcing pets to nibble around ridges and channels, a well-designed slow feeder bowl can significantly reduce gulping, choking, and bloating during mealtime. For pet brands and wholesalers looking to develop a private-label slow feeder, understanding the manufacturing process is crucial. This article, from the perspective of a custom silicone slow feeder manufacturer, walks through each step – from initial concept design and material selection to molding, quality control, and final production. We will also discuss how design elements (like maze patterns and suction cups) affect feeding behavior and manufacturability, the role of Shore A hardness (usually 40–60A) in product performance, and key OEM/ODM considerations (MOQ, lead times, mold costs, etc.). By the end, you’ll know what it takes to bring a food-grade silicone OEM slow feeder bowl from idea to reality – and what to look for in a manufacturing partner.
Design and Prototyping of the Slow Feeder Bowl
Every successful custom project begins with thoughtful design and prototyping. Engineers use CAD software to create a 3D model of the bowl, defining its diameter, depth, wall thickness, and the intricate interior pattern (maze or ridges). A critical aspect of design is ensuring manufacturability – features must have appropriate draft angles and no extreme undercuts, so the silicone part can be molded and released without tearing. For example, each ridge in the maze should be slightly tapered and all sharp corners rounded, which prevents the silicone from getting stuck in the mold.
Once a CAD design is ready, prototypes are made to validate both the feeding performance and the manufacturability. Rapid prototyping methods like 3D printing (often in plastic) can produce a sample bowl to assess its size and how the maze pattern slows down feeding. Some manufacturers also create a single-cavity prototype mold or cast a sample in silicone to test the design. Prototyping is key – it allows the pet brand to field-test the bowl with actual pets to ensure it truly reduces eating speed, and it helps identify any design issues early. For instance, a prototype might reveal that certain narrow channels are too difficult to fill with kibble or that a pattern is so tight it frustrates the pet. These insights inform design refinements before investing in full production tooling. The design phase may also include adding features like an anti-skid base or a spot for a logo. The goal is to strike the right balance between an effective slow-feed design and one that can be produced reliably at scale. Simulation tools (like mold flow analysis) might even be used on the CAD model to predict how liquid silicone will flow into the maze pattern and to spot potential air traps or weak points before cutting the mold.
Maze Pattern Considerations: The hallmark of a slow feeder bowl is its maze or puzzle pattern on the interior. These raised ridges and channels intentionally make the pet work for their food, dramatically extending mealtime. From a manufacturing perspective, intricate maze patterns require precision engineering:
Impact on Feeding Behavior: The height, spacing, and complexity of the maze directly influence how much the feeder slows the pet’s eating. Tall, closely spaced ridges create more obstacles, significantly reducing gulping and turning meals into an engaging challenge for the animal. When designing a custom pattern, brands often consider the target pet (e.g. a pattern for a large dog might be more open than one for a small dog) so that it’s challenging but not discouraging. The silicone material is gentle on teeth and gums, so even if pets enthusiastically lick or nudge the maze walls, there’s no risk of chipped teeth as there might be with a hard plastic or ceramic bowl.
Maze Geometry and Demolding: Intricate maze designs affect how the mold is made and how easily the part comes out of the mold. Typically, one half of the steel mold forms the bowl’s interior maze (as a cavity) and the other half forms the exterior shape. The mold must be precisely machined so that when closed, the thin maze walls are formed with uniform thickness. Designers will incorporate a slight draft angle (a few degrees of taper) on these tall maze walls. The draft ensures that when the cured silicone is pulled out, the walls release smoothly instead of scraping or tearing. Undercuts are minimized – any backward-hooking features are avoided or kept very shallow. Silicone is flexible enough to handle minor undercuts by stretching, but too much of an undercut could cause the part to tear or deform during demolding. Often, maze patterns are rounded rather than having sharp hooks for this reason.
Filling and Venting: Complex maze patterns create many channels that the silicone must fill during molding. In liquid injection molding, the liquid silicone is injected under pressure, which helps push material into every nook and cranny of the maze. The mold is usually gated at the center of the bowl (or uses multiple gates) so that silicone flows outward evenly into the maze channels. Tiny vent holes are machined at the ends of long channels or at the tops of maze peaks to let air escape as silicone fills in. Without proper venting, air pockets could get trapped at the thin tips of the maze walls, causing incomplete filling (short shots). A well-designed mold ensures the maze pattern comes out fully formed without air bubbles.
Maze Pattern and Suction Effect: One interesting challenge is that maze patterns can act like suction cups during demolding. The spaces between ridges form small pockets of air. When the mold opens, each pocket may momentarily vacuum-lock onto the mold core. In practice, manufacturers counter this by polishing the mold surface (to reduce friction) and sometimes by adding ejector pins or an air eject assist in strategic locations. It’s not uncommon to have ejector pins that pop out in the middle of maze sections or a quick puff of air to break the vacuum and push the part free. The flexibility of silicone actually helps here: the part can deform a bit as it’s being ejected, breaking any suction, and then spring back to shape once out of the mold.
Material Hardness for Maze Walls: The Shore A hardness of the silicone is carefully chosen for maze-style feeders. If the maze walls are very thin and tall, a slightly firmer silicone (toward the upper end of the range, say 55–60A) might be used so the walls don’t flop over too easily. A stiffer silicone helps the bowl keep its shape, ensuring the ridges remain upright to do their job slowing the pet’s eating. However, if the material is too hard, the bowl could become difficult to flex during demolding and might feel less gentle (in extreme cases a very hard silicone could even be unpleasant for a pet to bite or could make the bowl brittle under stress). Most slow feeder bowls use a medium hardness around Shore A 50 ±10 – this provides a stable shape but still plenty of flexibility. For example, a Shore 50A silicone has a rubbery give that is comfortable for pets and allows easy bending to peel out of the mold, while still being firm enough to support the maze structure. The excellent tear strength of quality silicone means even thin maze walls won’t easily rip during normal use.
Overall, maze-pattern slow feeders are usually produced with injection molding for best replication of detail and production efficiency. It is technically possible to compression-mold a complex maze, but aligning a pre-cut silicone blank into all those tiny grooves is impractical and would generate a lot of flash between the walls. Injection’s precision and pressure-driven filling is preferred to perfectly form the maze without excess flash.
Mold Making and Tooling
Once the design is finalized, the next phase is mold making (tooling). The manufacturer creates a precision metal mold that will form the silicone bowl’s shape. Molds for silicone products are typically made of hardened steel (or sometimes aluminum for simpler or short-run molds) and fabricated via CNC machining. All the details of the bowl design – the maze ridges, logos, texture, and overall dimensions – are cut into the mold cavities with exacting accuracy. A high-quality mold is critical: it determines the accuracy, surface finish, and consistency of every slow feeder bowl produced.
Key considerations during tooling include:
Single vs. Multi-Cavity: Depending on the production volume needed, the mold may be built with multiple cavities to produce several bowls per machine cycle. For example, a multi-cavity mold might have 2 or 4 identical cavities if a brand needs tens of thousands of units, whereas a smaller run might use a single-cavity mold. Multi-cavity molds greatly improve output (making multiple bowls in one shot) but are more complex and expensive to manufacture, since each cavity must be machined and balanced to fill evenly.
Precision Machining and Finishing: The maze features and bowl shape must be machined to tight tolerances, often within ±0.1–0.3 mm for linear dimensions, to ensure each bowl comes out uniform. After machining, mold makers polish or texture specific areas of the cavity as needed. For instance, the interior maze surfaces might be highly polished to help the cured silicone release easily, since a glossy surface has less friction. Alternatively, the outer surface of the bowl might be bead-blasted or etched to add a matte texture or grip. If the design calls for a logo, the logo can be CNC-engraved or EDM-sunk into the mold so that it appears raised or recessed on the final product. Every detail must be mirrored correctly in the mold.
In-House Tooling Advantages: A manufacturer with in-house mold making capabilities offers a big advantage for custom projects. They can fabricate and tune the mold on-site, resulting in faster lead times and better quality control. Small adjustments (like adding a vent pin, tweaking a draft angle, or polishing a troublesome area) can be done rapidly without shipping the mold to a third party. In-house CNC machining also protects the confidentiality of a custom design – critical if you’re investing in a unique pattern that you want to keep proprietary.
Mold Costs and Lead Time: Creating a custom slow feeder mold is a one-time investment that typically ranges from a few thousand dollars for a simple, single-cavity mold up to $5,000–$10,000 or more for large or multi-cavity molds. Actual costs depend on complexity: a basic mold (simple shape, one cavity) might be $500–$2,000, an intermediate mold (medium complexity or size) about $2,000–$5,000, and a very advanced mold (intricate design or multiple parts) could reach $5,000–$15,000+. Experienced OEM manufacturers will provide a detailed tooling quote up front. Lead times for mold fabrication are commonly around 2–4 weeks. Some factories can fast-track a prototype or single-cavity mold in about one week for simple designs – for example, using a rapid CNC program to cut a test mold (“micromold”) and mold a few samples to validate design. Standard production molds with multiple cavities and complex features will take longer to machine, assemble, and test. It’s wise to budget a few weeks for tooling and first-shot samples. Once the mold is ready, it can be used to mass-produce thousands of identical bowls with high efficiency.
Before moving to full production, the manufacturer will usually do a test run with the new mold. They inject or press a small batch of bowls and inspect them closely, a step often called T1 sampling. The first-off samples are sent to the client for approval. This is the chance to see the actual product in your hands and verify details like dimensions, pattern effectiveness, logo appearance, color, and overall quality. If any issues are found (for instance, if the fit or finish isn’t perfect), the mold can be tuned or adjusted. Only after the sample is approved does the project advance to the main production run.
Food-Grade Silicone Material Selection (and Shore Hardness)
Choosing the right silicone material is just as important as the design. Slow feeder bowls must use food-grade, platinum-cured silicone that is safe for pets to eat from. Reputable manufacturers source high-quality silicone from established suppliers and provide material certification to confirm it meets regulatory standards like U.S. FDA 21 CFR 177.2600 and the stricter European LFGB standard. These standards test that no harmful chemicals leach out of the silicone even under conditions like hot or acidic food contact. Always ensure your OEM partner is using 100% food-grade silicone, free of BPA, phthalates, PVC, and other toxins. They should be able to supply documentation (FDA/LFGB compliance certificates or third-party lab test reports) for the specific silicone formulation used.
Silicone comes in various durometers (hardness levels), measured on the Shore A scale. As noted earlier, slow feeder bowls typically use a medium hardness around 50 Shore A (with a usual range of about 40A to 60A being suitable). Hitting the right hardness is crucial:
A softer silicone (around 40A) will be very flexible and grip surfaces well (helpful for suction cups or anti-skid bottoms), but if it’s too soft the bowl might feel floppy or the internal ridges might bend excessively under a pet’s tongue or paws.
A harder silicone (60A) will be more rigid and hold its shape firmly, which keeps tall maze walls upright – but overly hard material could make demolding more difficult and might not provide the same gentle, springy feel that pet owners expect from silicone. Extremely hard silicone could also reduce the friction needed for suction cups to seal (since it doesn’t conform as easily to surfaces).
Manufacturers often balance hardness and thickness of the design. For example, if using a softer silicone for better suction on the base, they might slightly thicken the walls of the maze to compensate so they remain sturdy. Or if using a firmer silicone for durability, they ensure the edges and corners are rounded so the product is still safe and comfortable. The chosen Shore hardness also plays into durability and temperature resistance – food-grade silicone in the 40–60A range generally has excellent tear resistance and can handle a wide temperature range (typically from -40°C up to ~200°C) without degrading. This means the slow feeder bowl will remain intact even if a dog aggressively chews or bends it, and it also means the product is dishwasher-safe (it can withstand high heat washing and drying without warping). In fact, one selling point of silicone feeders over plastic ones is that silicone doesn’t crack or become brittle over time, and it doesn’t leach chemicals when heated.
Colorants and Additives: If a custom slow feeder bowl is to be produced in a specific brand color or a fun bright hue, the color is achieved by mixing food-safe pigments into the raw silicone before molding. Only FDA/LFGB-approved colorants are used, to ensure no heavy metals or harmful substances are present. The pigments are blended thoroughly with Part A or Part B of the silicone so that the final cured bowl has a uniform color that won’t rub off or fade. Virtually any Pantone or custom color can be matched by the manufacturer’s material team. Some brands even request dual-color slow feeders (for example, a bowl with a different colored maze vs. base). This can be done either by over-molding two silicones or by a two-shot molding process if the factory has the capability, or more simply by painting/printing a design post-molding (though embedded color is most durable). Aside from pigments, no other fillers should be in the silicone for pet products – reputable suppliers use pure platinum-cured silicone with no recycled content or unknown additives, ensuring the product is odorless, non-toxic, and compliant. Some manufacturers will do an extra post-cure bake of the molded parts (a few hours in a hot oven) to drive off any residual volatiles and ensure the silicone is fully cured and smell-free.
In summary, material transparency is a hallmark of a good silicone OEM. The factory should openly share the material specifications: Shore hardness, certification of food-grade compliance, and whether they do any additional post-curing or testing on the silicone. High-quality silicone (often platinum-catalyzed LSR for injection molding or high-consistency silicone rubber for compression) yields a feeder that is durable (withstands biting and pulling), heat-resistant (safe for dishwashers and sterilization), and resistant to mold or bacteria growth. These are important product benefits you can pass on to pet owners, and they all start with using the right raw material.
Molding Process: Compression vs. Injection Molding
The core manufacturing step is molding the silicone into the bowl shape. There are two main production methods for silicone slow feeders: compression molding and liquid silicone injection molding (LIM/LSR injection). Both processes involve filling the mold with silicone and heat-curing it (vulcanizing) into a solid elastomer, but the techniques differ:
Liquid Silicone Injection Molding (LSR Injection)
In LSR injection molding, a liquid silicone rubber is used. This method is ideal for high-volume production and designs with fine details (like complex maze patterns), because it offers excellent precision and repeatability. The process works as follows:
Metering and Mixing: Two liquid components of platinum-cure silicone (often called Part A and Part B) are stored in drums and fed into a metering unit in a 1:1 ratio. One part contains the platinum catalyst and the other contains a crosslinker and base polymer. The machine precisely pumps and mixes these components, sometimes adding a pigment at this stage for colored products. Once mixed, the silicone remains liquid for a short time before it begins to cure.
Injection and Curing: The mixed liquid silicone is injected under high pressure into the closed mold, which is heated (typically 150–175 °C) to accelerate curing. Thanks to the injection pressure, the silicone quickly flows into all areas of the cavity, capturing fine details like small ridges or logo text. The heat triggers rapid vulcanization – cycle times are often on the order of 30 seconds to 2 minutes for a part like a medium slow feeder bowl. In many cases, an LSR bowl can cure in about 60–90 seconds at temperature. This fast cure means injection machines can output a high number of parts per hour compared to compression. As soon as curing is complete, the machine opens the mold.
Demolding: Advanced LSR molds are designed for semi-automated demolding. Usually the cured bowl will stick to one half of the mold (by design, often the side with ejector pins). Ejector pins then push the part out of the cavity. Silicone is somewhat tacky, so if needed the mold might use air jets or have a very smooth finish to aid release. Sometimes a robotic arm or operator will grab the part if it doesn’t fully pop free. One advantage of injection molding is that it can incorporate a cold runner system, which delivers the silicone to each cavity with minimal waste. Many LSR molds separate the runner automatically (cold runners leave a tiny “gate” vestige on each part that is easy to trim). The result is little to no excess material attached to the bowl – a high-quality injection-molded slow feeder might only have a nearly invisible seam line and a small dot where the material was injected.
Advantages of Injection: LSR injection produces parts with excellent consistency and tight tolerances, due to the precision of machine controls and the closed molding environment. It’s well-suited to intricate designs – the injection pressure and automated mixing ensure even complex maze patterns are completely filled without voids. Injection molding is also highly efficient for large orders: cycle times are short and the process can be fully automated, reducing labor costs per part. In fact, even a single-cavity injection mold can often out-produce a multi-cavity compression setup in the same timeframe, thanks to fast curing and quick cycling. The process is clean (sealed from outside contaminants) and repeatable, which is important for maintaining quality. For these reasons, most high-end, private label slow feeder bowls for pets are made via LSR injection in modern facilities.
Typical Tolerances: With injection molding, dimensional tolerances on silicone parts are generally tighter than with compression. For example, for a bowl-sized part (100 mm+ diameter), you might expect on the order of ±0.3 mm variation or better in critical dimensions. Well-optimized processes can do even better on smaller features. The consistent pressure and dosing of material mean each part is very similar in weight and shape.
One consideration with injection molding is the upfront cost – the steel molds are more complex (often including cooling lines, multiple cavities, and injection runner systems) and thus higher cost, as discussed earlier. However, if your production volume is significant, the per-unit cost is lower and the quality is top-notch. Many OEM silicone manufacturers will recommend LSR injection for custom slow feeders, especially if the design has fine details or if you plan to scale to high volumes.
Compression Molding
Compression molding is a more traditional process using solid silicone rubber (often called HCR – high consistency rubber – which has a clay-like consistency). It can be a cost-effective choice for simpler designs, lower volumes, or very large parts:
Charging the Mold: The process is akin to making a waffle. A measured preform of uncured silicone is prepared – for instance, a chunk of raw silicone is weighed out and sometimes pre-shaped (like a disk or slab) close to the bowl’s size. This piece is placed into the open mold cavity by an operator. Properly measuring the silicone is important: too much material will lead to a lot of excess flash; too little will leave unfilled areas.
Pressing and Curing: The mold is then closed in a heated hydraulic press. The closing action squishes the silicone, forcing it to flow and fill the cavity (including the maze pattern). The mold is held closed under high pressure at curing temperature (again around 150–170 °C) for a longer time than injection – typically 5 to 10+ minutes depending on part thickness. During this dwell, the silicone vulcanizes into the shape of the bowl. Because there’s no injection nozzle, the mold often has small bleeder grooves or vents at the parting line to allow air and excess rubber to escape, preventing voids.
Opening and Demolding: After curing, the press opens and the operator manually removes the part by peeling it out of the mold. The new bowl will have a thin sheet or ring of flash – excess silicone that squeezed out between the mold halves – around its edges and possibly around any inserts or cores. Flash is expected in compression molding; the amount depends on mold fit and how precisely the material was dosed. The operator usually strips away the larger bits of flash by hand as they remove the part.
Advantages of Compression: Compression molding uses simpler, more affordable tooling since no injection system or runner channels are needed. A single-cavity compression mold can cost significantly less than an equivalent injection mold. This makes it attractive for low to medium volumes or startups who want to minimize initial costs. It’s also suitable for very large or basic parts that don’t have intricate detail – for example, a plain round slow feed mat or a simple ridged dish could be compression molded effectively, especially if only a few hundred or a couple thousand units are needed. Compression molding can be a good way to do a pilot run or market test for a new slow feeder design before investing in injection tooling. Additionally, compression presses generally exert less total force on the mold (since they’re not injecting at high pressure), which can allow molding of larger parts or multiple cavity molds with lower tonnage machines. However, compression is slower (curing each part takes minutes rather than seconds) and labor-intensive (each cavity must be manually loaded with material and the part manually demolded). This means the per-unit cost is higher when scaling up. Also, compression tends to have more variability in part weight and dimensions because it relies on manual material prep; each part might have slight differences based on how the operator placed the silicone, and flash trimming is required for every piece.
Typical Use Cases: If a slow feeder bowl design is relatively straightforward and the order volume is modest, a manufacturer might suggest compression molding to save cost. For example, an ODM slow feeder with a basic spiral or concentric ring pattern could be compression molded, especially if the brand wants a lower MOQ. That said, for complex maze designs, as noted, injection is generally preferred to ensure all details fill properly and to reduce the extensive flash that would result from pressing silicone into so many crevices.
Tolerances and Finish: Compression-molded parts often have slightly looser tolerances and require more post-mold finishing. Expect a more noticeable parting line and flash that needs trimming. Typical dimensional tolerances might be ±0.3–0.5 mm or more on a compression-molded bowl, versus ±0.2–0.3 mm on an injected one (exact numbers vary, but injection is inherently more precise). However, a well-made compression mold can still yield good quality – experienced manufacturers will design the mold with very tight parting surfaces and use techniques like preheating the silicone or vacuum degassing to improve consistency. The choice between injection and compression ultimately comes down to design complexity, volume, and budget. Many silicone OEMs have both capabilities and will choose the method that best fits the project’s needs.
Demolding, Trimming and Finishing
After molding (whether by injection or compression), the cured silicone bowl must be removed from the mold and finished. Demolding and trimming are crucial steps to ensure the final product is clean, safe, and cosmetically perfect:
Injection Mold Demolding: As described, injection molding often uses ejector pins to push the part out when the mold opens. Because silicone can stick, some molds include air poppet valves that puff air between the part and mold surface, or use extremely smooth finishes to minimize adhesion. High-end LSR molds can eject parts with very little manual intervention. Any leftover runner or gate vestige (the tiny nipple of material where the silicone entered the part) is cut off at this stage, though in many cases the mold design eliminates runners automatically. A well-optimized injection process produces minimal flash – often just a hairline seam around the parting line that’s barely visible. The operator might do a quick trim with a scalpel or send the parts for cryogenic deflashing, where they are tumbled in a freezing chamber so that any micro-flash freezes and breaks off. For most slow feeder bowls, manual trimming of a tiny seam and gate is all that is needed.
Compression Mold Demolding: In compression molding, once the press opens, an operator peels the part out. Silicone’s flexibility allows the bowl to be pulled off any cores (like pulling off a sock). As mentioned, compression parts will have more flash. The operator typically removes the large ring or sheet of flash by tearing it off along the edge. They then pass the part to trimming.
Trimming and Inspection: Trimming is the process of removing all excess silicone (flash, sprues, runner bits) and smoothing the edges. For injection-molded bowls, trimming might involve using a small knife or cutter to slice off the negligible flash line or gate nub. Often this is very quick. For compression-molded bowls, trimming is more laborious because there can be a larger flap of flash around the rim or even covering the entire parting area. Skilled workers use scissors, knives, or special trimming dies to cut away this flash without nicking the actual part. In some cases, a custom trimming tool is made – for instance, a circular punch that the bowl is placed into to cut the perimeter in one go, ensuring a clean round edge. Interior holes or suction cup areas also need to be carefully checked and trimmed. The team must be meticulous because even a tiny leftover flash edge can interfere with the product’s function (for example, a bit of flash on a suction cup lip can prevent it from sealing). After trimming, the bowl’s edges should be smooth to the touch and the shape exactly as intended.
Surface Finish and Cleaning: Silicone is forgiving in that cut edges can be very smooth (no fraying or sharpness once flash is removed). Manufacturers often give each bowl a final once-over such as a quick buffing, rinse, or wipe-down to remove any particles or dust from trimming. Because these products will be used for feeding, cleanliness is important. Some factories wash the bowls in clean water or a mild food-safe soap and then dry them completely before packaging. Any particulate or leftover trimming bits must be eliminated.
At this point, the slow feeder bowl is molded and physically complete – it looks like a finished product. All ridges are in place, edges are trimmed, and the bowl is functional for its intended use. The next steps focus on ensuring quality control and any custom finishing (like branding or packaging).
Quality Control and Testing
Quality control (QC) is vital in silicone pet product manufacturing. A reputable private label slow feeder bowl manufacturer will have multiple checkpoints for quality to ensure every batch meets safety standards and design specs.
Key QC activities include:
Visual & Tactile Inspection: Trained inspectors examine the bowls for any visible defects. They check the shape (no warping or deformation), verify that all molded features are present and correct (e.g., every maze ridge is fully formed, with none missing or short due to air bubbles). They also feel the surfaces, making sure there are no rough spots or residual flash that could harm a pet or feel sharp. The bowl’s interior and exterior should be smooth except for the intended texture. Any tacky or uncured spots in the silicone would be flagged (this is rare if molding was done properly, but tackiness could indicate under-curing).
Dimensional and Functional Checks: Critical dimensions may be measured with calipers or gauges – for example, overall diameter and height (to ensure the bowl will fit in any accessories or packaging), thickness of certain sections, etc. Because silicone is flexible, dimensional checks have some tolerance, but the goal is to catch any major deviations (perhaps due to mold wear or process drift). The hardness (durometer) of the silicone might be tested on a few samples to ensure the correct material was used and cured properly. A good QC practice is also to do a functional test: factory staff can sprinkle some dog kibble into a finished slow feeder and tilt or jostle it to see that the food lodges among the maze as intended. This simulates the user experience and confirms the design performs – kibble shouldn’t all immediately slide out of the bowl, for instance. If the product includes a suction base, QC will test that it actually sticks to a flat surface for a reasonable time.
Compliance Verification: Since these products contact food, manufacturers maintain strict compliance records. The QC team will ensure the materials used in that batch match the certified food-grade lot (traceability is often kept by recording material lot numbers). Many factories also do an additional post-curing oven bake for food-contact silicone products and then verify there’s no residual odor or bloom on the parts. Some will send random samples for third-party lab testing (for example, an extraction test to reconfirm FDA compliance or to ensure no lead in pigments, etc., especially if required by the client’s country regulations). An experienced silicone OEM can provide certificates of conformity or lab test results upon request to support your product safety claims. They will be familiar with international standards and can help navigate any testing needed for import/export.
Consistency and Lot Sampling: In mass production, typically not every single bowl is measured in detail (that would be very time-consuming), but the factory will sample a certain percentage from each batch or each cavity for large molds. For instance, they might fully inspect 5% of units and do a quicker check on the rest. Any detected defect can trigger a 100% check. Common issues they watch for are: air bubbles trapped in silicone (should be none visible), improper curing (very unlikely in a well-controlled process), contamination (no debris embedded in the silicone), or cosmetic flaws like big flow lines or discoloration (again rare if pigments are mixed correctly).
A manufacturer with ISO 9001 or similar quality certification will have documented procedures for these inspections. The bottom line is that quality control is woven throughout the process – from incoming material checks, to in-process inspection, to final QC before packaging – to ensure the slow feeder bowls are safe, compliant, and meet the brand’s specifications. This rigorous QC ultimately reduces customer complaints and returns, protecting the brand’s reputation and the manufacturer’s as well.
OEM/ODM Production Considerations (MOQ, Lead Times, Costs)
When partnering with a silicone manufacturer to create a custom or private label slow feeder bowl, there are important business logistics and project management aspects to consider. Below are key OEM/ODM details:
Minimum Order Quantity (MOQ): Silicone manufacturers typically set an MOQ for custom projects to make the production economically viable. For slow feeder bowls, MOQs can vary depending on the factory and the complexity of the item. Some specialized silicone pet product factories advertise low MOQs like 200 pcs for custom orders, especially if they are confident in selling that design or if they want to support small brands. More commonly, MOQs might be in the range of 500–1000 units for a first order of a custom bowl. The MOQ covers the cost of setting up the production (and often the custom packaging). Keep in mind that producing fewer units than the MOQ is usually possible but at a higher unit cost. If a manufacturer is willing to do a small initial run (hundreds of units), it’s a sign of flexibility – they may be hoping to grow with your brand long-term. Be sure to clarify MOQ expectations early.
Lead Time and Production Schedule: Custom manufacturing involves several stages each with its own timeline. Here’s a general scenario for a new silicone slow feeder project:
Design Finalization & Quotation: This can take a few days to a couple of weeks as you and the factory exchange ideas, 3D models, and finalize requirements.
Mold Fabrication: Typically 2–4 weeks as discussed. Some manufacturers can expedite a prototype mold in ~1 week, but standard lead time for a durable production mold is a few weeks.
Sampling (T1 sample): Once the mold is ready, initial samples are molded. You should expect samples about 1 week after mold completion (to allow time for molding and QC). Shipping the sample to you might add another few days if by express courier. Some factories quote 7–10 days for sampling after tooling.
Sample Approval: You should promptly test and review the samples. If changes are needed, mold adjustments could take a few extra days. Minor tweaks (like polishing a surface or venting a bit more) are usually quick. In case of a major design change, a new mold insert might be needed, which adds time.
Mass Production: Once the sample is approved, the factory will schedule the production run. Actual production of bulk quantities might take 2–3 weeks for a few thousand units, for instance. One manufacturer gives a guideline of 15–25 days for bulk production depending on order size. Production includes molding all units, performing trimming and QC on each, and preparing them for packaging.
Packaging & Consolidation: If you have custom packaging (boxes, labels, etc.), add time for those to be printed (often concurrently while molding happens). Final packing of products into their packaging and then into export cartons might add a few days.
Shipping: This is outside manufacturing but important for your timeline. Sea freight can take 3–6 weeks to the US or Europe; air freight takes days but is costlier. Factor this in to your go-to-market schedule.
In total, a realistic timeline from project kickoff (after design lock and payment) to having goods ready to ship could be around 6–8 weeks (e.g., 3–4 weeks tooling + sampling, 2–3 weeks mass production, plus any buffer) for a straightforward project. Some manufacturers pride themselves on faster turnarounds – for example, “prototype new molds in about one week and move to production in roughly two weeks for straightforward designs” – but this is an optimized scenario. Always discuss lead times with your supplier and build in some cushion for unexpected delays.
Mold Fee and Payment: Most OEM manufacturers charge a one-time mold fee upfront. As outlined earlier, this can range widely (a few hundred to several thousand dollars). Some factories may agree to amortize the mold cost into the unit price for very large orders or waive the mold fee if you commit to certain volume. But typically, the mold is paid 100% (or 50% deposit, 50% on approval) before or during the sampling stage. This mold remains your property (in many cases) or at least dedicated to your production – ensure your contract clarifies that it won’t be used for other clients without permission. In many cases, if you reorder regularly, the mold can last for hundreds of thousands of cycles, effectively making the mold cost negligible per unit over time.
Per Unit Pricing: The unit cost for the slow feeder bowls will depend on order quantity, silicone weight, coloring, complexity, and any extras like packaging. Silicone material itself is not cheap (high-grade LSR might be $5–10 per kg or more), and a large bowl uses a significant amount of material, so expect a few dollars per unit just in silicone cost. Labor for trimming/packaging and any scrap factor also adds. Generally, larger orders get better pricing. It’s wise to get a price breakdown for different quantity tiers (e.g. 1k, 5k, 10k units). Don’t forget to account for packaging costs if you have custom boxes or inserts – those can add $0.20–$1.00 per unit depending on complexity.
Sample Policy: Most manufacturers will provide a couple of initial samples from the mold for free or at cost (sometimes charging only shipping). It’s important to thoroughly test these samples – check the fitting of lids (if any), try it with pet food, run it through a dishwasher, etc. If any issue arises in samples, communicate them clearly. Manufacturers are generally willing to adjust the mold or process to fix legitimate problems. After approval, if you require an official pre-production sample (from the first batch, with final packaging) that can usually be arranged too. Some brands also request a material swatch or color plaque ahead of production to approve the exact silicone color, since colors can appear differently in person than in digital renderings.
OEM Branding and Customization: In addition to the product itself, you’ll coordinate with the factory on branding elements: logo application (molded vs printed), labels, and packaging artwork. Good OEM partners often help with these details. For example, a cost-effective way to brand is to have your logo engraved in the mold so it appears raised or debossed on the bowl – this incurs no per-unit cost and looks professional. If you want a full-color logo, factories can do pad printing or apply a heat-transfer decal and ensure the ink is food-safe and durable. Discuss these during the design phase, as adding a molded logo must be done before the mold is finalized. For packaging, you might send them your artwork for boxes or ask their design team to help create a package that fits your brand style. Many silicone product manufacturers offer one-stop services, handling everything from product to packaging, which simplifies the supply chain for you.
Regulatory Testing and Certifications: If your market or distributors require specific certifications (for example, EU LFGB food-contact test, or US FDA documentation, or even reach/RoHS chemical compliance), let the manufacturer know upfront. Reputable factories are very familiar with these and often have in-house labs or partnerships to get products tested. They might have done basic FDA/LFGB testing on the material already (which covers the product in many cases). For a custom item, you can sometimes use a previous material certificate plus a written declaration. However, for full peace of mind, you may decide to commission a third-party lab test on the final product. A good manufacturer will assist with testing – they can send sample pieces to an accredited lab and provide you the reports, usually at your cost (few hundred dollars per test). This is well worth it to ensure your product meets all safety regulations. Top manufacturers will also be transparent about their quality control processes and certifications (look for ISO 9001, BSCI, etc., which indicate strong process and social compliance).
In summary, clear communication with your OEM partner is key to navigating MOQs, costs, and timelines. A professional silicone factory will guide you through these steps, from initial quote to final delivery, and make the process as smooth as possible. Many advertise features like low MOQs, in-house mold making, fast sampling, and certified materials – all signs that they cater to custom projects. Don’t hesitate to ask questions and have everything defined in the manufacturing agreement, including ownership of the mold, lead time guarantees, payment terms, and quality expectations. Developing a food-grade silicone OEM product is a collaboration – the factory’s expertise plus your market knowledge should result in a successful product launch.
What Sets a Good Silicone Manufacturer Apart?
Choosing the right manufacturing partner can make or break your custom slow feeder project. Beyond basic capabilities, great silicone manufacturers distinguish themselves in several ways:
Expertise in Material and Compliance: The best manufacturers prioritize using premium, transparent materials. They will gladly share the composition and source of the silicone they use, along with food-grade compliance certificates. If a supplier is hesitant or vague about material quality, that’s a red flag. Top-tier factories use platinum-cured silicones and can customize the formulation (hardness, color) as needed while still meeting FDA/LFGB standards. They stay up-to-date on global regulations (like EU REACH, CA Prop65, etc.) and proactively ensure products have no prohibited substances. This material expertise saves you from surprises down the line – such as a shipment held up in customs for missing test documents.
In-House Mold Tooling and R&D: As mentioned, in-house tooling capability is a major advantage. Manufacturers with their own CNC machines and mold engineers can iterate designs faster and control quality tightly. They might offer quick-turnaround prototype molds, which helps in refining the product design quickly. In-house mold making also tends to reduce costs and lead times for you. These manufacturers usually have an R&D team that can provide design for manufacturability feedback early – suggesting, for example, slight changes to a maze pattern to optimize flow or adding a feature like a suction base per their experience. A collaborative partner will treat your project as their own, investing engineering time to get it right rather than just “taking orders.” Look for factories that emphasize their engineering strength and have case studies of custom projects.
Quality Control and Certifications: A good manufacturer implements stringent QC processes as we detailed. Things to look for: ISO 9001 certification (ensures they have a formal quality management system), any factory audit reports or social compliance certifications (e.g., BSCI) if that’s relevant to you, and a track record of producing for reputable brands (which implies they passed those brands’ quality requirements). Ask if they do 100% inspection or how they handle defects. Leading suppliers might even invite you to see their QC process or provide a detailed QA report with your order. They stand behind their product quality, often promising to replace any subpar units. This commitment to quality reduces risk for your brand.
Ability to Assist with Testing and Compliance: Beyond making the product, a manufacturer that helps with testing, certification, and documentation is invaluable. They should be able to provide you with all the paperwork you need for customs and retailers – this might include food-contact safety declarations, material Safety Data Sheets, quality certificates, etc. The better ones often have a library of past test reports (for similar products or materials) and can quickly arrange any new testing you request. They understand pet industry standards and even specific retailer compliance (for example, if a large pet retail chain has its own testing protocol, a seasoned OEM supplier may have encountered it before). Essentially, they act not just as a production site but as a compliance consultant to ensure your slow feeder bowl meets all necessary standards in your target market.
Communication and Project Management: In B2B relationships, especially across continents, communication is key. The best manufacturers assign a dedicated project manager or account manager to your project. This person keeps you updated at each milestone – design, tooling, sample, production, etc. Look for suppliers who are responsive (reply within 24 hours typically) and who can understand your requirements (technical and aesthetic) clearly. Since you may be iterating on design, having someone who can provide photos, videos, or even live video calls from the factory floor is a huge plus for peace of mind. Top manufacturers are proud to show their process and keep you in the loop. This kind of transparency builds trust; you essentially have eyes on the ground watching over your project.
Value-Added Services: Finally, consider what other services a manufacturer offers. Many good silicone OEMs offer custom packaging, labeling, assembly, and logistics support. For example, if your slow feeder is part of a set (say, with a silicone lick mat or a stainless steel bowl), can they source or produce the other items and kit them together? Some have partnerships for mixed material products (like combining silicone with plastic or metal components). Others can warehouse or drop-ship if needed. While not every project requires these extras, having a versatile manufacturing partner can simplify scaling your business – you won’t need to coordinate multiple vendors if one factory can handle the majority of the work under one roof.
In essence, what sets a good manufacturer apart is their commitment to your product’s success. They will be proactive in improving the design, meticulous in production, honest and thorough in quality control, and supportive in achieving certifications. As the client, you should feel that the factory is an extension of your own team, not a black-box supplier. When you have that level of partnership, you can confidently develop innovative products like custom slow feeder bowls knowing that quality and compliance are in expert hands.
Conclusion
Developing a custom silicone slow feeder bowl – from initial concept to a market-ready product – is a complex but rewarding journey. We’ve explored how careful design (and maze geometry) can influence a pet’s eating habits and how those design choices translate into manufacturing considerations for mold making and demolding. We discussed why food-grade silicone (usually medium Shore A hardness) is the material of choice for its safety, durability, and dishwasher-proof resilience. And we compared compression vs. injection molding for production, noting why many brands opt for the precision of LSR injection for intricate private label slow feeder bowls.
For pet brands and wholesalers, partnering with an experienced custom silicone slow feeder manufacturer is crucial to navigate these technical details. The right OEM will help with everything: optimizing your design for manufacturability, prototyping samples, building high-quality molds, and ensuring each batch of bowls meets stringent quality and safety standards. They’ll also guide you through business aspects like MOQs, lead times, and certification so you can launch your product smoothly and confidently.
At the end of the day, a silicone slow feeder bowl is more than just a pet accessory – it’s a health and wellness product that reflects on your brand’s quality. By choosing a manufacturing partner that excels in material transparency, in-house tooling, and rigorous quality control, you set your product up for success in the market. Such a partner will not only deliver a great product but also act as a collaborator in innovation, perhaps suggesting new features (like better suction footing or collapsible designs) to keep your line cutting-edge.
OEM / ODM Silicone Manufacturing
Ready to Develop a Private Label Slow Feeder?
We support pet brands and wholesalers with custom silicone slow feeders and other silicone pet products. From design and prototyping to certified mass production, we make the process simple and reliable.
What you get
Pattern + structure optimization for better feeding performance
Shore hardness, color matching, and food-grade silicone options
Fast prototyping and sample approval support
Consistent QC + compliance documentation for your market
If you’ve ever had itching, burning, or weird irritation after using a sex toy, you’re not alone — and it’s not “all in your head.”
Many mass-market toys are made from materials that can contain phthalates, dyes, fragrances, and other additives that irritate sensitive skin. The result: discomfort instead of pleasure.
That’s exactly why more people (and professionals) are switching to high-quality silicone. In this article, we’ll explain:
Why some toy materials cause reactions
What makes silicone different
How to spot truly body-safe silicone toys
When to talk to a doctor
Why Some Sex Toy Materials Cause Irritation
Not all toy materials are created equal. Some common culprits include:
“Jelly” or “rubber” toys – often porous and may contain softeners and additives
PVC and some plastics – can include plasticizers and dyes that irritate skin
Low-quality blends labeled as “silicone” – sometimes mixed with unknown fillers
These materials can be:
Porous – tiny holes allow fluids, bacteria, and residue to soak in
Chemically unstable – may break down over time, releasing compounds
Lightly scented or colored – added fragrances and certain dyes can be irritating
If you’re prone to skin reactions, have a history of contact dermatitis, or are simply sensitive, these materials can easily trigger:
Redness or rash
Itching or burning
Unusual discharge or irritation after use
What Makes High-Quality Silicone Different?
High-quality liquid silicone
High-quality, platinum-cured silicone used for body-safe toys is:
Non-porous – it does not absorb fluids, making it easier to clean thoroughly
Chemically stable – it doesn’t rely on phthalates or softening chemicals to stay flexible
Latex-free – it’s an alternative for people with latex allergies
Widely used in medical and healthcare products like tubing, implants, and baby products
This doesn’t mean no one on earth can ever react to silicone (people can be sensitive to almost anything), but true, pure silicone has a very low rate of reactions compared to many other materials used in adult products.
How to Tell If a Toy Is Really Silicone
Unfortunately, not every toy labeled “silicone” is actually made from high-quality, pure silicone. Here are some signs to look for:
Brand transparency
Do they clearly describe the material as “100% silicone” or “platinum-cured silicone”?
Do they provide safety information, care instructions, and testing standards?
Smell and feel
A strong chemical or “plastic” smell is a red flag.
Sticky or oily surfaces can indicate cheap materials or coatings.
Price and packaging
Extremely low prices can mean cut corners on material quality.
Professional packaging with clear material information is usually a good sign.
Why Non-Porous Surfaces Matter for Sensitive Users
If you’re allergy-prone or sensitive, cleanliness is huge. Porous toys can trap:
Bacteria
Yeast
Lube and body fluids
Soap and cleaning product residues
Over time, that lingering buildup can trigger discomfort or recurring irritation, even if you clean the toy as best as you can.
High-quality silicone is:
Non-porous – so you can fully clean the surface
Often able to withstand higher-temperature cleaning methods (check the manufacturer’s instructions)
Compatible with simple, unscented cleansers and proper toy cleaners
That means fewer surprises for your skin.
Tips for Sensitive or Allergy-Prone Users
If you’ve reacted to toys in the past, try this approach:
Switch to known, body-safe silicone
Look for 100% silicone with clear, professional information.
Avoid toys labeled only as “jelly,” “rubber,” or “novelty use only.”
Patch test on your skin
Clean the toy first.
Press it gently against the inside of your forearm for a few minutes.
Wait a few hours and see if there’s any reaction.
Use a simple, gentle lube
For silicone toys, many people use high-quality water-based lubes.
Avoid flavored or heavily scented products if you’re sensitive.
Clean thoroughly and consistently
Wash before and after each use according to the instructions.
Let the toy dry completely before storing.
Store in a clean, dry bag or container away from other materials that could react with it.
When to Talk to a Medical Professional
If you experience:
Persistent burning, pain, or swelling
Unusual discharge or odor
A rash that doesn’t go away
you should stop using all toys and speak with a healthcare professional. Bring information about the materials you used — they may help identify the specific trigger.
The Bottom Line: Why We Rely on Silicone
As a silicone-focused manufacturer, we choose this material because it’s:
Safer and more predictable for most users
Durable and long-lasting, reducing waste
Versatile, allowing many shapes, sizes, and firmness levels
Suitable for customization, so users with extra sensitivities can request surface finishes or designs that are even gentler on their bodies
If you’ve been burned (literally or figuratively) by cheap toys in the past, high-quality silicone is one of the best ways to give your body a fresh start.
https://www.newtopsilicone.com/wp-content/uploads/2025/12/sex-toys.png320986Enriquehttps://www.newtopsilicone.com/wp-content/uploads/2022/06/newtop-logo-300x138-2.pngEnrique2025-12-10 14:59:332025-12-10 15:10:49Allergic to Some Sex Toy Materials? Why High-Quality Silicone Is a Safer Choice
Picking your first dildo can feel… a little overwhelming. So many shapes, sizes, and materials — and then you see words like “shore hardness” and “dual-density” and think, okay, I just wanted something that feels good.
The good news: once you understand size and firmness, choosing the right silicone dildo gets much easier.
In this guide, we’ll walk through everything you need to know before you buy (or design!) your first one.
Why Silicone Is a Smart Choice for Beginners
Before we talk size and firmness, a quick note on material.
High-quality silicone is:
Non-porous – it doesn’t soak up fluids, so it’s easier to clean and more hygienic
Body-safe – it’s free of phthalates and other common irritants found in some cheap toys
Durable – it holds its shape and texture for years with proper care
Versatile – it can be made soft, firm, matte, glossy, smooth, or textured
That means you can focus on getting the right feel instead of worrying about safety.
Step 1: Choosing the Right Size
When we talk about dildo size, we’re usually talking about:
Length (often “insertable length”)
Girth (circumference around the widest part)
Both matter — but girth usually makes the biggest difference in how a toy feels.
A. Length: How Long Is “Too Long”?
For a first dildo, you don’t need to chase impressive numbers. Your body is unique, but a good beginner range is usually:
Insertable length: about 12–16 cm (4.75–6.5 inches)
Longer toys aren’t “wrong,” but they:
Take more practice and control
Can feel uncomfortable if you push past your natural limits
Are simply not necessary for good sensations, especially at the beginning
If you’re unsure, start in the middle of that range. You can always size up later.
B. Girth: The Most Important Measurement
If you only pay attention to one number, make it circumference (girth).
Most people will feel a big difference between, for example, 3.5 cm and 4 cm diameter, even if the length is the same.
For beginners, a comfortable girth range is often:
Slim/Beginner: 9–10.5 cm (3.5–4.1 inches) circumference
Average: 11–12.5 cm (4.3–4.9 inches) circumference
If you’re used to inserting nothing or only small items (like slim fingers or small plugs), start on the slimmer end. If you’re already comfortable with moderate insertion, average might be perfect.
Tip: Roll a measuring tape into a loop and test different circumferences around your fingers to visualize how it might feel.
Step 2: Understanding Firmness
Silicone firmness is often measured on a Shore scale (typically Shore A for toys). You don’t need to memorize the exact numbers, but it helps to understand the basic categories:
Soft / Plush: squishy, bends easily
Medium: flexible but with some “push back”
Firm: holds shape strongly, less bend
Some toys are also dual-density – a soft outer layer with a firmer core to mimic body tissue.
Great for beginners, sensitive bodies, and deeper thrusting
Less intense pressure on sensitive areas
Medium silicone
A balance between squish and structure
Good for thrusting and pressure without feeling too hard
Very popular as an “all-rounder” firmness
Firm silicone
Excellent for targeted pressure (e.g., G-spot, A-spot, prostate)
Easier to control and position
Can feel intense or too hard for some beginners
For a first dildo, most people do best with soft to medium firmness — especially if you’re still learning what your body likes.
Step 3: Matching Size + Firmness to Your Body & Preferences
Now let’s put it together. Ask yourself:
How experienced am I with insertion?
Totally new → slim girth, medium or softer
Some experience → average girth, medium
Very experienced and likes fullness → you might enjoy a thicker toy, but consider starting with a medium firmness first.
Do I want gentle comfort or strong pressure?
Gentle, relaxing, or longer sessions → softer, slightly slimmer toy
Strong, focused pressure on specific spots → medium to firm toy, not too long
Am I mainly interested in thrusting or more static pressure?
Thrusting → a bit of flexibility is good; choose soft to medium
Static pressure or grinding → medium to firm can work better
Step 4: Other Design Details That Matter
Size and firmness are key, but a few extra design features will also shape your experience:
Shape: Straight for versatility, curves for G-spot/prostate focus
Base: A wider base adds safety for anal play and can be harness-compatible
Surface: Smooth silicone is beginner-friendly; ridges and textures are better once you know what you like
Weight: Heavier toys can feel more “present”; lighter toys are easier to maneuver
If you’re working with a manufacturer (like us) who offers customization, you can fine-tune all of these to suit your body and preferences.
Step 5: Start Smaller, Upgrade Later
Your first silicone dildo doesn’t have to be your forever dildo. Think of it as a starting point:
Begin with a comfortable, confidence-boosting size and medium or soft firmness
Learn what your body likes – more girth, less length, more curve, more firmness, etc.
Use that experience to choose or design your next toy (maybe a custom one!)
Your comfort matters more than the numbers on a product page. If you choose something that feels good for you, you picked the right size.
https://www.newtopsilicone.com/wp-content/uploads/2025/12/Dildo_Size.webp5191024Enriquehttps://www.newtopsilicone.com/wp-content/uploads/2022/06/newtop-logo-300x138-2.pngEnrique2025-12-10 11:15:002025-12-10 14:26:25How to Choose the Right Size and Firmness for Your First Silicone Dildo
Pet toy designers often face a critical material decision: how soft or hard should the toy be? As a silicone manufacturing factory, we know that getting the Shore hardness right is key to a toy’s success. The hardness of a silicone or natural rubber toy affects its durability, flexibility, and, most importantly, pet safety. In this post, we’ll demystify Shore hardness (including the Shore A and Shore 00 scales) and explore how different hardness levels suit various pet types – from gentle puppies and cats to power-chewing dogs. We’ll also share insights on selecting the optimal material hardness for different pet toy styles (chew toys, fetch toys, treat-dispensers) and discuss how manufacturers test and ensure quality. By the end, you’ll see why collaborating with your material supplier on hardness selection can make all the difference in creating safe, enjoyable pet toys.
What Is Shore Hardness?
Shore hardness measures a material’s resistance to indentation – essentially how “hard” or “soft” it is. The measurement is done with a spring-loaded device called a durometer, which presses a standardized needle into the material’s surface. The depth of indentation is converted to a hardness value on a scale of 0 to 100, where higher numbers mean a harder material. A reading of 0 would indicate an extremely soft gel, while 100 would be as hard as a solid plastic or glass. In practice, most rubbery materials fall somewhere in between.
Shore Hardness Scales (A and 00): There are several Shore scales for different material types. The two most relevant for pet toys are Shore A and Shore 00. Shore A is the standard scale for flexible rubbers, silicone elastomers, and soft plastics. It covers materials from very soft and stretchy (low Shore A) to semi-rigid (high Shore A). Shore 00 is a separate scale used for extra-soft materials like gels, foams, or sponges that are too soft to measure accurately on Shore A. For example, a memory foam or silicone gel might be measured in Shore 00 units. Both scales run 0–100, but Shore 00 uses a different indenter shape and pressure suitable for ultra-plush materials. (There’s also Shore D for hard plastics, which isn’t typically applicable to pet chew toys.) In short, most solid silicone and natural rubber pet toys are rated on the Shore A scale, while something exceedingly soft (imagine a squishy gel pet mat) would use Shore 00.
Image Source:smooth-on Shore hardness comparison chart: The Shore 00 scale covers very soft, gel-like materials (like gummy candies or gel insoles), while Shore A covers soft rubbers up to semi-rigid plastics.
To put these numbers in perspective, common objects can help: a standard rubber band is around Shore A 20; a pencil eraser is roughly Shore A 40–50; typical car tire tread is about Shore A 70. That means a material at Shore A 20 is very soft and easily indented (much like a gummy candy or silicone gel insole), whereas Shore A 70 feels quite stiff (you can barely dent a car tire by pressing). Shore 00 materials are even softer – for instance, a marshmallow might be ~10 Shore 00 and a gel shoe insole ~30 Shore 00. Pet toys usually don’t go into the Shore 00 range unless they are extremely soft foam toys (which are generally not durable for chewing). In practice, pet toy materials (silicone, natural rubber, TPE) tend to span from about 15 Shore A up to 80+ Shore A in hardness, depending on the application.
How Hardness Affects Durability, Flexibility, and Safety
Hardness vs. Softness – what’s the trade-off? The hardness of a toy material directly influences its feel and performance. Softer rubbers (lower Shore values) are more elastic and compressible – they offer a gentle “mouth feel” and flexibility. This can be great for a teething puppy or a toy that needs to bend easily. However, very soft materials can also tear or abrade more easily under sharp teeth. On the other hand, harder rubbers (higher Shore values) are tough to dent or puncture – they tend to last longer against aggressive chewing and hold their shape under force. The downside is that an overly hard toy might be too rigid, less fun to chew, or even pose a risk of tooth damage if the dog bites down too hard. As one guide explains, softer silicones are gentle and flexible, whereas harder silicones provide strength for tough use – finding the balance is key.
Durability: In general, increasing hardness improves a material’s resistance to puncture and wear, up to a point. A firm silicone or rubber (say Shore A 70) will withstand powerful jaw pressure better than a Shore A 30 silicone, which a big dog could likely shred quickly. Manufacturers often formulate “tough chew” toys in the Shore A 60–80 range so they won’t rip apart under aggressive chewing. Some “indestructible” toy designs even use materials as hard as 70–90 Shore A – comparable to a skateboard wheel in stiffness – to survive the most persistent chewers. However, harder isn’t always better: if a toy is extremely hard, the pet might lose interest or risk tooth injury. That’s why one industry guideline for rubber chew balls is to avoid going too hard – “look for toys with a hardness of 60–70 Shore A” to prevent harming the dog’s teeth. In other words, the goal is maximum durability without becoming dangerously hard.
Flexibility and Bounce: Softer materials flex and stretch more. A low-durometer silicone can often elongate hundreds of percent and still spring back. This flexibility can be useful – for example, a soft rubber toy will deform under a pet’s bite, which can make it more satisfying to chew and can help scrub their teeth or massage their gums. Soft toys are also easier for pets to grip and carry. Additionally, softness can contribute to a toy’s bounce – up to a point. A medium-hard rubber ball (around Shore A 50–60) typically has a nice bounce for fetch games, whereas a very soft ball might just thud, and an extremely hard one (Shore 90+) might not bounce much either (more like a rock). Fetch toys therefore use a mid-range hardness to achieve an elastic rebound while retaining shape. For example, many high-quality fetch balls use natural rubber around Shore A 55–65, which gives a good mix of bounce and toughness (a famous example being the orange and blue fetch balls known for their high bounce, made of resilient rubber in that hardness range).
Pet Safety (Teeth and Gums): Hardness also ties directly into safety and comfort. A softer toy is gentle on teeth and gums, making it ideal for puppies, senior dogs, and any pet with sensitive mouths. Soft, flexible silicone or latex will compress under bite force, reducing the risk of tooth fractures. That’s why puppy-specific toys use softer rubber formulas – the KONG™ Puppy, for instance, uses a gentle natural rubber around 30 Shore A to protect young teeth. Conversely, a very hard toy can actually be too abrasive or rigid, potentially wearing down teeth or even cracking them if a dog bites down wrong. Veterinary dentists often warn against extremely hard chews (like some antlers or hard nylon toys) for this reason. In terms of Shore hardness, anything much above ~80A is quite stiff – not something you’d want a dog gnawing on for long. Even at 70A, caution is advised: that’s roughly the hardness of a tire tread, and while durable, it’s borderline on what a dog’s teeth should repeatedly bite. On the flip side, if the toy is too soft (low durometer) and the pet can bite pieces off easily, that’s a choking or ingestion hazard. Thus, finding the right hardness is a safety balancing act – soft enough to be tooth-friendly, but hard enough to resist being torn into small pieces. For example, a treat-dispensing toy might lean softer so it’s pleasant to chew and interact with, whereas a “power chewer” bone will be made much firmer to avoid large chunks being ripped off.
Material Composition Notes: It’s worth noting that hardness is one controllable aspect of a material’s formulation. By adjusting the silicone or rubber mix (for instance, the ratio of polymer to fillers, or the curing agent level), manufacturers can “tune” the Shore A hardness to a target value. This means the same base material can often be made in a soft version or a hard version. In our factory, we routinely customize silicone compounds in a range of durometers (e.g. offering a pet toy design in 50A or 70A as needed). Hardness will also correlate with other properties: softer elastomers usually have lower tensile strength and tear strength, while harder ones tend to have higher tensile/tear but lower elongation. For instance, a 30A silicone might stretch like crazy but tear if pulled too far, whereas a 70A silicone is strong and won’t stretch much before it snaps. These are technical nuances, but they underlie why extreme softness can compromise durability, and extreme hardness can raise brittleness – reinforcing the need for a balanced approach.
Silicone vs. Natural Rubber: Material Matters
Two of the most popular pet toy materials are silicone (synthetic rubber) and natural rubber (latex). Both are elastomers available in various hardnesses, and each has its pros and cons for pet products.
Silicone Rubber: Silicone is a lab-made polymer known for its purity and stability. High-quality silicone (especially food-grade silicone) contains no harmful additives and is free of BPA, phthalates, and latex proteins. This makes it a top choice for pet toys that might double as treat holders or that owners want to be sure are non-toxic. Silicone can also withstand extreme temperatures – it won’t deform in boiling water (helpful for sterilizing a toy) and resists UV light and weathering without degrading. In terms of hardness, silicone elastomers are typically available in roughly Shore A 20 up to Shore A 80 for solid products. Most pet silicone toys fall in the 30–70A range as a practical matter. Silicone at a given hardness tends to be a bit “springy” and has a smooth, almost silky surface feel. One thing to note: silicone’s tear strength, while decent, is often a bit lower than natural rubber’s. If a silicone toy is too thin or too soft, a determined chewer can tear it. Manufacturers compensate by designing silicone toys with thicker walls or solid shapes and avoiding sharp corners that could tear. On the whole, silicone is prized for being safe, hygienic, and fairly durable – a well-designed silicone chew toy can be very resilient, and it won’t get soggy or rot. And if your pet (or customer) has a latex allergy, silicone is a perfect latex-free alternative.
Natural Rubber: Natural rubber comes from rubber tree latex and has been used in pet toys for decades (the iconic KONG® chew toys are made of natural rubber, for example). Natural rubber is extremely elastic and generally has higher tensile and tear strength than equivalently soft silicone. This means it can often withstand aggressive chewing a bit better, especially in lower hardness ranges. Natural rubber also has a certain “bounce” and grippy texture that dogs love – it’s not as silky as silicone, which can be a pro or con depending on the toy. In terms of hardness span, natural rubber can be formulated from very soft to very hard as well. The KONG product line nicely illustrates this: KONG Puppy toys are made of a soft natural rubber around ~30 Shore A, the classic red KONG is medium firmness around ~50 Shore A, and the KONG Extreme (black) uses an extra-dense natural rubber near ~80–90 Shore A. So natural rubber covers the full spectrum from puppy-soft to power-chewer hard. A few considerations: Natural rubber is an organic material and can age – over years it might develop surface oxidation or get a bit brittle (ever seen an old rubber band that crumbles?). It also can produce a slight latex odor that some find off-putting (though pets often don’t mind). Moreover, the latex proteins can be allergens for a small percentage of people and potentially pets (though canine latex allergy is rare). Still, natural rubber is very safe for most dogs, and its performance is comparable to silicone in chew toys. Some pet brands even advertise “all-natural rubber” as a selling point. One advantage we see is that natural rubber’s high tear strength allows slightly softer formulations to be used without tearing – for instance, a 40A natural rubber toy might hold up better against tearing than a 40A silicone toy, all else equal. The choice between silicone and natural rubber often comes down to design and branding: silicone offers superior colorability, heat resistance, and chemical inertness, while natural rubber offers a classic feel and possibly better raw tear durability. Many ultra-durable toys actually blend the two (or mix synthetic rubber with natural rubber) to hit an optimal hardness and toughness.
Bottom line: Both silicone and natural rubber can be excellent for pet toys. Both can be made in a range of hardness levels to suit different needs. The key is to specify the right hardness and formulation for your particular toy’s purpose. For example, if you’re making a treat-dispensing toy that needs a bit of flex to release treats, you might choose a silicone at ~50A or a natural rubber at ~50A – either could work, and both would be safe. If you need an extreme-duty chew stick, perhaps a natural rubber at 80A or a high-durometer silicone blend is the way to go. A knowledgeable manufacturer (like us) will guide you on material selection, taking into account not just hardness but also factors like manufacturing method (injection vs. compression molding), achievable shapes, and any certifications (FDA food grade, etc.) required.
Selecting the Right Hardness for Different Pets
Not all pets play the same. A small terrier, an aggressive pit bull, a kitten, and a teething puppy all have very different toy needs. Here we break down recommended hardness ranges by pet type, to help brands and designers choose wisely:
Puppies (Teething or Light Chewers): For young puppies (and even senior dogs with sensitive mouths), softer is better. Typically, Shore A 15–30 is ideal for puppy toys. This softness allows the toy to compress gently, soothing sore gums and not harming baby teeth. (For context, a pencil eraser is about 30A – puppy toys are around or even below that softness.) These toys will feel very pliable if you squeeze them. Common examples are puppy chew rings or plush-filled rubber toys that you can indent with your thumb. The KONG Puppy, as mentioned, is ~30A natural rubber. Such toys might show bite marks over time (since they are soft), but that’s acceptable as long as chunks aren’t coming off – the goal is a comfort chew. Manufacturers may design these toys to be thicker or in gentle shapes to compensate for the lower material strength at that softness. Always ensure puppy toys are non-toxic and free of loose bits, since puppies will mouth them a lot.
Small Dogs (Adult small breeds, moderate chewers): Smaller dogs (e.g. under 20 lbs) often do best with a medium-soft to medium hardness – roughly Shore A 30–50 range. Why? A tiny dog’s jaw can’t typically generate the force of a large dog, so they don’t need an ultra-hard material to get durability. In fact, if it’s too hard (say a 70A toy), a small dog might not even be able to compress it at all, making the toy uninteresting. So for small breeds, we often recommend somewhere around 40A–50A: firm enough to last, but with a bit of “give” when they bite. Around Shore 40–50A, a toy is about as hard as a car’s rubber door seal or a shoe sole – you can flex it, but it’s tough. Many generic rubber toys and balls marketed for small dogs fall in this middle ground. It’s also a safe zone in terms of not damaging their smaller teeth. If the dog is an aggressive chewer despite its size, lean to the upper end (50–55A) and use a tear-resistant formulation. If the dog is gentle, you could lean softer (30–40A). Also consider toy size – small dogs need physically smaller toys, which in turn should usually be a bit softer because there’s less bulk to withstand force. (Pro tip: a thin toy made of very hard rubber can crack; if you must use a hard material, ensure the design is thick enough.)
Large Dogs & Aggressive Chewers: For big breeds or any dog that’s a notorious power chewer (regardless of size), harder materials are warranted. These pets can crunch through flimsy toys in minutes. Typically we suggest Shore A 60–80 for aggressive chewers. At ~60A and above, rubber starts to get quite tough – a human can barely dent it with a fingernail. Chew toys in this category (think of black “extreme” rubber toys, heavy-duty rubber balls, etc.) will hold up far better under strong jaws. For example, an “indestructible” chew stick might be made of 70–75A rubber (comparable to a skateboard wheel or hard hat in stiffness). Some extreme toys even go nearly to 90A (though we caution, beyond ~85A you risk the toy being too hard for safe chewing, as discussed). A good strategy is multi-layer construction: some high-end chew toys have a tough core around 60–65A and a slightly softer outer layer around 45–50A. This gives a bit of a cushion on the surface but a durable heart inside. If you design a toy for aggressive chewers, you’ll also want to ensure it’s physically large enough that the dog can’t fit the whole thing in its mouth (to prevent choking) and that there are no weak points (like narrow appendages) that invite tearing. Material-wise, natural rubber is popular for these tough toys (it can be formulated very hard but still with slight elasticity). Reinforced TPR (thermoplastic rubber) blends are also used around 70–80A. And some brands use nylon or polypropylene elements for ultra-hard parts, but those are plastics on a different hardness scale (and not “soft” at all – more like bone). As a silicone manufacturer, we’d note that silicone in the 80–90A range can be made, but it’s quite rigid – often, we’d instead recommend a composite of silicone and fabric or a dual-hardness approach for extreme chewers. In summary, give your power chewer toys a fighting chance by using very firm, high-durometer rubber – just don’t exceed what’s safe for teeth (usually max ~90A).
Cats: Feline play behavior is different from dogs – cats are generally not chewing with massive force, but they do claw, bite lightly, and carry toys in their mouth. Many cat toys are actually plush or hard plastic, but there are silicone and rubber cat toys too (e.g. treat-dispensing cat toys, cat chew toys for dental health, or interactive balls). For cat applications, softer rubber is usually preferred, both to entice the cat and for safety. A cat’s teeth are small and sharp; a very hard material provides no satisfaction for them to bite and could even crack a tooth (yes, cats can fracture teeth on very hard objects too). Thus, we’d recommend cat chew toys be around Shore A 20–40, on the softer side. This gives a nice squishy feel if a cat gnaws on it and is gentle on their teeth. Soft silicone also has an interesting “mouthfeel” that some cats like (similar to how they chew on soft silicone straws or earbuds). If the toy is a ball or something meant to be batted around, a medium firmness (around 40A-50A) might be used to ensure it’s durable and bouncy enough – but in those cases, the cat isn’t usually biting hard into it. Cat treat-dispensing toys (like little food-dispensing balls) could be in the 40–50A range for a bit of bounce and to hold their shape. One thing about cats: they are lighter and generally don’t destroy toys the way dogs do, so durability is less of a concern except for scratching. A softer toy (say 30A silicone) will hold up fine to cat claws and occasional nibbling, as long as it’s thick enough. And since cats often like to carry toys in their mouth, the lightweight nature of a softer silicone is a bonus. In short, for cats we lean soft – you’re rarely going to need a “hard” rubber for a cat product, and keeping it soft makes the toy more attractive for them to pounce, kick, and lightly chew.
Typical Hardness Ranges by Toy Type
Another way to choose material hardness is by considering the type of toy you’re making. Chew toys, fetch toys, and treat toys each have different functional requirements:
Chew Toys: This category covers toys meant to be gnawed on for extended periods (rubber bones, chew sticks, dental chews, etc.). The hardness depends on the target chewer. For a gentle chew toy or puppy chew, you might go as soft as Shore A 20–30 (very soft, as discussed). For a standard all-purpose dog chew toy, somewhere around Shore A 50–60 is common – durable but still with some flex. And for heavy-duty chew toys marketed as “tough” or “indestructible,” you’ll see Shore A 70–85 materials. For example, a thick rubber dental chew for aggressive chewers might be ~75A so that the teeth sink in only slightly (just enough to clean), and the toy doesn’t chunk off. Always err on the side of a little softer if unsure, because a chew toy that’s slightly too soft will just get cosmetic damage, whereas one that’s too hard could hurt a dog’s teeth. Many brands have tiered product lines: e.g., “soft chew” for seniors/puppies (around 30A), “medium chew” for average dogs (~50A), and “power chew” for strong jaws (~70A+). Our factory can produce custom hardness chew toys to fit those tiers easily. Also, squeaky chew toys (like squeaker balls or squeaky rubber bones) usually need to be in the mid-range hardness. They must be soft enough to depress and allow the squeaker to function, but hard enough to last. Typically, a squeaky rubber ball might be around 60–70 Shore A – as one buyer’s guide notes, that range avoids the toy being so hard it harms teeth, yet is firm enough to be durable.
Fetch Toys (Balls and Flyers): Fetch toys like balls, discs (frisbees), and tug toys have to handle impact (being thrown, bouncing, etc.) and often need good bounce or flight. Balls: A good fetch ball is usually a medium-firm natural rubber. Common hardness here is around Shore A 50–65. At ~50A, a ball has a nice bounce and can deform a bit when the dog grabs it, making it easy to pick up. Hardness much above 65A and the ball might get too stiff (and heavy) to have an exciting bounce – plus it could be unpleasant for the dog to catch. The popular Chuckit! Ultra Ball for example is lauded for durability and bounce; while we don’t have exact specs, the feel suggests it’s in that mid-durometer range (not squishy, but you can indent it a little by pressing). Flying discs (rubber frisbees): These need flexibility so they don’t crack, but also enough stiffness to hold a disc shape. Silicone or rubber flying discs are often around Shore A 40–60. A 40A disc will be very flexy (able to be crumpled up, good for safety), whereas a 60A disc is more rigid for longer flights. One of our customers makes a silicone fetch disc at ~50 Shore A – it can fold in your hand but flies decently, and if the dog bites it mid-air it flexes without hurting their mouth. Tug toys (rubber tugs or rings): They’re a bit different since they undergo pulling rather than impact. But generally, a tug toy made of natural rubber might be around 50–70A. You want it tough (to resist tearing when two dogs or a dog and human play tug-of-war), but if it’s too hard, it won’t have the enjoyable stretch. Many tug toys use reinforcement (like rope inside rubber) so hardness is less critical than design. Lastly, consider that fetch toys often double as chew toys when the dog is alone – so if you know the ball will be chewed, maybe opt for the higher end of hardness for durability. On the other hand, if you’re designing an indoor fetch toy or a light play ball, a softer material (even 30–40A) could be nice to avoid breaking lamps and to be gentle in the dog’s mouth. We’ve seen silicone spiky balls for dogs that are very soft (around 25A) intended for gentle indoor fetch and massage, for instance.
Treat-Dispensing Toys (Puzzle Toys): Treat or food-dispensing toys (like fillable rubber toys, slow-feed balls, etc.) have a unique goal: they should be firm enough to hold their shape with food inside, but ideally somewhat soft so the dog can bite and squeeze them to extract treats. The classic example is the KONG Classic, a treat-stuffable toy which is about Shore A 50 in hardness (medium firmness). That choice of hardness lets it flex when the dog chews, so treats can fall out or be worked out, but it’s not so soft that pieces tear off when the dog is focused on it. Generally, 40–60 Shore A is a good window for treat-dispensing toys. At 40A, the toy is quite soft – easy for a dog to compress, maybe suitable for mild chewers or for cold conditions (some treat toys are meant to be frozen with goodies inside, so they chose a softer base rubber knowing it will stiffen slightly when frozen). At 60A, a treat toy will be tougher and last longer, suited for dogs that would otherwise destroy a softer one. One manufacturer we know uses about 50A food-grade silicone for their treat puzzle toys, finding it a “sweet spot” that’s both flexible and durable. Also, treat toys often get gnawed continuously as the pet tries to lick out peanut butter or kibble, so the material must withstand a lot of repeated biting. We ensure our silicone for these toys has good tear strength (often adding a reinforcement or using a high-strength grade) so that even at 50A it doesn’t split at the opening. In summary, for puzzle toys: aim mid-range hardness; soft enough for interactivity, tough enough for longevity. (And always food-safe material since treats will be in contact – silicone shines here due to its inertness.)
Of course, there are other toy categories (e.g. interactive electronics encased in silicone, which often use soft silicone for a nice feel, or edible chews, which are another realm entirely). But for most solid silicone/natural rubber toys, the above guidelines apply. The main point is to match the hardness to the use case: softer for comfort and gentle play, harder for durability and challenge. When developing a new toy, think about the target pet and the toy’s purpose – this will guide the durometer choice. We often prototype a design in two or three hardness levels and do pet testing to see which performs best.
Manufacturing Testing and Quality Control
From a manufacturer’s perspective, ensuring the toy has the specified hardness and quality is crucial. In our silicone factory, we have strict quality control practices to verify every batch of toys meets the target specifications and safety standards:
Hardness Testing (Durometer Checks): We measure the Shore hardness of each production batch using calibrated durometer instruments. According to ASTM D2240 (the standard for Shore hardness), the test samples should be a certain thickness (at least 6 mm) and we take the reading ~1 second after pressing to get a consistent value. Our QC technicians use a Shore A durometer for most pet toys (and Shore 00 if we ever do very soft gels) to make sure, for example, that the “50A” toy you ordered is indeed 50A ± a small tolerance. If the hardness reading falls outside the agreed range, we adjust the material mix and re-mold. Maintaining consistent hardness is important not just for performance but also for customer expectations – a batch of toys that come out too soft might wear out faster, while too hard could violate safety aims. Therefore, hardness testing is a routine step in our production process. We use both analog and digital durometers, and they are regularly calibrated against reference blocks.
Tensile and Tear Strength Testing: Alongside hardness, we often test the tensile strength (how much pulling force the material can withstand) and tear resistance of the rubber compound used. This is done with specialized equipment like a tensile tester (which stretches sample strips of the rubber until they break). For tear, we might use a trouser tear test or similar per ASTM standards. These tests ensure that if we have formulated a softer rubber, it still has adequate strength to not split when a dog is chewing. For instance, if a certain Shore A 30 silicone isn’t meeting our tear strength criteria, we might need to modify the formulation (e.g. add a reinforcing filler or slightly increase hardness) before mass production.
Bite/Chew Simulation Tests: A very informative test we do for chew toys is a mechanical chew simulation. One setup involves a pneumatic or motor-driven clamp that repeatedly compresses the toy or a test slab of the material to mimic a dog’s bite. We might also perform a kind of “puncture” test using metal probe heads of various shapes (simulating canine teeth) to see how the material holds up. According to one pet toy company, rigorous durability testing can involve over 10,000 bite cycles on a toy to ensure it doesn’t tear or deform excessively. We adopt a similar mindset – for any new design, we’ll put it through cyclic chewing tests and inspect for damage. If a toy is meant for power chewers, we test it under even more extreme conditions (higher forces, more cycles). These tests help catch issues like weak spots or potential choke-hazard pieces coming loose.
Safety and Chemical Tests: We ensure all our silicone and rubber raw materials are certified non-toxic. This includes checking for things like lead, BPA, phthalates, or other harmful substances (many of the same tests as children’s toys, even though pet toys aren’t always legally held to that standard). For silicone, we often use platinum-cured, food-grade silicone that’s FDA/LFGB compliant. For natural rubber, we make sure it’s purified and free of nitrosamine-producing chemicals, etc. We also test that colors are colorfast and won’t leach dye when the toy is chewed or washed. Some clients ask for specific certifications or testing (for example, EU REACH compliance or California Prop65). Quality control in this area means working closely with material suppliers and sometimes sending toys to independent labs (like Eurofins or SGS) for analysis. A passed chemical safety test is as important as the physical durability.
Dimensional and Visual Inspection: Hardness aside, each toy is inspected for proper molding – no excess flash, no air bubbles or voids, no sharp edges. We verify that any design features (like treat holes, squeaker inserts, etc.) are correctly formed. If two materials are over-molded (say a hard core and soft outer layer), we check the bond strength between layers. Throughout a production run, our team does regular spot checks (for example, 10+ regular checks and 5 random checks per order as one quality plan) to catch any deviations. We use tools like calipers to measure critical dimensions and ensure consistency.
Hardness Tuning and Process Control: Achieving the desired hardness reliably is partly an art of compounding and processing. Our engineers control parameters like mixing time, temperature, and cure time precisely to hit the target durometer. For instance, longer cure or more curing agent can increase hardness in many rubber systems. We document these process settings so that once the ideal hardness is dialed in during prototyping, we can reproduce it for mass production. If a client wants two hardness options for a toy (say a 50A and a 70A version), we will have two separate formulations and possibly molding setups, and we keep strict separation to avoid any mix-ups.
Field Testing and Feedback: As a final quality step, we often conduct or encourage real-world testing of our toys. We provide sample toys to a few pet owners or even have an in-house test dog squad (some employees’ dogs volunteer!) to play with new toys. Their feedback – how quickly does the toy wear, do they show interest, any unexpected issues – is invaluable. This isn’t a quantifiable test like durometer reading, but it’s a key part of quality assurance for pet products. It helps verify that our lab testing correlates with actual pet usage. For example, a lab machine might not fully replicate a dog’s chewing pattern of “hold in paws and gnaw on one end,” so a dog test might reveal a weak point we didn’t anticipate. We treat these insights seriously and iterate the design or material if needed.
Through all these practices, the goal is to deliver consistent, safe, and effective pet toys. Whether it’s a silicone cat ball at 25A or a tough rubber stick at 80A, our factory’s quality systems make sure the hardness is on target and the toy will perform as promised when it’s in a pet’s jaws. We want pet brands to have confidence that when we say “this toy is suitable for aggressive chewers,” it truly has been engineered and verified to meet that claim.
Conclusion
Shore hardness might be a technical metric, but as we’ve seen, it has a very tangible impact on pet toy performance. The difference between a 30A and a 70A material in a chew toy could be the difference between a toy that’s shredded in minutes and one that lasts for months – or the difference between a toy a teething puppy loves and one it won’t touch. By understanding Shore hardness and choosing the right softness/firmness for the specific pet audience, brands can dramatically improve their toys’ success in the market. The sweet spot is always a balance: durable yet not dangerously hard, flexible yet not flimsy.
As a silicone manufacturing partner, we speak this language of durometers daily. We’re here to help pet product designers navigate these material decisions. Choosing the right material and hardness is not a one-size-fits-all formula – a lot depends on the pet’s size, age, chew strength, and the toy’s purpose. Our team can advise whether a high-tear natural rubber might suit your design better, or if a silicone of a certain Shore A with a specific additive would give the best results. We can even produce sample pieces in multiple hardness levels for you to evaluate.
Collaborate with your manufacturer early in the design process to dial in the hardness – it can save time and cost later by preventing failures or redesigns. If you’re developing a new pet toy (be it a chew, fetch, or treat toy), we encourage you to consult with us or another experienced materials supplier. We’ll help you select the optimal softness for safety and fun, and ensure rigorous quality control so every unit meets those standards. In the end, our goal aligns with yours: to deliver pet toys that are safe, high-quality, and tail-waggingly enjoyable.
Ready to create the perfect pet toy? Feel free to reach out to our team for expert guidance on silicone and rubber materials. With the right Shore hardness and our manufacturing know-how, your next pet toy product can truly stand out in durability and pet-approved performance. Let’s work together to make toys that pets love and owners trust!
https://www.newtopsilicone.com/wp-content/uploads/2025/10/Hemispherical-dog-toy-7).png10001000Enriquehttps://www.newtopsilicone.com/wp-content/uploads/2022/06/newtop-logo-300x138-2.pngEnrique2025-11-24 17:30:252025-11-24 17:50:26Understanding Shore Hardness: Choosing the Right Softness for Pet Toys



 For beauty brands and lingerie manufacturers looking to serve customers with larger busts, it’s crucial to design nipple covers that truly address their needs. Here are key considerations for designing nipple covers for D+ cups:
 Silicone nipple covers allow women to wear backless or strapless fashions confidently without a bra, providing invisible coverage over the nipples. These reusable covers stick to the skin securely and blend in so that nothing shows through or slips out of place. They are made of soft silicone gel that conforms to the breast’s shape, creating a smooth silhouette under fabric. Unlike traditional bras, they leave the back and shoulders free – enabling outfits with low backs, cut-outs, or thin straps.