Post-curing is an additional heat-treatment process used after silicone molding to improve material stability, reduce volatile residues, support odor control, and prepare silicone products for higher safety or performance requirements.

For many custom silicone products, molding is only one part of the manufacturing process. Depending on the product application, material type, target market, and buyer requirements, post-curing may be an important step before final inspection and packaging.

This guide explains what silicone post-curing is, when it is needed, which products may require it, and what buyers should confirm before starting a custom silicone project.


What Is Silicone Post-Curing?

Silicone post-curing is a secondary curing process performed after the initial molding process. During molding, silicone is shaped and cured under heat and pressure. After demolding, some products may go through an additional heating process to further stabilize the material.

The purpose of post-curing is usually to:

  • Reduce volatile residues
  • Improve odor control
  • Support material stability
  • Improve heat aging performance
  • Support food-contact or body-contact applications
  • Help products meet stricter buyer or market requirements

Post-curing does not change the basic design of the product. Instead, it helps improve the final material condition after molding.

For buyers, the key point is simple: post-curing is not always required, but it should be discussed when the product has higher safety, odor, hygiene, or performance expectations.


Why Post-Curing Matters in Silicone Manufacturing

Silicone is widely used because it is flexible, heat-resistant, durable, and suitable for many consumer, medical, industrial, and food-contact applications. However, not all silicone products have the same requirements.

A silicone promotional item, a baby teether, a kitchen spatula, and a medical silicone component may all use silicone, but the production expectations can be very different.

Post-curing matters because it can help improve the product in several important areas.


1. Post-Curing Helps Reduce Volatile Residues

After silicone molding, small amounts of volatile substances may remain in the material depending on the silicone type, curing system, formulation, product thickness, and molding conditions.

Post-curing helps reduce these residues through additional heat treatment.

This is especially important for products such as:

  • Baby care silicone products
  • Silicone kitchenware
  • Food-contact silicone parts
  • Personal care products
  • Medical silicone components
  • Products used in enclosed packaging
  • Products with higher odor sensitivity

For buyers, this is one reason why post-curing may be recommended when the product will contact food, skin, mouth, or body areas.


2. Post-Curing Can Improve Odor Control

Odor is one of the most common concerns for silicone products, especially in consumer markets.

Some buyers may assume that any odor means the material is unsafe. This is not always correct. Silicone odor can be affected by raw material, curing system, color masterbatch, additives, production environment, storage, packaging, and post-treatment.

Post-curing can help reduce certain odors related to residual volatiles, but it cannot solve every odor problem by itself.

For better odor control, manufacturers should also review:

  • Silicone raw material quality
  • Color masterbatch compatibility
  • Curing system
  • Production cleanliness
  • Product thickness
  • Post-curing conditions
  • Packaging method
  • Storage and ventilation before shipment

For products sold in baby, kitchen, personal care, and wellness markets, odor control should be discussed before mass production.


3. Post-Curing Supports Food-Contact and Skin-Contact Applications

For food-contact and skin-contact silicone products, buyers often care about material safety, odor, surface cleanliness, migration testing, and long-term user experience.

Post-curing may be recommended for:

  • Silicone baby teethers
  • Silicone pacifier-related parts
  • Silicone feeding products
  • Silicone kitchen tools
  • Silicone baking molds
  • Silicone bottle parts
  • Personal care silicone products
  • Wearable silicone parts
  • Beauty and skincare tools

Post-curing alone does not guarantee compliance with FDA, LFGB, REACH, or other market requirements. However, it can be part of a controlled manufacturing process for products that need better material stability and lower volatile residue.

Buyers should always confirm testing requirements based on the target market.


4. Post-Curing Can Help Improve Material Stability

Post-curing may also support better material stability after molding.

For some silicone products, especially thicker parts or technical components, additional curing can help the material reach a more stable condition.

This can be relevant for:

  • Thick silicone parts
  • High-temperature silicone components
  • Industrial silicone seals
  • Medical silicone parts
  • Silicone parts used under compression
  • Silicone parts requiring consistent mechanical performance

The actual effect depends on the material formulation, part design, and curing conditions. For technical projects, post-curing should be evaluated together with the material supplier and molding engineer.


5. Post-Curing May Be Required by Buyer Specifications

Some buyers include post-curing requirements in their product specification, especially for medical, food-contact, baby care, personal care, or industrial applications.

A buyer specification may include requirements such as:

  • Material grade
  • Hardness
  • Color
  • Post-curing process
  • Odor standard
  • Volatile control
  • Testing requirement
  • Packaging requirement
  • Traceability requirement

If post-curing is part of the buyer’s standard, it should be clearly stated during the RFQ stage. This allows the manufacturer to evaluate cost, lead time, production planning, and testing requirements correctly.


Which Silicone Products Usually Need Post-Curing?

Not every silicone product requires post-curing. The decision depends on product use, material, design, safety requirements, and target market.

The table below gives a general reference.

Product TypeIs Post-Curing Usually Needed?Reason
Baby silicone productsOften recommendedMouth contact, odor control, safety expectations
Food-contact silicone productsOften recommendedFood-contact requirements and volatile reduction
Medical silicone componentsOften required or recommendedHigher hygiene, safety, and performance requirements
Personal care silicone productsOften recommendedSkin or body contact
Thick silicone partsMay be neededHelps improve internal curing stability
High-temperature industrial partsMay be neededSupports performance under demanding use
General silicone promotional itemsNot always neededUsually lower performance requirements
Pet silicone productsDepends on applicationFeeding products may need higher safety control
Silicone seals and gasketsDepends on useTechnical performance requirements vary
Low-cost general consumer productsNot always neededCost and use may not justify extra process

For custom silicone products, the safest approach is to evaluate post-curing during product development rather than after mass production.


Post-Curing vs. Normal Curing

Many buyers confuse normal curing and post-curing. They are related but not the same.

ItemNormal CuringPost-Curing
TimingDuring moldingAfter molding
Main PurposeShape and cure the silicone into the final product formFurther stabilize material and reduce residues
EquipmentMold and molding machineOven or post-curing system
Required for All Products?Yes, molding requires curingNo, depends on product requirement
Affects Product Shape?Yes, the product is formed during this stageUsually no major shape change
Common PurposeForming, curing, production efficiencyOdor control, volatile reduction, stability improvement
Buyer Should Specify?Usually part of the manufacturing processYes, if required by application or standard

Normal curing makes the silicone product. Post-curing improves the final material condition when needed.


Factors That Affect Whether Post-Curing Is Needed

Several factors can influence the decision.

1. Product Application

Products used for food, baby care, medical, skin-contact, or body-contact applications usually have higher requirements than general silicone items.

2. Material Type

Different silicone materials and curing systems may have different post-curing recommendations. The material supplier’s technical data should be considered.

3. Product Thickness

Thicker silicone parts may need more attention because internal curing and volatile release can be different from thin parts.

4. Target Market

Products sold in the US, EU, UK, Japan, Australia, or other regulated markets may need different testing and documentation.

5. Odor Requirement

If the buyer has strict odor requirements, post-curing may be part of the solution.

6. Packaging Method

Products sealed immediately after production may retain more odor if post-treatment and ventilation are not properly managed.

7. Testing Requirement

If the product needs third-party testing, the manufacturer should confirm whether post-curing is needed before sending samples for testing.


Common Misunderstandings About Silicone Post-Curing

Misunderstanding 1: All Silicone Products Must Be Post-Cured

Not true. Many general silicone products can be produced without post-curing if the material, process, and application do not require it.

Misunderstanding 2: Post-Curing Can Fix Poor Material Quality

Post-curing cannot turn poor material into high-quality material. Raw material selection is still the foundation of product safety and performance.

Misunderstanding 3: Post-Curing Automatically Makes a Product Food-Grade

Not true. Food-grade suitability depends on material, formulation, colorants, production control, and testing results. Post-curing may support the process, but it does not replace compliance testing.

Misunderstanding 4: Post-Curing Removes All Odor

Post-curing can reduce certain odor sources, but odor may also come from packaging, color masterbatch, storage, contamination, or other factors.

Misunderstanding 5: Post-Curing Has No Effect on Cost or Lead Time

Post-curing adds processing time, energy use, handling, and production planning. It may affect both cost and lead time.


What Buyers Should Confirm Before Production

Before starting a custom silicone project, buyers should confirm whether post-curing is needed. This is especially important before mold development and sample approval.

Buyer Checklist

ItemWhat to Confirm
Product applicationFood-contact, baby care, medical, personal care, industrial, etc.
Target marketUS, EU, UK, Japan, Australia, or other regions
Material requirementFood-grade, medical-grade, high-temperature, transparent, etc.
HardnessShore A requirement
ColorNatural, transparent, Pantone color, or custom color
Odor requirementStandard requirement or strict buyer-specific requirement
Product thicknessThin wall, thick wall, solid part, hollow part
Testing requirementFDA, LFGB, REACH, biocompatibility, or other tests
Packaging methodBulk packaging, sealed bag, retail box, individual packaging
Post-curing requirementRequired, recommended, or not needed
DocumentationMaterial data, batch records, test reports, QC records

A clear specification helps the manufacturer quote accurately and avoid changes after sampling.


How Post-Curing Affects Cost and Lead Time

Post-curing is an additional production step, so it may affect project cost and delivery schedule.

The cost impact depends on:

  • Product size
  • Product quantity
  • Material type
  • Post-curing time
  • Oven capacity
  • Packaging requirements
  • Testing requirements
  • Additional handling and inspection needs

For small trial orders, post-curing may increase unit cost more noticeably. For larger mass production orders, the cost impact can be planned more efficiently.

Buyers should confirm post-curing requirements during the quotation stage, not after mass production starts.


Post-Curing and Third-Party Testing

If a product needs third-party testing, post-curing should be completed before the test samples are submitted.

This is important because the tested sample should represent the final production condition.

For example, if a food-contact silicone product will be post-cured during mass production, then the test samples should also be post-cured before testing.

Buyers should confirm:

  • Which standard needs to be tested
  • Which market the product is for
  • Whether color samples need separate testing
  • Whether post-cured samples are required
  • Whether packaging affects the final test condition
  • Whether retesting is needed after material or color changes

This helps avoid unnecessary testing delays and additional costs.


Post-Curing for Different Silicone Product Categories

Baby Care Silicone Products

Baby products often have higher requirements because they may contact the mouth, skin, or food. Post-curing may help improve odor control and reduce volatile residues.

Examples include:

  • Silicone teethers
  • Feeding spoons
  • Baby bibs
  • Silicone bowls
  • Pacifier-related components
  • Bottle accessories

For baby products, buyers should also confirm material safety, colorant safety, product structure, choking hazard risk, packaging, and market testing requirements.


Kitchen and Food-Contact Silicone Products

Kitchen silicone products may contact food directly or be used under heat. Post-curing is often considered for products such as:

  • Baking molds
  • Spatulas
  • Food storage accessories
  • Silicone lids
  • Ice trays
  • Cooking utensils

For food-contact products, buyers should confirm FDA, LFGB, or other relevant market requirements before production.


Medical Silicone Components

Medical silicone parts may require stricter material, process, and documentation control. Post-curing may be part of the production requirement, depending on the application.

Examples include:

  • Medical silicone seals
  • Tubing components
  • Wearable medical parts
  • Device-related silicone components
  • Healthcare silicone accessories

Medical applications may also require additional validation, biocompatibility testing, clean production, and traceability.


Personal Care and Skin-Contact Products

Personal care silicone products often contact skin or body areas. Odor, surface feel, softness, and cleanliness can strongly affect user experience.

Examples include:

  • Facial cleansing tools
  • Massage tools
  • Beauty applicators
  • Wearable silicone parts
  • Body-contact silicone accessories

For this category, post-curing may help improve product comfort and perceived quality.


Industrial Silicone Parts

Industrial silicone parts may need post-curing when performance stability is more important than appearance.

Examples include:

  • Gaskets
  • Seals
  • Dampers
  • Protective covers
  • Heat-resistant parts
  • Electrical insulation parts

For technical parts, buyers should provide working environment details such as temperature, pressure, compression, chemical exposure, and tolerance requirements.


How to Work With a Silicone Manufacturer on Post-Curing Requirements

For custom silicone products, post-curing should be discussed as part of the product development plan.

A professional silicone manufacturer should help evaluate:

  • Whether post-curing is necessary
  • Which material is suitable
  • Whether the product structure may affect curing
  • Whether the product needs odor control
  • Whether post-curing affects appearance or dimensions
  • Whether testing should be performed after post-curing
  • Whether packaging should be adjusted after post-curing

The earlier these details are confirmed, the easier it is to control quality, cost, and delivery.


RFQ Template for Post-Cured Silicone Products

Buyers can use the following template when requesting a quotation.

RFQ ItemInformation to Provide
Product nameProduct type or project name
Product applicationBaby, kitchen, medical, personal care, industrial, etc.
Drawing or sample2D drawing, 3D file, photo, or physical sample
Material requirementFood-grade, medical-grade, high-temperature, transparent, etc.
HardnessShore A requirement
ColorStandard color, transparent, or Pantone color
Product sizeDimensions and wall thickness
Molding processLSR injection, compression molding, extrusion, overmolding, etc.
Post-curing requirementRequired, recommended, or unsure
Odor requirementNormal, low odor, or buyer-specific standard
Testing requirementFDA, LFGB, REACH, biocompatibility, or other tests
Packaging methodBulk pack, individual bag, retail box, sealed packaging
QuantitySample quantity and estimated mass production quantity
Target marketUS, EU, UK, Japan, Australia, or other regions

If buyers are unsure whether post-curing is needed, they can provide the product application and target market first. The manufacturer can then make a recommendation based on the project requirements.


Conclusion

Post-curing is an important secondary process for many silicone products, especially when the product requires better odor control, reduced volatile residues, improved material stability, or higher safety expectations.

It is commonly considered for baby care products, food-contact silicone products, medical silicone components, personal care products, and certain industrial silicone parts.

However, post-curing is not required for every silicone product. It should be evaluated based on the product application, material, thickness, target market, testing requirements, and buyer specifications.

For custom silicone projects, discussing post-curing early can help avoid sampling delays, testing issues, odor complaints, and unnecessary production changes.

NEWTOP SILICONE supports custom silicone product development from material selection and design review to molding, post-processing, quality control, testing coordination, and packaging. If your project has food-contact, medical, baby care, personal care, or technical performance requirements, our team can help evaluate whether post-curing is needed for your product.


FAQ

1. What is silicone post-curing?

Silicone post-curing is an additional heat-treatment process performed after molding. It helps reduce volatile residues, improve odor control, and support better material stability for certain silicone products.

2. Do all silicone products need post-curing?

No. Not all silicone products need post-curing. It depends on product application, material type, product thickness, target market, odor requirements, and testing requirements.

3. Why is post-curing important for food-grade silicone products?

Post-curing can help reduce volatile residues and improve odor control, which may be important for food-contact silicone products. However, food-grade compliance still depends on material selection, formulation, production control, and testing results.

4. Can post-curing remove silicone odor completely?

Post-curing can reduce some odor sources, especially those related to residual volatiles. However, odor may also come from color masterbatch, packaging, storage, or contamination, so post-curing alone may not remove all odor.

5. Is post-cured silicone safer?

Post-curing can support better material stability and lower volatile residues, but safety still depends on the silicone material, formulation, production control, and applicable testing. It should be considered one part of the overall quality process.

6. Does medical silicone need post-curing?

Many medical silicone applications require or recommend post-curing, but the actual requirement depends on the material, product use, regulatory expectations, and buyer specifications.

7. Does post-curing affect silicone product dimensions?

Post-curing usually does not significantly change the product shape if the process is properly controlled. However, for precision parts, dimensions should still be checked after post-curing.

8. Does post-curing increase production cost?

Yes, post-curing may increase cost and lead time because it adds an extra production step, energy use, handling, and process control. The cost impact depends on product size, quantity, and process requirements.

9. Should test samples be post-cured before third-party testing?

If mass production products will be post-cured, then test samples should usually be post-cured before testing. This helps ensure that the tested samples represent the final production condition.

10. How do I know whether my silicone product needs post-curing?

The best way is to confirm the product application, target market, material requirement, odor standard, testing requirement, and packaging method with your silicone manufacturer before tooling and sampling.

Clean room silicone manufacturing is used when silicone products require a more controlled production environment, especially for medical, baby care, personal care, skin-contact, and other sensitive applications. Compared with standard silicone production, clean room manufacturing focuses more on dust control, material handling, operator hygiene, packaging control, and batch traceability.

For brands developing silicone products that come into contact with the body, skin, food, or sensitive equipment, the production environment can be just as important as the material itself.

This guide explains when clean room silicone manufacturing may be needed, what it changes during production, and what buyers should confirm before starting a custom silicone project.


What Is Clean Room Silicone Manufacturing?

Clean room silicone manufacturing refers to producing silicone products in a controlled environment where airborne particles, dust, contamination sources, operator access, and material handling are managed more carefully than in a standard workshop.

It is commonly used for products such as:

  • Medical silicone components
  • Baby care silicone products
  • Personal care silicone products
  • Skin-contact silicone parts
  • Healthcare and wellness products
  • Sensitive industrial silicone components
  • Precision LSR molded parts

Clean room production does not only mean a cleaner room. It usually involves a more controlled workflow, including controlled material storage, dedicated production procedures, operator hygiene rules, product protection, and defined packaging steps.

For silicone products with higher safety, hygiene, or performance requirements, clean room production can help reduce contamination risks and improve production consistency.


When Do Brands Need Clean Room Silicone Manufacturing?

Not every silicone product requires clean room production. For many general consumer goods, standard silicone molding with proper quality control is sufficient.

However, clean room silicone manufacturing may be recommended when the product has higher requirements for hygiene, surface cleanliness, or sensitive application environments.

Clean Room Manufacturing Is Usually More Suitable For:

Product TypeWhy Clean Room Production May Be Needed
Medical silicone componentsHigher hygiene and process control requirements
Baby care productsProducts may contact the mouth, skin, or food
Personal care productsProducts may contact sensitive skin or body areas
Wearable silicone partsLong-term skin contact requires better surface control
Healthcare productsHygiene, traceability, and packaging control matter
Sensitive industrial partsDust or particles may affect assembly or performance
LSR precision partsAutomated production and stable process control are often required

If your product is used in a sensitive environment, clean room production should be discussed during the RFQ stage rather than after sampling.


Clean Room vs. Standard Silicone Workshop

The main difference between clean room production and standard production is the level of environmental and process control.

A standard silicone workshop can still produce high-quality products when the factory has proper material control, molding process control, inspection, and packaging procedures. However, clean room production adds another layer of protection for projects where contamination control is more important.

ItemStandard Silicone ProductionClean Room Silicone Production
Production EnvironmentGeneral controlled workshopControlled clean production area
Main FocusEfficiency, molding quality, appearance, functionCleanliness, consistency, contamination control
Typical ProductsKitchenware, pet products, general consumer goods, industrial partsMedical, baby, personal care, healthcare, sensitive parts
Operator ControlStandard production rulesHigher hygiene and access control
Material HandlingNormal factory handling processMore controlled storage and transfer
PackagingStandard bulk or retail packagingMore protected packaging process
TraceabilityBased on factory QC systemUsually stricter batch and process records

The decision should depend on the product application, target market, testing requirements, and buyer’s internal quality standard.


What Changes in Clean Room Silicone Manufacturing?

Clean room manufacturing affects more than the molding machine. It changes the way the entire project is managed.

1. Material Handling Becomes More Controlled

Silicone raw materials, color masterbatch, additives, and inserts need to be handled more carefully to reduce contamination risks.

For clean room projects, buyers should confirm:

  • Material grade
  • Supplier documentation
  • Storage requirements
  • Batch number control
  • Color masterbatch safety
  • Whether post-curing is required
  • Whether material contact surfaces need extra protection

For medical, baby, or skin-contact products, material selection should be confirmed before mold development.


2. Operator Hygiene Requirements Become Stricter

In clean room production, operators usually need to follow stricter clothing, hand-cleaning, access, and operating rules.

This may include:

  • Dedicated clean room clothing
  • Gloves or protective covers
  • Controlled entry procedures
  • Reduced direct hand contact with products
  • Cleaner handling during inspection and packaging

For sensitive products, small details during manual handling can affect the final product quality.


3. Dust and Particle Control Becomes More Important

Silicone has a soft and sometimes slightly sticky surface, which can attract dust or small particles during production, trimming, inspection, or packaging.

Clean room production helps reduce this risk through a more controlled environment.

This is especially important for:

  • Transparent silicone parts
  • Medical silicone components
  • Silicone parts with high surface appearance requirements
  • Products packed immediately after molding
  • Products that require low particle contamination

For products with strict appearance standards, clean room production can also help reduce visual defects caused by dust.


4. Molding Process Control Becomes More Consistent

Clean room silicone manufacturing is often used together with LSR injection molding because LSR molding supports a more automated and closed production process.

Compared with manual processes, automated molding can help reduce handling and improve production consistency.

Key process controls may include:

  • Mold temperature control
  • Injection pressure control
  • Curing time control
  • Material mixing ratio control
  • Part removal method
  • Flash control
  • In-process inspection

For precision silicone parts, stable processing is critical for both appearance and function.


5. Packaging Control Becomes More Important

For clean room silicone projects, packaging is not just the final step. It is part of the contamination control process.

Buyers should confirm packaging requirements early, such as:

  • Bulk packaging or individual packaging
  • Inner bag material
  • Sealed packaging requirement
  • Labeling method
  • Lot number display
  • Carton marking
  • Whether secondary packaging is required

If the product is clean-room molded but packed in an uncontrolled environment, the benefit of clean production may be reduced.


6. Batch Traceability Becomes More Detailed

Clean room projects often require better documentation and production records.

Typical traceability information may include:

  • Raw material batch
  • Production date
  • Machine number
  • Mold number
  • Operator or production shift
  • Inspection records
  • Packaging batch
  • Test report reference, if applicable

This is especially important for medical, healthcare, baby, and regulated products.

For international buyers, traceability helps with quality management, customer complaints, and market compliance documentation.


What Clean Room Manufacturing Cannot Replace

Clean room manufacturing is important, but it does not replace product design validation, material testing, or regulatory review.

Buyers should not assume that clean room production automatically means the product is ready for every market.

Clean room manufacturing cannot replace:

  • Product safety design
  • Material compliance testing
  • FDA, LFGB, REACH, or other market-specific testing
  • Medical device registration requirements
  • Biocompatibility testing, if required
  • Finished product performance testing
  • Packaging validation
  • Buyer-side quality approval

For example, a silicone baby product may be produced in a clean environment, but the material, colorant, shape, labeling, and packaging may still need to meet the requirements of the target market.

Clean room production is part of a quality system, not the entire quality system.


Clean Room Needed or Not Always Needed?

The following table can help buyers make an initial decision.

Product SituationClean Room Recommended?Notes
Medical silicone partUsually yesDepends on application and regulatory requirements
Baby teether or pacifier-related componentOften recommendedMaterial and testing requirements should also be confirmed
General silicone kitchen toolNot always requiredFood-grade material and testing may be more important
Silicone pet bowl or pet toyUsually not requiredStandard production with proper QC is often sufficient
Personal care skin-contact productOften recommendedEspecially for sensitive skin or body-contact products
Industrial gasket or sealDepends on applicationClean room may be needed for electronics, medical, or precision assembly
Transparent silicone part with high appearance standardMay be helpfulHelps reduce dust and visible particles
Low-cost promotional silicone itemUsually not requiredCost and application usually do not justify it

The final decision should be based on product use, market requirements, customer expectations, and risk level.


Questions Buyers Should Ask a Clean Room Silicone Supplier

Before starting a clean room silicone manufacturing project, buyers should ask clear questions. This helps avoid misunderstanding during quotation, sampling, and mass production.

Recommended Buyer Checklist

  1. What type of clean production environment is available?
    Ask whether the supplier can support your required production environment and whether a specific clean room class is needed for your project.
  2. Which molding process is recommended?
    Confirm whether LSR injection molding, compression molding, overmolding, or another process is more suitable.
  3. Can the supplier support material documentation?
    Ask for available material information, safety data, and testing support based on your target market.
  4. How are products handled after molding?
    Confirm trimming, inspection, cleaning, and packaging procedures.
  5. Can the products be packed in a controlled area?
    Packaging is important for maintaining product cleanliness.
  6. What batch traceability records are available?
    Confirm whether the supplier can record material batch, production date, machine, mold, and inspection details.
  7. Can the supplier support third-party testing?
    For medical, baby, personal care, or food-contact products, third-party testing may be required.
  8. What information should the buyer provide before quotation?
    A complete RFQ should include product drawings, material requirements, application, target market, expected quantity, packaging method, and testing requirements.

How to Prepare an RFQ for Clean Room Silicone Manufacturing

For a clean room silicone project, a clear RFQ can save time and reduce development risk.

Buyers should prepare the following information:

RFQ ItemWhat to Provide
Product ApplicationMedical, baby care, personal care, industrial, healthcare, etc.
Drawing or 3D File2D drawing, 3D file, or reference sample
Material RequirementSilicone grade, hardness, color, transparency, special resistance
Molding ProcessIf known: LSR injection, compression molding, overmolding, etc.
Clean Room RequirementAny required clean room class or internal quality standard
Target MarketUS, EU, UK, Japan, Australia, or other regions
Testing RequirementFDA, LFGB, REACH, biocompatibility, or other testing needs
Packaging MethodBulk pack, individual bag, sealed pack, retail packaging
Estimated QuantitySampling quantity and mass production forecast
Quality StandardCritical dimensions, appearance requirements, inspection level

If you are not sure whether your product needs clean room production, a professional silicone manufacturer can help evaluate the project based on its use, design, and target market.


Why Work With an Experienced Silicone Manufacturer?

Clean room silicone manufacturing requires more than equipment. It requires engineering support, material understanding, molding experience, quality control, and communication with the buyer from the early development stage.

An experienced silicone manufacturer can help with:

  • Product structure review
  • Material selection
  • Molding process recommendation
  • Mold design support
  • Sample development
  • Clean production planning
  • Quality inspection
  • Batch traceability
  • Packaging customization
  • Testing coordination

For brands developing medical, baby, personal care, or sensitive silicone products, early technical communication can reduce risk before tooling investment.


Conclusion

Clean room silicone manufacturing is not required for every silicone product, but it can be important for products with higher hygiene, safety, appearance, or performance requirements.

For medical silicone parts, baby care products, personal care products, healthcare items, and sensitive industrial components, clean room production helps improve environmental control, reduce contamination risks, and support more consistent quality management.

Before starting a project, buyers should confirm the product application, material requirements, molding process, target market, packaging method, and testing expectations. The earlier these details are discussed, the easier it is to choose the right manufacturing solution.

NEWTOP SILICONE supports custom silicone product development from design review and material selection to tooling, molding, quality control, and packaging. If your project requires clean room silicone manufacturing or a more controlled production process, our team can help evaluate the best solution based on your product requirements.


FAQ

1. What is clean room silicone manufacturing?

Clean room silicone manufacturing means producing silicone products in a controlled environment where dust, particles, handling, access, and packaging are managed more carefully than in a standard workshop. It is often used for medical, baby care, personal care, healthcare, and sensitive silicone products.

2. Do all silicone products need clean room production?

No. Many general silicone products can be produced in a standard workshop with proper quality control. Clean room production is more suitable for products with higher hygiene, safety, skin-contact, medical, or appearance requirements.

3. Is clean room production the same as medical-grade silicone?

No. Clean room production refers to the manufacturing environment, while medical-grade silicone refers to the material and its suitability for medical-related applications. A medical silicone product may require both suitable material and controlled production, depending on its use.

4. Which silicone molding process is best for clean room production?

LSR injection molding is commonly used for clean room silicone manufacturing because it supports a more automated and controlled production process. However, the best process depends on product design, material, tolerance, volume, and application.

5. Can clean room manufacturing guarantee product compliance?

No. Clean room production helps control the manufacturing environment, but it does not replace material testing, product validation, or market-specific compliance requirements. Buyers should confirm required tests based on the target market and product application.

6. What products are commonly made in clean room silicone production?

Common products include medical silicone components, baby care products, personal care products, wearable silicone parts, healthcare items, and precision silicone parts used in sensitive environments.

7. What should buyers provide for a clean room silicone RFQ?

Buyers should provide drawings or samples, product application, material requirements, hardness, color, target market, clean room requirements, testing needs, packaging method, and estimated order quantity.

8. Does clean room silicone manufacturing increase cost?

Usually yes. Clean room production may increase cost because it requires stricter environmental control, handling procedures, packaging control, and quality management. However, for sensitive products, the added control can reduce quality risks and support higher market requirements.

In the competitive world of custom silicone products, having a great concept is only the beginning. Recently, a consumer goods brand approached us with an innovative idea for a silicone product, but they needed a manufacturing partner to bring that concept to life. As a professional OEM/ODM silicone product manufacturer, NEWTOP SILICONE offers a one-stop solution – from design and precision tooling to prototyping, high-quality mass production, and even branding and packaging support. We worked closely with this client through every step of the process, ensuring their idea was realized efficiently and to the highest quality standards.

In this case study, we’ll walk through how we transformed the client’s concept into a production-ready reality. You’ll see how our strengths in precision tooling, rapid prototyping, use of high-quality materials, comprehensive traceability, and strong IP protection contributed to a successful outcome. From initial design collaboration to choosing the optimal molding process, managing quality control, and delivering retail-ready products, each stage highlights our commitment to excellence and customer success.

The Client’s Challenge and Product Concept

For this project, our client was a small but ambitious baby products brand with a big idea: a silicone baby teething toy that was both soothing for infants and stylish for parents to carry. The concept featured a unique shape with gentle textures to massage a baby’s gums – something unlike anything on the market. However, turning this imaginative design into a real product posed several challenges. The brand had never developed a silicone item before, so they were unsure about material requirements, manufacturing methods, and safety standards. They also needed confidence that their idea would remain confidential throughout development – protecting their intellectual property was a top concern.

Right from the start, we assured the client that their concept was in safe hands. NEWTOP’s policy is to uphold strict confidentiality; we routinely sign Non-Disclosure Agreements (NDAs) to guarantee that a client’s custom design will not be revealed to others. This gave our client peace of mind that their innovative teether design would be protected while we worked on it. With trust established, we moved on to understanding their vision and the product requirements. We discussed the intended use (being safely chewed by infants), the desired look and feel, and any regulatory needs (for example, compliance with baby product safety standards). The challenge was clear: we had to engineer a silicone product that was safe, durable, and true to the client’s creative concept – all within a reasonable timeline for their product launch.

Design Refinement and Material Selection

Once the concept was defined, our design and engineering team collaborated with the client to refine the product’s design and select the best materials. Often, a great idea needs some adjustment to be manufacturing-ready, so we provided guidance on design for manufacturability. For example, we analyzed the 3D CAD model of the teether and suggested slight changes like rounding any sharp edges and ensuring consistent wall thickness so the silicone would fill the mold evenly. These tweaks did not alter the look of the toy but would prevent issues later in production. We also confirmed the teether’s dimensions were safe for infants (large enough not to pose a choking hazard, yet easy for small hands to hold).

Material selection was another critical part of this stage. Not all silicones are equal, especially for baby products that go into a child’s mouth. We chose a 100% premium food-grade silicone for this teether – the same caliber of material we use for infant feeding products. This high-quality, platinum-cured silicone is non-toxic and free of harmful chemicals like BPA, PVC, and phthalates, ensuring the final product would be absolutely safe for babies. We source our raw silicone from reputable suppliers and guarantee it meets strict U.S. FDA and European LFGB standards for food contact. By using such high-grade material, we not only ensure safety but also achieve a durable, odorless product that can withstand lots of chewing without degrading. The client also requested a specific color for the teether, so our material lab custom-mixed pigments to perfectly match their brand’s Pantone shade. The color was introduced during material mixing to ensure it was uniform throughout the silicone (not just surface-painted), and every batch of teethers came out in the exact same gentle hue.

By investing time in design refinement and careful material selection upfront, we set a strong foundation for the rest of the project. The client appreciated our expertise in this phase, as we essentially translated their concept into a detailed blueprint ready for tooling and production.

Precision Tooling and Rapid Prototyping

With the design finalized, we moved into tooling – the step of creating the mold that would form the product. Mold fabrication is where precision engineering truly counts, because the quality of the mold determines the quality of every single teether coming off the line. Our in-house tooling workshop uses advanced CNC machining to craft metal molds (typically steel) to exacting specifications. For this project, our engineers built a multi-cavity steel mold, meaning it could produce several teether pieces per molding cycle, which would boost efficiency for mass production. Every detail of the teether’s shape – from the soft ridges to the client’s small logo engraved on the handle – was carefully cut into the mold cavities. We often polish or texture specific areas of a mold as needed; for instance, we gave the handle section a fine matte texture for better grip, while polishing the biting surfaces to a smooth finish. These finishing touches in the tooling ensure that the silicone part will release cleanly and have the desired feel and appearance once molded.

Before committing to full production, we also took advantage of our rapid prototyping capabilities to validate the design. Using a quick prototype mold (a simplified single-cavity version of the tool), we produced a handful of sample teethers in just about a week. This rapid prototype run allowed the client to physically test the product – checking the softness, the feel of the textures, and how baby “test users” responded to the toy – and it gave us a chance to fine-tune any minor details. For example, we discovered that adding one more tiny vent feature in the mold would help the silicone fill an internal pocket more consistently, so we included that change before making the final multi-cavity mold. This prototyping step exemplified our commitment to “get it right” before mass production. It ultimately saved time and cost by avoiding any surprises later. The client was thrilled to see real prototypes of their idea so quickly, and their positive feedback gave the green light to move forward with confidence.

Armed with a precise production mold and a validated design, we were ready to shift gears into manufacturing the teether at scale.

Choosing the Optimal Production Process

Silicone Factory

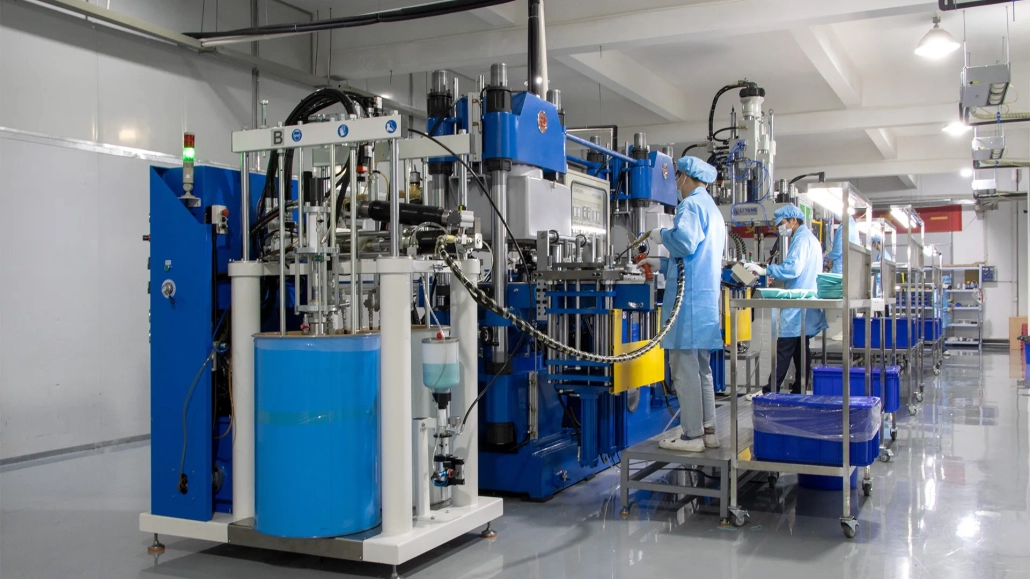
Figure: Inside NEWTOP SILICONE’s factory during production. Our team operates advanced silicone molding machines (in this case, a liquid silicone injection molding setup) in a clean, controlled environment. We use automated processes and strict quality checks to produce each part with precision.

We have a broad suite of silicone molding capabilities – including liquid silicone rubber (LSR) injection molding, compression molding, transfer molding, extrusion, overmolding, multi-shot molding, and even clean-room production for sensitive products. Our approach is to choose the optimal process for each project. In this case, given the teether’s intricate shape and the need for high throughput, we selected LSR injection molding as the ideal manufacturing method. In summary, injection molding of LSR is generally the most efficient way to mass-produce flexible silicone parts with complex shapes and tight tolerances. Compared to compression molding, injection would give us faster cycle times and ensure each teether came out with minimal flash (the thin excess trimming edge) and excellent detail reproduction. Another advantage is cleanliness: our injection process is highly automated and can be performed in a controlled environment, which is important for baby products. In fact, we carried out the molding of this teether in a dust-controlled, ISO Class 8-equivalent clean production area – when molding and post-processing take place in an environmentally controlled clean room, the risk of contamination is minimized and traceability is improved. This extra step was taken to keep quality and hygiene standards extremely high for the infant end-users.

During production, two-part liquid silicone (Part A and Part B with a platinum catalyst) was precision-metered, mixed, and then injected into the heated multi-cavity mold we’d prepared. Each cycle of the machine produced a set of teethers in just a couple of minutes, and our computer-controlled equipment kept the process parameters consistent 24/7. The low-viscosity silicone flowed into every nook of the mold, capturing the toy’s design features perfectly. Thanks to the combination of a high-precision mold and advanced injection machinery, the parts came out virtually identical from cavity to cavity – an important factor when you’re making thousands of units. We had designed the mold with effective venting and gating, so any flash or sprue marks were very minimal and easily trimmed off later in finishing. Our team monitored the first few molding cycles closely and then performed regular in-process checks to ensure everything stayed on track. The benefits of using LSR injection quickly became evident in the efficiency: once the process was dialed in, we could produce a large batch of teethers in a short time, comfortably meeting the client’s volume requirements ahead of their deadline.

(It’s worth noting that if this project had different needs – for example, a very small production run or an extremely simple part – we could have chosen a different method like compression molding. In this case, however, injection molding was clearly the right choice to deliver top quality at scale. We always make such decisions with the client’s goals in mind, leveraging our broad expertise in silicone manufacturing to get the best results.)

Quality Assurance and Custom Packaging

Producing the parts was only part of the journey – we also put strong emphasis on quality assurance and fulfilling the client’s packaging and customization needs. Quality control (QC) was woven throughout our process. During molding, our team conducted routine inspections of the teethers coming off the line, checking dimensions, weight, and appearance to catch any inconsistencies early. Silicone manufacturing can be very reliable once tuned, but we leave nothing to chance: we examine sample pieces from each batch to verify that the softness (durometer) and all details meet the specifications. Because of our precise mold and stable process, the defect/reject rate was extremely low – nearly every piece met our strict quality standards without any rework needed.

After molding, any tiny bits of flash or vestiges from the gating were carefully trimmed so that each teether had smooth, baby-safe edges. We then gave the products a gentle post-cure bake in an oven to ensure they were fully vulcanized (cured) and to eliminate any trace of residual substances (a common practice for high-purity silicone parts intended for food or baby use). Once the teethers cooled, they went through a final cleaning step. In our clean packaging area, each item was given a quick wash/wipe with a food-safe sanitizer and fully dried, then sealed in an individual polybag to keep it hygienic and dust-free.

A key part of our quality system is traceability. Every production run and material lot is documented and tracked from raw material to finished product. In fact, each box leaving our factory is recorded and labeled as part of our quality system, so we maintain full traceability – from the silicone material batch to the finished packaged product – which is important for accountability and continuous improvement. This means if there were ever any issue or question, we could trace exactly which batch of silicone and which molding run a particular teether came from – an important factor for safety and for our client’s peace of mind.

With the teethers manufactured and inspected, we turned to packaging and branding. The client wanted the product to be retail-ready straight from the factory, which is something we routinely support. Our team developed custom packaging that reflected the brand’s playful, modern aesthetic. We designed a colorful backing card with the brand’s logo and all the necessary product information (material, care instructions, safety warnings), and this card was used in a clear blister pack to hold the teether – perfect for store displays. We handled printing these cards and assembling each teether into its blister package, meaning the client received fully finished units ready for sale. (For other projects, we can just as easily provide branded boxes, inserts, or any style of packaging that suits the client’s needs.) We even applied barcodes and any required labels to each package to meet retail and regulatory requirements, simplifying our client’s logistics.

Additionally, the client’s logo was subtly molded into the product itself. As mentioned earlier, we had engraved their logo into the steel mold, which produced a small embossed logo on each teether. This permanent, hygienic branding meant there was no need for secondary printing on the silicone – the brand mark is part of the product and will never wear off. This kind of built-in customization is a benefit of working with an OEM manufacturer like us, and it gave the product a nice professional touch that the client loved.

By the end of this stage, the silicone teethers were not only high-quality and safe, but also beautifully packaged and branded. We had essentially delivered a turnkey solution: the product went from concept to mass-produced, retail-ready goods without the client having to juggle multiple suppliers or processes on their own.

Outcome: From Concept to Mass Production Success

In the end, the project was a resounding success. What started as a sketch of an idea in the client’s mind became a tangible, sellable silicone product in a matter of months. After final approvals, we ramped up to full-scale manufacturing smoothly. Thanks to our efficient processes and upfront planning, we were able to deliver the first mass-production batch (several thousand units) on schedule, aligning perfectly with the client’s launch timeline. The finished teethers looked and felt exactly as the client had imagined – in fact, our client noted that the quality surpassed their expectations, with the products feeling premium and consistent across the entire order.

The client was particularly pleased with how hassle-free the experience was. By partnering with a one-stop manufacturer like NEWTOP, they avoided the typical pitfalls of coordinating multiple vendors. Our integrated approach – covering design, tooling, production, and packaging – meant the client could focus on marketing and selling their new product while we handled the technical execution. They also valued the peace of mind from our rigorous quality control and IP protection. Knowing that every teether was made from certified-safe materials, in a clean process, and that each shipment could be traced in our records gave them great confidence as they introduced the product to the baby goods market.

Finally, the market response to the silicone teether has been very positive. Retailers and parents alike have praised the design and quality. For us at NEWTOP, seeing another client’s concept successfully come to life is exactly what our business is about. We take pride in helping brands large and small realize their product ideas through our expertise in silicone manufacturing. This case reinforced how crucial it is to combine creative innovation with solid engineering and manufacturing know-how. Our complete silicone product development capabilities allow us to do just that – we use our professional knowledge and technology to turn client ideas into reality and help bring products to market quickly and cost-effectively. By leveraging precision tooling, high-end materials, and close collaboration at every step, we helped transform a creative concept into a production-ready product that is now delighting customers – and we stand ready to do the same for many more innovators to come.

Silicone sex toys are prized for their safety, durability, and premium feel – but achieving consistent quality in manufacturing is crucial for brand reputation and product performance. Sourcing managers, product developers, and private-label buyers must be aware of common molding defects that can occur during silicone molding. The most frequent issues are flash, sink marks, and bubbles. Below, we explain what each defect is, why it matters for your product’s quality and usability, the technical root causes in molding, and practical methods to prevent and detect these defects before products reach customers.

Flash: Excess Material at Parting Lines

An injection-molded part exhibiting flash (thin excess silicone along the edges and seam).

What It Is: Flash is a thin flange or film of extra material that appears on the edges of a molded part, typically along the mold’s parting line or around ejector pin locations. In silicone molding, flash occurs when liquid silicone rubber seeps into small gaps between mold halves or components, curing as an unwanted extension of the part. Even minimal flash can create problems – it can make a product feel sharp or uncomfortable, impede the part’s fit in assemblies, or simply look sloppy. In high-end or intimate consumer products like sex toys, any visible burr or seam is seen as poor quality and can irritate the user, undermining the brand’s premium image.

Root Causes: Flash is often a sign that something in the mold or process is out of spec. Common causes include:

  • Mold Misalignment or Wear: If the two halves of the mold (or any inserts) are not perfectly aligned or have worn parting surfaces, gaps allow silicone to escape and form flash. Even microscopic gaps can be filled by low-viscosity liquid silicone under pressure.

  • Insufficient Clamping Force: If the molding machine doesn’t apply enough clamp tonnage to hold the mold tightly closed, internal pressure can force material out between the mold plates. Conversely, damaged or dirty mold surfaces can prevent full closure.

  • Overfilling or High Injection Pressure: Excessively high injection pressure or injecting too much material can push silicone into vent holes or parting lines, causing flash fins. High mold temperatures (in silicone vulcanization) or thermal expansion can also contribute by widening gaps.

  • Poor Venting of Air: Inadequate venting can cause air to compress in the cavity; this trapped gas seeks an escape path and may force the uncured silicone out at the parting line, leading to flash.

Prevention and QC: Eliminating flash starts with good design and vigilant process control. Key prevention measures include:

  • Precision Mold Design & Maintenance: Ensure mold halves mate with tight tolerances and flat parting surfaces. High-precision tooling prevents gaps where silicone could leak. Regularly inspect and refurbish molds – repairing any worn edges or damage on the parting line – to maintain a perfect seal.

  • Optimize Clamping and Pressure: Set adequate clamping force to keep the mold tightly shut during injection. Avoid excessive injection pressure that could overpack the cavity – the injection process should be tuned not to overwhelm the mold’s sealing capability. If flash is observed, the manufacturer can adjust process parameters (injection speed, pressure, and cure temperature) to reduce material seepage.

  • Improve Venting and Parting Line Placement: Design the mold with proper vent channels at the cavity edges to allow air to escape in a controlled way (reducing pressure that can force silicone out). Place parting lines in less visible and low-stress areas of the product so that if a small flash does occur it is less noticeable. Fine-tuning vent size is also important – vents must be small enough that silicone cannot easily flow through, but sufficient to relieve air.

  • Material Selection and Mixing: Using an appropriate silicone material can help. Some silicone formulations have slightly higher viscosity or cure characteristics that are less prone to flashing. However, any material should be properly mixed and deaerated; fillers or inconsistent mix ratios can affect viscosity (and thus flash behavior).

  • Quality Control & Deflashing: Despite best efforts, tiny flash burrs can sometimes occur. Manufacturers should have a real-time quality inspection routine to catch flash early. Common practices include in-process visual inspection of each part as it’s demolded and periodic dimensional checks of flash-critical areas. If flash is present, parts can undergo deflashing processes before shipment – this may involve manually trimming the flash with a knife, tumbling parts to knock off flash, or cryogenic deflashing (freezing and blasting off the flash) for high volumes. These secondary operations add cost and time, so the goal is to minimize flash upfront. Ultimately, a flash-free part not only looks and feels higher quality, it also spares your brand from delivering products with sharp edges or visible defects.

Sink Marks: Surface Depressions from Shrinkage

A molded part showing a visible sink mark (surface depression) due to shrinkage in a thick section.

What It Is: Sink marks are small indentations or dimples on the surface of a molded silicone part where the material has shrunken inward. They often appear as a slightly sunken, smooth depression in an area that’s supposed to be flat or convex. In injection molding, sink marks happen when the interior of a thick section cools and contracts, pulling the outer surface inward before it fully solidifies. For silicone sex toys, which may have varying thickness (for example, a thick base or sculpted features), a sink mark can mar the smooth appearance and texture. While usually cosmetic, sink marks signal suboptimal molding and can severely affect the perceived quality. Notably, these defects cannot be simply polished away – on soft silicone, a sink area might also create a spot that’s less firm. If numerous or pronounced sink marks are present, end users will perceive the product as poorly made, hurting the brand image. In some cases, a sink mark correlates with internal voids that could impact structural integrity or hygiene (an internal void might not be sealed, potentially trapping liquids).

Root Causes: The primary cause of sink marks is uneven cooling and curing of the silicone, especially in thick sections of a part. Key factors include:

  • Thick Wall Sections: Areas of the part with greater thickness cool and cure more slowly than thin areas. The silicone in the thick section continues to cure and shrink after the surface has solidified, causing an inward pull that creates a shallow “pocket” on the surface. (If the surface is rigid enough not to deform, the shrinkage may instead cause an internal void – a related defect known as a vacuum void.) Features like heavy solid bases, reinforced areas, or poorly designed ribs can all lead to sink marks.

  • Insufficient Packing/Hold Pressure: In injection molding, after the cavity is filled, a hold pressure is typically applied to pack additional material and compensate for shrinkage. If the hold (packing) pressure or time is inadequate, the material in thick sections doesn’t get enough additional silicone to fully compensate shrinkage, resulting in a surface depression. In silicone molding, which is a thermoset process, packing must be done before the silicone cures. An insufficient feed of material during curing will leave shrinkage voids or sinks.

  • Poor Cooling Control: Uneven cooling rates across the part contribute to sink marks. If the mold temperature isn’t uniform or cooling time is too short, some areas remain hotter (and shrink more) while others have solidified. This differential cooling/shrinkage causes surface irregularities.

  • Gate Location and Flow: If the injection gate (the entry point of material into the cavity) is positioned such that thick sections are last to fill or far from the gate, those areas may not pack properly. A gate located away from a thick boss or base means that by the time silicone reaches that section, pressure may drop and less material is available to pack it out, increasing sink mark risk. Similarly, if flow into a section is restricted (narrow paths leading to a thick area), that section might not fill and pack optimally, leaving voids or sinks.

  • Material Shrink Characteristics: Different silicone formulations have different shrink rates after curing. Most platinum-cure silicone rubbers have relatively low shrink (often 1-3%), but certain formulations or additives could increase shrinkage. If a silicone has a higher shrink factor, thick sections will be more prone to sink unless compensated.

Prevention and QC: To prevent sink marks, the strategy starts at the design phase and continues through molding process adjustments:

  • Uniform Wall Thickness Design: Design products with consistent wall thickness wherever possible to avoid isolated thick areas. If thick sections are needed for functionality, consider coring them out or using lattice structures internally to reduce the bulk volume of silicone. Keep thickness transitions gradual – avoid abrupt changes from thick to thin which can cause differential cooling.

  • Optimal Gate Placement and Part Design: Position injection gates near thick sections or design multiple gates for large parts so that thick areas fill and pack with sufficient material. Use simulation or mold flow analysis to check that no area is starved of pressure during packing. Additionally, add features like ribs or fillets to redistribute material; for instance, instead of one thick block of silicone, a cross-section can be redesigned with supportive ribs that maintain shape but reduce the likelihood of a sink mark by eliminating a mass of material.

  • Controlled Cooling and Cure: Ensure even mold temperature and sufficient curing time for thick sections. In LSR injection molding, mold temperature is usually high to vulcanize silicone, but using cooling lines or thermal analysis to balance temperature can help. A balanced cure means the outside and inside of a thick part solidify more simultaneously, reducing sinks. Slower, more uniform cooling (or post-curing in the mold for an extra moment) can allow the outer skin to stay plastic long enough to be supported as the inside shrinks.

  • Adequate Packing Material: Work with the molder to adjust process parameters like injection hold pressure or hold time. For example, slightly increasing hold pressure or extending the hold duration (before silicone fully cures) will push additional material into the cavity to compensate for shrinkage. However, this must be done before cross-linking makes the silicone solid. Some advanced LSR molding machines use dynamic feed systems to inject a bit more silicone as curing happens, to counteract shrink.

  • Material Choice: If sink marks persist, consider the silicone compound. Some specialty silicone materials or additives cure with lower shrinkage. Working with your silicone supplier to choose a grade known for dimensional stability can be beneficial for thick parts.

  • Quality Inspection: Sink marks are primarily detected by visual inspection. QC inspectors should view each part under proper lighting and from multiple angles to catch any surface depressions. For critical dimensions, a comparator or a depth gauge can quantify the sink (e.g. measuring the depth of a dimple). Generally, any noticeable sink mark on a cosmetic or functional surface would be classified as a defect for a consumer product. As a rule, parts with obvious sink marks should be rejected or reworked. Keep in mind that what might seem like a minor cosmetic dent can strongly influence customer perception – consumers equate a smooth, uniform surface with quality, and sinks with cheap manufacturing. By holding your silicone OEM supplier to strict cosmetic standards and requiring them to implement design reviews and process controls, you can ensure sink marks are minimized or eliminated before products ship.

Bubbles and Voids: Trapped Air Pockets in Silicone

Clear molded silicone showing multiple air bubbles trapped inside the material (an unacceptable defect in quality production).

What It Is: Bubbles (air bubbles or voids) are pockets of air or gas encapsulated in the molded silicone. They may appear as internal voids (trapped air inside the part, sometimes visible through translucent silicone) or as surface bubbles (a blister or hole on the surface). In either case, a bubble indicates that part of the cavity did not fill with solid material – air occupied that space. For silicone sex toys, bubbles are particularly problematic: a bubble on the surface can create an opening where fluids or bacteria collect, and internal voids can weaken the product’s structure. Visually, bubbles give the product an irregular, flawed appearance (imagine a clear or colored silicone toy with an unsightly air pocket inside). Functionally, bubbles can cause localized weak points that may tear under stress. Manufacturers and quality inspectors typically consider any visible bubble or void as a defect beyond minor levels. If numerous or large voids are present, the part can be rendered completely unacceptable, since there’s air where solid silicone should be, compromising durability and even waterproof performance in some designs.

Root Causes: Air bubbles and voids result from air or gas being trapped in the silicone or mold during the molding process. Several technical factors contribute:

  • Air Entrapment in the Mold Cavity: The most direct cause is air not escaping from the mold as silicone fills it. If the mold design lacks sufficient vents at the end of fill or in complex areas, the incoming silicone can trap air pockets in corners or thick sections. The air that should have been vented gets compressed and forms a bubble. This is especially common if the flow of material converges from multiple directions, potentially encircling a pocket of air (known as a gas trap).

  • High Injection Speed or Turbulent Flow: Pumping silicone into the mold too quickly can create turbulence, mixing air into the material flow. Unlike thermoplastics, liquid silicone is injected relatively slowly, but if the injection rate is excessive or the gating causes jetting, air can be encapsulated as the streams of silicone meet. Essentially, an extreme injection speed or poor flow can stir air into the cavity instead of pushing it out the vents.

  • Improper Mixing or Degassing of Silicone: Liquid silicone rubber is typically a two-part mixture (Part A and B plus any pigments) that is mixed just prior to injection. If the mixing process introduces air – for example, inadequate vacuum degassing of the mixed silicone – those air bubbles can carry into the mold. Also, if the components are not mixed homogeneously, pockets of air or volatile components might form bubbles during curing. For hand-poured silicone processes (used by some small-scale sex toy makers), failing to degas the silicone in a vacuum chamber before pouring will almost guarantee bubbles in the cured part.

  • Moisture or Volatiles in Material: In some cases, moisture in raw materials or additives can vaporize when the silicone is heated, creating gas bubbles. (This is more of an issue in thermoplastic molding, but even LSR can trap moisture in fillers or colorants.) Any gas generation inside the cavity, if not vented, will form a void.

  • High Viscosity Material: A very high-viscosity silicone (a thicker formulation) can be more prone to trapping air because it doesn’t flow easily around air pockets. The air cannot bubble out on its own if the silicone is too thick. Similarly, if the silicone begins curing too quickly (increasing viscosity rapidly upon entering the hot mold), it may “freeze” before all air can escape. This is why process timing is critical – if parts cure before fully venting, bubbles get locked in.

Prevention and QC: Preventing bubbles and voids requires careful attention to mold design, material handling, and processing parameters:

  • Mold Venting Design: Incorporate adequate vents at the furthest points of flow and along parting lines to give air a escape route. Vents in silicone molds are often very thin (to avoid flash) but must be placed strategically. Proper venting will bleed air out as silicone fills the cavity, reducing the likelihood of entrapment. Additionally, some molds include vacuum ports or extra ejector pins that act as vents in tricky areas.

  • Vacuum-Assisted Molding: Many silicone OEM manufacturers use vacuum molding techniques for complex or air-sensitive parts. Vacuum molding involves evacuating air from the mold just before or during injection. Vacuum assist can virtually eliminate air bubbles by removing air from the cavity so that silicone fills every void. If your product has zero-tolerance for internal voids (as is often the case for medical or food-grade silicone products), ensuring the supplier has vacuum molding capability is crucial.

  • Thorough Material Mixing and Degassing: Ensuring that the silicone mix is free of air before it goes into the mold is a fundamental step. Manufacturers should mix LSR components in a way that minimizes air inclusion (e.g. using static mixers and proper ratios) and use vacuum degassing on the mixed material or in the injection chamber. Proper mixing reduces introduced air pockets in the material itself. For instance, if pigments are added, the mixing process should include a vacuum cycle to pull out any entrained air.

  • Controlled Injection Parameters: Slower, steadier injection of silicone can help because it gives air time to move ahead of the flow front and out vents. Using a moderate injection speed and pressure avoids excessive turbulence that traps air. Some advanced LSR machines have programmable injection profiles to ramp speed up or down at certain points, helping to sweep air out. Additionally, ensuring the mold isn’t over-filled (which can compress air) is important – the shot size should be just right to fill the part and feed shrinkage without leaving extra that could trap air.

  • Material and Cure Optimization: If bubbles persist, consider the silicone formulation. Sometimes a lower viscosity silicone or one with a longer pot life will flow better and release air more easily. Similarly, cure time can be adjusted: a slightly longer cure can allow air to escape before the silicone solidifies. However, be cautious – using too low viscosity or too long a cure time can have other trade-offs. The manufacturer’s material experts can recommend a grade of silicone less prone to voids.

  • Quality Control Checks: Detecting bubbles may be straightforward if the part is translucent or transparent – QC can visually inspect for any air pockets inside. For opaque or colored silicone, inspection might involve feeling for soft spots or using strong backlighting or even x-ray/CT for critical parts (in high-end manufacturing). Final QC should classify any part with a surface-breaking bubble or noticeable internal void as defective. Minor bubbles below a certain size might be allowed if they do not affect function or appearance (this threshold should be defined in your quality standard). Additionally, some brands perform a stress test or squeeze test on each part to ensure no hidden voids cause collapse. By working closely with your supplier’s quality team, you can set clear acceptance criteria: for example, “no bubbles larger than X mm, and none on critical surfaces.” Remember that air bubbles not only weaken the part but also signal a process issue, so a proactive supplier will investigate and correct the cause rather than simply sorting out bad parts. Maintaining strict QC for bubbles ensures that only fully solid, reliable silicone products represent your brand.

Conclusion: Ensuring Defect-Free Silicone Products

Maintaining high quality in silicone sex toy manufacturing is essential for user safety, product performance, and brand reputation. Defects like flash, sink marks, and bubbles can downgrade a premium product to an unacceptable one. Fortunately, these molding defects are predictable and preventable with the right approach. By focusing on robust mold design, optimized molding processes, and thorough quality control, manufacturers can largely avoid these issues. Sourcing managers and product developers should collaborate closely with their OEM manufacturers on Design for Manufacturability (DfM) reviews and insist on proactive measures for defect prevention. This includes reviewing mold designs for proper venting and alignment, setting clear quality standards for surface finish and appearance, and perhaps even auditing the producer’s process controls and inspection routines.

From a business perspective, delivering silicone products free of flash, sink marks, and bubbles not only reduces scrap and rework costs, but also strengthens the end customer’s trust in the product. A vibrator or silicone toy that arrives with a rough seam or a visible air pocket could lead to customer complaints or returns – outcomes that erode profit margins and brand equity. On the other hand, a smooth, flawless silicone finish conveys excellence. By implementing the prevention methods outlined above and catching any defects before shipment through rigorous QC, companies can ensure their silicone products meet the highest standards. In the competitive market of adult products, quality differentiation is key – and zero-defect molding is a concrete way to achieve it, protecting both your customers and your brand’s reputation.

Silicone is prized for its softness, flexibility and durability, but these qualities depend on mechanical performance. In silicone products, tensile, tear and elongation properties directly affect safety, longevity and user comfort. For example, a poorly formulated silicone can tear unexpectedly during use, creating safety hazards (even “catastrophic consequences” in critical devices). Conversely, a high-quality silicone will stretch and rebound reliably, giving users a pleasant feel and extending product life. By testing silicone’s mechanical properties, engineers and buyers ensure the material meets design requirements. Indeed, designers aiming for “more durable, long-lasting products” rely on knowing silicone’s properties. In short, mechanical testing isn’t just a specification sheet – it’s a proxy for how the part will perform in the real world (safety, comfort and durability for the user).

Mechanical performance also underpins user experience. For example, soft-touch silicone grips are more comfortable and slip-resistant than hard plastic, but the manufacturer must verify that the softer material still has enough tear and tensile strength not to deform or fail under stress. Similarly, silicone used on overmolded buttons or handles should maintain its shape and grip through thousands of cycles. In demanding environments (temperature swings, UV, moisture), silicone’s innate resistance helps parts last longer, but mechanical tests confirm that durability. Overall, requesting and understanding silicone test data ensures the part will be safe (no unexpected rips), durable (meets lifetime expectations) and user-friendly (comfortable, reliable feel).

Key Mechanical Properties of Silicone

Silicone elastomers are characterized by three core properties: tensile strength, elongation at break, and tear strength. Understanding these terms is vital:

  • Tensile Strength: The maximum stress (force per area) that silicone can withstand when stretched before breaking. In an ASTM D412 tensile test, the sample is pulled until rupture. Tensile strength (often in MPa or psi) is the ultimate stress at failure. It indicates how strong the material is under pull. (A high tensile strength means the silicone resists breaking under load; lower values mean it breaks more easily when stretched.)

  • Elongation at Break: The strain or percent stretch of the silicone when it breaks. Also measured by ASTM D412, ultimate elongation is the % increase in length at rupture. Silicones typically have very high elongation (hundreds of percent) compared to plastics. For example, a silicone rated 500% elongation can stretch to 5× its original length before breaking. High elongation means the part can deform a lot, which is desirable in flexible parts (like sleeves or suction cups). Low elongation means it breaks sooner and is stiffer.

  • Tear Strength: The resistance to tear propagation. In practice, a pre-cut sample (like a notched or trouser-shaped specimen) is pulled until a tear runs through it. Tear strength is reported as force per thickness (usually N/mm or kN/m). Conceptually, tear strength is the force needed to continue ripping an existing cut under tension. This matters if your silicone part can be nicked or has thin sections; a higher tear strength means small cuts won’t grow easily. (In other words, a low-tear silicone might tear completely from a small nick.)

These three properties are related but distinct. A silicone with high tensile strength may still tear easily if its tear strength is low. Elongation tells you how stretchy it is (often important for user feel). All three are critical for reliability. For context, Wacker Chemie reports typical silicone ranges of roughly 5–11 MPa tensile and 100–1100% elongation, with tear strength around 5–55 N/mm (depending on grade). Specialty high-strength silicones can reach ~10–14 MPa and 30–55 N/mm tear, whereas very soft grades might be near the low end.

Standard Test Methods (ASTM D412, D624)

To measure these properties objectively, the industry uses standard tests. The most common are ASTM D412 for tensile/elongation and ASTM D624 for tear. Both use a universal tensile tester (often called an Instron).

  • ASTM D412 Tensile Test: A rectangular or “dumbbell” specimen of the silicone is gripped and pulled at a constant speed (typically ~500 mm/min) until it breaks. During the test, the machine records the stress–strain behavior. The key results are tensile strength (the peak stress) and ultimate elongation (percent strain at break). (Tests may also report modulus at 100%, 300% elongation, or tensile set, but for general use tensile strength and elongation at break are most important.) ASTM D412 essentially tells you how much force the material will take and how far it will stretch before snapping.

  • ASTM D624 Tear Test: A notched piece of silicone (e.g. a crescent or “trouser” shaped specimen) is pulled apart in the tester. ASTM D624 defines several tear geometries (Type A, B, C, etc.), but a common one is a crescent cut (Die B) or trouser tear (Type T). The test records the force as the specimen tears. Tear strength is then calculated as the force per unit thickness of the sample. In other words, how much force is needed (per mm of thickness) to propagate the tear. This normalizes for sample thickness so that values (in kN/m or N/mm) are comparable. A higher result means the silicone resists tearing better. (Per ASTM D624, the tear strength is usually given in N/mm or kN/m, sometimes lbf/in.)

These tests follow strict procedures (standard specimen shape, size, speed, temperature) so results are comparable across labs. When you review a report, ensure the report cites “ASTM D412” or “ASTM D624” and notes the specimen type. For example, a lab sheet might list “Tensile Strength (ASTM D412, die C): 9.5 MPa; Elongation at break: 450%; Tear Strength (ASTM D624, die B): 28 N/mm.” These standardized numbers let you compare between materials and target values.

Interpreting Test Results: Typical Ranges

When you get test data for a silicone grade, how do you know if it’s good? First, know rough benchmarks. As one technical reference notes, general-purpose silicone rubbers usually test in the ballpark of 5–12 MPa tensile and 100–1,100% elongation. Tear strength (D624) often runs 5–55 N/mm, though most consumer-grade silicones fall mid-range. For example:

  • Tensile strength: Many soft to mid-grade silicones yield ~6–8 MPa (≈900–1200 psi). The FDA-approvals spec sheet for silicone sheet rubber (40–70 Shore A) shows tensile min of 950–1100 psi (≈6.5–7.6 MPa). High-performance high-strength silicones can reach 10–14 MPa.

  • Elongation at break: Soft silicones can stretch 500–800% easily. The FDA sheet lists 200–400% min for Shore 40–70A. Many formulations exceed 600–1000% for very soft grades. High-strength types often trade some stretch for strength, e.g. ~400–700%.

  • Tear strength: Typical silicones often fall in the 10–30 N/mm range. The FDA sheet’s Die C values (~90–100 ppi) correspond to roughly 15–18 N/mm. Reinforced or high-strength rubbers can reach 30–50 N/mm or more (for context, specialty RTV silicones for molds are rated ~20–50 N/mm).

In practice, “good” values depend on application: a heavy-duty silicone gasket might warrant 8–10 MPa tensile, whereas a purely soft-touch grip could manage at 4–6 MPa if it deforms elastically enough. Always compare reported values against benchmarks or similar approved materials. For instance, if a supplier claims >15 MPa tensile but gives low elongation (~100%), it may be too brittle for a stretchable part. Conversely, a silicone rated 1000% elongation but only 3 MPa tensile might work for benign flex parts but not for load-bearing plugs or rings.

Factors Influencing Mechanical Performance

Silicone test results are affected by formulation and processing. Key factors include:

  • Shore Hardness: Hardness correlates strongly with strength and stretch. Softer silicones (e.g. Shore A 10–30) typically have lower tensile strength but higher elongation. Harder silicones (A 50–90) often have higher modulus but may exhibit lower elongation and, in some formulations, even slightly reduced tensile strength. (Increased hardness usually comes from more filler or crosslinks, which can embrittle the rubber if overdone.) In summary: as hardness rises, expect tensile and tear to rise up to a point, but elongation to fall. Always check the combined profile: a 70A silicone may achieve 9 MPa/300% while a 30A type might be 4 MPa/800%.

  • Cure System: Platinum-cure and peroxide-cure are common. Platinum-cured silicones generally yield higher tensile and elongation than peroxide-cured equivalents. (Platinum cures tend to give clearer, higher-purity elastomers with better mechanicals.) For example, one source notes platinum grades often have “better elongation, tensile, and tear strength compared to peroxide-cured” materials. However, peroxide-cured silicones may be more economical. Buyers should note which cure is used—platinum-curing is preferred in medical/adult goods for purity and strength.

  • Fillers and Additives: Most silicone rubbers include reinforcing fillers (like fumed silica) to boost strength and tear resistance. Added silica typically increases tensile and tear strength, because the filler particles reinforce the polymer network. By contrast, adding too much silicone oil or plasticizer can soften the rubber—improving flexibility and cold temperature performance, but usually at the cost of lower tensile/tear. (Interestingly, some plasticizers can improve tear by making the rubber more extensible, but generally high filler = stronger rubber, while high plasticizer = weaker but softer rubber.) Pigments, cure inhibitors or other additives may also slightly shift values; always compare tested samples to the exact material you plan to use.

  • Part and Specimen Geometry: Test specimens are standardized, but real parts aren’t. In tests (ASTM D624), tear strength is force normalized by thickness. In the field, thin sections and sharp corners concentrate stress and make failures easier. For example, a 2 mm wall might tear under a small nick even if a 5 mm test sample is fine. Similarly, if a component has highly non-uniform thickness or intaglio features, real-life tear resistance can differ. Designers should avoid knife-edges or sudden transitions in silicone parts. Also note that test speed and temperature affect results: faster pull rates or extreme temperatures usually change the measured values. (ASTM standards assume ~23 °C and specified speed.)

In summary, softer, less filled, platinum-cured silicone generally yields very high elongation; harder, highly filled rubber yields higher tensile/tear but less stretch. When comparing data, always consider hardness and formulation.

Guidance for Buyers: Using Test Data

When specifying or procuring silicone parts, insist on up-to-date mechanical test reports. Here are practical tips:

  • Request Specific Test Reports: Always ask your supplier for ASTM D412 and D624 test results on the actual material grade you’re ordering. Generic data sheets are useful, but a lab report (with date, specimen type and conditions) is more reliable. The report should state the test standard (e.g. “ASTM D412, Die C dogbone” and “ASTM D624, Die B crescent tear”).

  • Read the Lab Data Carefully: Look at both the average and the minimum (if provided). Test reports often list “Tensile Strength: X MPa; Elongation: Y%; Tear: Z N/mm”. Make sure units are correct (MPa vs psi, N/mm vs kN/m) and specimen thickness is noted. Watch for “Die C vs Die B” designations (Die C is common for tensile, Die B for tear). If multiple values (like 100%, 300% modulus), focus on ultimate tensile and elongation at break for bulk performance.

  • Compare to Benchmarks: Relate the values to known targets. For example, a silicone sleeve on an adult toy might need elongation ≥300% and tear ≥20 N/mm. (By comparison, high-tear silicones for mold-making are ~20–50 N/mm.) A moderate-use gasket or ring might require only ~8 MPa tensile and ~200% elongation. If a report shows tensile of only 3 MPa, that material is very soft – possibly unsuitable for any load-bearing part. Conversely, a silicone spec’d 400% elongation but with just 2 MPa tensile is likely a very low durometer (≈10A) product – fine for plush cushions, but not for structural components.

  • Consider the Application: Tailor thresholds to the product’s demands. For stretchable toys or sleeves, prioritize high elongation and good tear. E.g., a high-grade TPE (thermoplastic elastomer) or silicone intended for extreme flex might specify ≥300–500% elongation and ≥20 N/mm tear. For grips and suction bases, elongation is crucial (to form suction) – look for ≥200–300%. For rings or plungers that must bear tension, emphasize tensile strength (≥6–8 MPa) and moderate hardness (e.g. Shore 40–60A). Soft, stationary parts (like decorative toys) might only need ~5–6 MPa and ~150% stretch.

  • Ask About Safety Tests: In adult or consumer goods, silicone often needs to meet FDA/medical standards (bioresistance, no harmful additives). Mechanical tests may also be part of regulatory checks (e.g. ASTM D412 results for a medical silicone). Ensure that required biocompatibility or food-grade certificates accompany the mechanical data if needed.

  • Lab Accreditation: When possible, use ISO/IEC 17025 accredited labs or trusted test houses. DIY in-house tests can help screen batches, but final procurement specs should cite a reputable lab’s report for traceability.

By following these guidelines, buyers can vet silicone materials effectively. Remember: numbers don’t lie. If a report says tensile = 10 MPa for a Shore 30A rubber, that’s unusually high and worth double-checking. If a soft gel is rated only 50% elongation, it will feel hard and break easily. Use data, combined with material knowledge, to select the right grade.

Summary: Matching Tests to Applications

Property ↓ / Use Case →Soft Stretchy ToysRigid Rings/SealsSuction Cups/BasesSleeves/High-Stretch Parts
Tear StrengthHigh importance: needs resistance to edge-tears. Typically ≥15–30 N/mm (≥1500–3000 N/m) is desired for durable stretchable parts.Moderate: Some resistance needed but tension load is key. E.g. ≥10 N/mm usually suffices.Moderate: Edges see suction force; look for ~10–20 N/mm.High: Similar to soft toys – must survive large stretches. Aim ≥20 N/mm.
Tensile StrengthModerate: Unlikely to see heavy loads, but enough strength (~4–6 MPa) prevents splits.High: Often structural. Look for ≥6–8 MPa or higher for longevity.Low/Mod.: Not heavily loaded once suckered; 4–6 MPa is usually OK.Moderate: Needs body support but also stretch; typically 5–8 MPa.
Elongation at BreakHigh: Key for stretchiness. Typically ≥300–500% for a very stretchy feel.Low/Moderate: Rings may flex a bit; ≥150–300% often enough. Too much stretch means it won’t hold shape.High: Must deform fully to form suction. Ideally ≥300% for reliable suction.Highest: Must accommodate extreme stretch. Usually ≥400–600% needed for safety.

Note: These are illustrative guidelines. Always verify with test data and consider the product’s specific design. In general, stretchy consumer products benefit from very high elongation and strong tear resistance, whereas load-bearing or sealing parts emphasize tensile strength. For example, elastomers used in high-performance molds often have tear >30 N/mm, so domestic products with less demanding use can often accept lower (but still robust) values.

Overall, by focusing on the right test (tear vs tensile vs elongation) for each part’s function, and ensuring values meet thresholds similar to industry standards, engineers and buyers can select silicone materials that satisfy safety and performance goals.

Quality Control (QC) is critical for silicone adult products because these intimate, skin-contact items must be safe, reliable, and consistent. As one manufacturer notes, “QC can make or break your product line”. Every sex toy is a touchpoint with the consumer – defects or toxic residues can damage your brand and, more importantly, harm users. Rigorous QC ensures each unit meets specifications (size, hardness, finish), is free of harmful chemicals, and feels exactly as intended. High-quality silicone (often platinum-cured “food grade” silicone) is non-porous and hypoallergenic, but even premium materials require strict oversight through production. A robust QC SOP – with checkpoints from raw silicone to final packaging – protects users and preserves brand reputation.

In practice, good QC means multiple inspection stages, clear defect criteria, and documented tests at each step. A supplier following ISO 9001 or similar standards will verify incoming materials, monitor in-process parts, perform final inspections, and do a pre-shipment audit (PSI). Commonly, an AQL (Acceptable Quality Level) sampling plan is used for final lots. For instance, buyers often set Critical defects = 0, Major ≈2.5% AQL, Minor ≈4.0% AQL. Let’s break down each QC stage and list the key checks and tests.

1. Incoming Material Inspection (IMI)

  • Certifications & Documentation: Verify each silicone batch comes with a Certificate of Analysis (COA) and MSDS. Check FDA 21 CFR 177.2600 or USP Class VI compliance (body/food-grade), REACH/RoHS status, and, if relevant, ISO 10993 bio-compatibility test reports. Keep lot numbers traceable.

  • Visual and Physical Checks: Inspect raw materials on arrival. Confirm color and viscosity match the specification (no discoloration or premature curing). Look for foreign debris or unmixed particles. Ensure packaging is intact and labeled (batch, color code, date).

  • Odor Test: Sniff the material; any strong chemical smell indicates curing issues or contamination. A slight silicone odor is normal, but foul or solvent smells are a red flag.

  • Hardness/Viscosity Spot Test: Optionally, mold or cure a small sample. Measure Shore A hardness of the cured sample to confirm the correct durometer. Inconsistent hardness can signal mix errors.

  • Compliance Sampling: If feasible, send samples for chemical testing (e.g. ICP-MS for heavy metals, GC-MS for phthalates). Platinum-cure silicone should pass RoHS/EN71-3 limits (no lead, cadmium, etc.) and Prop 65 criteria.

2. In-Process Quality Control (IPQC)

  • First-Article Inspection: When starting a run (or after any pause), inspect the very first molded item before full production. Check dimensions (length, diameter, wall thickness) with calipers against the design specs. Verify hardness (Shore A durometer) on a flat area or a molded test strip. Confirm color and finish match the approved sample. Ensure no obvious defects (warpage, bubbles, incomplete fill).

  • Mold & Machine Setup: Confirm the mold is clean and properly clamped. Inject at the correct pressure/temperature; record machine settings. Adjust shot size to avoid flash or short shots. If using multi-cavity molds, verify each cavity fills correctly.

  • Ongoing Monitoring: During production, sample units at regular intervals (e.g. first piece of each shift, mid-run, end-run). For each sample: visually inspect for flash (thin excess silicone on parting lines) and air bubbles or voids. Trim any flash immediately and log the occurrence. Re-check dimensions on samples to ensure consistency.

  • Functional In-Process Checks: If the toy has features (e.g. a suction-cup base, detachable parts, or electronics), test them on a sample. For example, press a molded suction base onto a surface to see if it holds, or assemble any multi-part units to test fit. Ensure no binding or gaps in assemblies.

  • Surface Finish and Odor: Inspect surface finish – it should be smooth and matte or glossy as designed. Any tacky or sticky areas may mean incomplete curing or oil bloom, which must be corrected. Check that new parts have no strong solvent smell (parts should air out to a mild neutral odor). Sticky, oily surfaces or chemical smells are critical issues.

  • Record Keeping: Log all measurements and defects. Use check sheets or digital records so that issues (e.g. a particular mold’s flash problem) can be traced and fixed quickly.

3. Final Quality Control (FQC)

  • 100% Visual Inspection: Ideally inspect every finished unit (or at least all pre-shipment samples) at the end of the line. Look for cosmetic flaws: air bubbles or pinholes, color streaks, uneven surfaces, specks or contaminants embedded in silicone. Verify seams are fully trimmed and logos or textures are clear. Any product with visible defects is pulled out. Because these items are used intimately, some factories do 100% visual checks.

  • Dimension & Hardness Verification: Re-measure critical dimensions on final samples. Confirm the product still meets tolerances (especially if there’s any secondary processing that could warp it). Check hardness again (Shore A) on final pieces or molded plaques to ensure it matches spec. Consistent softness is important for user feel.

  • Odor Check: Sniff final products. Platinum silicone should be essentially odorless. Reject any with “chemical” or excessive solvent smell.

  • Functional Tests: Perform key functional tests on finished items. For example: insert electronics and run a vibrator test; attach any removable parts; press suction bases; stretch flexible parts. Batteries and electrical components should be safely secured. If a motor is included, test it under load to ensure it functions.

  • Packaging and Labeling: Inspect the packaging for damage, correct artwork, and print quality. Verify that each unit is properly packaged (e.g. clamshell, bag) and includes all parts (user manual, battery, assembly if needed). Check labels and paperwork: presence of batch codes/serial numbers, CE/RoHS symbols, “for adult use only” warnings, and, if selling to California, a Proposition 65 warning if any listed chemicals are present. Ensure barcodes or QR codes scan correctly and match the product.

  • Documentation: Attach or file final inspection reports. Ensure each lot has the required compliance documents (COA, test reports, MSDS) on record and sent with shipment if needed.

4. Pre-Shipment Inspection (PSI)

  • Random Carton Sampling: Before loading for shipment, perform a final check on packed cartons. Open a random sample of boxes (typically when 80–100% of goods are packed) and pull out units for re-inspection. On these samples, repeat the crucial FQC checks: look for any undetected defects, verify dimensions and hardness, and confirm functionality.

  • Quantity and Assortment: Count units in several cartons to verify total quantities and ensure the correct SKUs/colors are packed as ordered. Make sure packaging lists and shipping marks (item code, quantity, PO number) on the outside of cartons are accurate.

  • Packaging Integrity: Inspect the physical condition of the packaging (no crushed boxes or water damage) and confirm that sealing tape/straps are secure. Verify that each product is in its retail packaging, with manuals and labels intact. Check that any factory seals or tamper-evident features are unbroken.

  • Labeling and Documentation: Confirm that all cartons and products have the proper regulatory labels (e.g. CE mark, RoHS, disposal symbols) as required. Check that any country-specific warnings or bilingual labels are present. Ensure the packing list and compliance certificates (COA, test reports) match the shipment.

  • Final Defect Check: Even at PSI, inspectors use AQL sampling to decide accept/reject. They record counts of critical, major, and minor defects in the sample. If defects exceed agreed AQL levels (see below), the shipment can be held or rejected. Common practice is Critical=0 tolerance – even one critical defect means fail.

Defect Classification

Defects are typically categorized as Critical, Major, or Minor, with examples as follows:

  • Critical Defects (0 allowed): These make a toy unsafe or unusable. Examples: tears, holes or holes in the silicone, embedded sharp fragments, grossly misformed parts, or toxic failures (e.g. mold residue, banned phthalates, heavy metals beyond limits). Also items with strong chemical/solvent odors after airing are treated as critical. Any single critical defect (even 1 in a sample) causes the lot to fail.

  • Major Defects (~2.5% AQL typical): Defects that affect function or appearance significantly. Examples: deep flashing or mold lines, large air bubbles or voids on the surface, color mismatches or stains over a few millimeters, incorrect dimensions or hardness outside tolerance (causing poor fit or feel). A popped seam or a noticeably sticky patch also counts as major. Major defects may not be immediately dangerous, but they degrade the user experience.

  • Minor Defects (~4.0% AQL typical): Cosmetic imperfections. Examples: slight color variation, a very small speck or pinhole under the surface, a faint flow line from the mold, or a tiny bubble near the tip. These flaws do not affect safety or basic function. For instance, a very light swirl mark or a 2 mm flash that can be rubbed off would be considered minor. Note: “minor” assumes the defect is truly inconsequential; any issue that even could affect use (sticky spots, weak seams) should be treated as major or critical.

By defining these classes in writing (for example, “TPE tears >3mm = major; any >5mm = critical” or “sticky/chemical smell = critical”), factories and inspectors can apply QC consistently.

AQL Levels and Sampling

Most quality agreements for silicone toys use ISO 2859-1 (ANSI/ASQ Z1.4) sampling tables. A common scheme is AQL 0.01/2.5/4.0 (Critical 0%, Major 2.5%, Minor 4.0). In practice:

  • Critical = 0. One critical defect fails the entire lot. This zero-tolerance treats these products almost like medical items where safety is paramount.

  • Major ≈ 2.5. Typically up to ~2.5% of units can have a major defect in a sample. For example, if 100 units are checked, more than 2 majors causes fail. Some high-end brands demand 1.0 or 1.5% on majors for extra-stringent control.

  • Minor ≈ 4.0. Usually up to ~4% of units may show purely cosmetic issues. If minor defects exceed this, the lot fails minor criteria.

Inspection Level II (medium stringency) is standard for most shipments. For very large or high-risk orders, a tighter Level III can be used (larger sample, stricter acceptance). The chosen AQL and level must be agreed in the quality agreement or purchase order. Sampling is statistical – inspectors pick random units according to the table. If defects exceed the allowable count, the lot is rejected or reworked.

Compliance and Safety Checkpoints

In addition to visual and dimensional checks, silicone toys must meet chemical safety standards. Include these compliance items in your QC:

  • Heavy Metal Migration: Although these are adult products, testing against toy standards (EN 71-3) or RoHS is common practice. Use ICP-OES or similar to verify no lead, cadmium, mercury, hexavalent chromium, etc. above limits.

  • Organic Contaminants: Test for banned plasticizers (phthalates) and other organics by GC-MS. Platinum silicones should naturally be phthalate-free, but any plasticizers or softeners must comply with REACH and California Prop 65.

  • Prop 65 Labeling: In California, any listed carcinogen/repro toxin above thresholds requires a warning label. Ensure your product and packaging carry a Prop 65 notice if applicable (e.g. “WARNING: This product can expose you to chemicals…”). Many silicone toy makers simply use compliant materials so no warning is needed, but verify with lab results.

  • Regulatory Labels: Affix CE/UKCA marks if selling in Europe (toys standards do not apply, but general safety and RoHS/REACH do). Include “Not for Children” or “For adult use only” warnings as needed.

  • Material Traceability: Keep MSDS and Certificates of Conformity (CoC) for all resins, pigments, and components. A good factory requires every silicone batch to have a lot-specific COA (usually from the supplier) confirming purity and composition. Retain these with production records so you can trace back any issue to the raw material lot.

  • Testing Records: Maintain copies of third-party lab tests (toxicology, flammability, electrical safety for vibrators). These aren’t QC “checklist” items per se, but having up-to-date reports is part of an SOP for compliance.

Adhering to standards (e.g. ISO 3533 for sex toys, FDA for medical grade claims) and doing lab validations gives extra assurance. For example, a factory may voluntarily test finished toys for ISO 10993 biocompatibility (cytotoxicity) and ASTM or EU directives to prove the silicone is truly inert.

Summary of Key Checks by Stage

QC StageInspection ItemsTest Methods / Tools
Incoming Material (IMI)Material certifications (COA, MSDS); batch traceability
Visual check of raw silicone (color, clarity, odor)
Verify shelf life and packaging integrity
Spot hardness/viscosity test
Compliance sampling for heavy metals/phthalates
Review certificates and MSDS
Visual inspection
Durometer (Shore A) or viscometer
Small test cure
Laboratory ICP/GC-MS tests
In-Process (IPQC)First-article check: dimensions (length, diameter, wall thickness)
Surface finish (no flash, burrs, bubbles)
Hardness test (consistency)
Functional check (fit, suction, basic operation)
Airflow / purge checks to prevent silicone burn
Calipers/Go-NoGo gauges
Durometer
Visual magnifier
Sample assembly/test rig
Production logs
Final QC (FQC)100% visual inspection: color uniformity, surface defects, seam trimming
Re-measure key dimensions/hardness on finished units
Odor check (sniff test)
Function test (if vibrator: electronics, power; if other: assembly, stretch)
Packaging contents (manuals, parts) and labeling correctness
Visual inspection station
Calipers, Durometer
Olfactometer or human sniff test
Electric safety tester (for battery toys)
Barcode scanner/label verifier
Pre-Shipment (PSI)Random carton sampling: inspect products inside random boxes
Count/confirm quantities and SKUs
Re-check defects on samples; classify as Critical/Major/Minor
Packaging integrity and label verification
Verify shipping marks and paperwork
Final sign-off on documentation (QC report, test certificates)
Visual inspection of sample units
Scales and tape (count weight)
Quantity checker tools
Checklist per [32] items
Shipping label check

Key test equipment commonly used: digital calipers for dimensions, Shore A durometer for hardness, optical comparator or profile gauge for mold lines (optional), UV or blacklight (to detect impurities), and magnifying lamps for fine cosmetic inspection. For chemical checks, partner with accredited labs for migration and biocompatibility tests.

By following this silicone product QC checklist SOP – from incoming resin to final carton – factories and buyers can ensure every adult toy is safe, functional, and on-brand. Consistent QC not only meets regulations (e.g. CA Prop 65, REACH) but also builds consumer trust in your products.

FAQ

1) What’s the difference between IPQC, FQC, and PSI?

  • IPQC (In-Process QC): Checks during molding/finishing to catch issues early (flash, bubbles, hardness drift, color streaks).

  • FQC (Final QC): Inspection of finished goods before packing (appearance, dimensions, odor, function, labeling).

  • PSI (Pre-Shipment Inspection): Audit on packed cartons to confirm quantity, packaging integrity, and lot quality right before shipping.

2) What are “Critical / Major / Minor” defects for silicone adult products?

A common practical rule:

  • Critical: Any safety risk or unusable product (tears, sharp edges, contamination, strong chemical odor, wrong material). Zero tolerance.

  • Major: Affects function/feel/brand perception (large bubbles, heavy flash, wrong hardness beyond tolerance, visible stains).

  • Minor: Cosmetic-only and does not affect use (tiny specks, faint flow line, slight color variation within spec).

3) What AQL should I use?

Many buyers use Critical = 0, Major = 2.5, Minor = 4.0 (ANSI/ASQ Z1.4 / ISO 2859-1, Inspection Level II).
Premium brands sometimes tighten Major to 1.0–1.5. The “right” AQL depends on your price point and risk tolerance.

4) How do we control Shore hardness consistently?

  • Lock down the silicone grade, mixing ratio (LSR A:B), pigment/additive loading, and curing conditions.

  • Use a durometer on a consistent test location (or a test plaque) and record readings by shift/lot.

  • Define a realistic tolerance (e.g., ±2 Shore A for many products, tighter if needed).

5) Why do some silicone products smell, and how do we QC for odor?

Odor can come from incomplete cure, volatile residues, pigments/additives, or poor storage. QC approach:

  • Set an odor acceptance standard (e.g., “no solvent/chemical smell after 24–48h airing”).

  • Consider post-curing when required by formulation/performance goals.

  • Treat strong chemical odor as Critical.

6) How do we inspect and manage flash / seam lines?

  • Define allowable flash thickness/length and where seams are acceptable.

  • Use standardized trimming tools and training to avoid sharp edges.

  • If flash spikes, check mold parting fit, clamp force, shot size, venting, and mold wear.

7) What dimension checks matter most for adult products?

Prioritize features that affect fit/comfort:

  • Outer diameter/width at key points

  • Insertable length

  • Wall thickness (if hollow)

  • Base diameter (especially suction products)
    Use go/no-go gauges for speed on high-volume lines.

8) What functional tests are recommended?

Pick tests that match the product:

  • Suction hold test: defined surface + time + pull force requirement

  • Stretch/tear screening: quick stretch check (plus periodic lab tear/tensile tests)

  • Fit/assembly: mating parts, caps, or accessories

  • Electronics (if any): run test, vibration modes, noise, battery contact, waterproofing if claimed

9) Do we need chemical/compliance tests for every batch?

Not always, but you should have:

  • Incoming COA/MSDS + traceability for each raw material lot

  • A testing plan (e.g., qualification testing per material change, then periodic verification)

  • Trigger-based testing (new pigment, new supplier, process change, customer request)

10) How do we ensure traceability (batch/lot control)?

  • Assign lot numbers to incoming silicone + pigments

  • Record mold number, machine, date/shift, operator

  • Link finished goods cartons to the production lot
    If a problem appears in the field, you can isolate affected lots quickly.

11) What’s the best way to prevent contamination (dust, hair, fibers)?

  • Controlled packing area (clean benches, hair nets, gloves)

  • Air blow + visual check before bagging

  • Dedicated storage bins for “OK” parts

  • Avoid linty wipes; use approved cleaning methods

12) What should be checked on packaging and labeling?

  • Correct SKU/color, barcode scan, quantities per carton

  • Required warnings (“adult use only”), country-specific labeling

  • Instruction leaflet included (if needed)

  • Tamper seal integrity (if used)
    Packaging mistakes are often Major because they cause returns and compliance risk.

13) Should we do 100% inspection or sampling?

For intimate silicone products, many factories do 100% visual inspection (surface/flash/contamination), then apply AQL sampling for deeper dimensional/function checks. The right mix depends on volume and defect history.

14) Can third-party inspections replace factory QC?

No—third-party PSI is a final audit, not a substitute for IPQC/FQC. The best outcomes happen when the factory QC system is strong and third-party inspection verifies it.

A happy dog chewing on a natural rubber toy. Natural rubber chew toys are popular for their durability and non-toxic reputation.

Many pet owners and pet product retailers are asking the same question: are natural rubber dog toys safe for our dogs? With growing awareness of toxic chemicals in plastics, it’s no surprise that people worry about things like latex allergies, BPA, and phthalates in pet toys. In this post, we’ll take an expert yet accessible look at the safety profile of natural rubber dog toys. We’ll explain what natural rubber (latex) is, discuss allergy concerns, and clarify whether natural rubber toys contain harmful chemicals like BPA or phthalates. By the end, you’ll know how to choose reputable, non-toxic natural rubber toys for safe play.

What Is Natural Rubber (Latex) in Dog Toys?

Natural rubber is derived from latex sap of rubber trees (Hevea brasiliensis), as shown above. Natural rubber used in dog toys comes from the milky latex sap of rubber trees. This plant-based latex is harvested (tapped) from the tree and processed into a durable rubber material. In other words, natural rubber is essentially latex, a term you might see on toy labels. Because it comes from a natural source, rubber from Hevea tree sap is renewable and biodegradable. Unlike synthetic plastics, it doesn’t rely on fossil fuels and breaks down more easily in the environment.

Importantly, high-quality natural rubber dog toys are made of 100% natural latex with no added toxins. For example, one manufacturer notes their toys use “100% natural rubber (latex) from the sap of rubber trees” and are “free of any harmful chemicals – like BPA, phthalates, and nitrosamines”. In short, natural rubber provides a plant-based, non-toxic material for dog toys, which is a big reason it’s considered safer than many plastic alternatives.

Safety Benefits of Natural Rubber Toys (Non-Toxic & Durable)

Natural rubber dog toys have earned a reputation for safety and toughness. Here are key safety benefits:

  • Non-Toxic Material: Pure natural rubber is generally non-toxic and safe for dogs to chew. Unlike some plastics, it typically doesn’t contain hormone-disrupting chemicals. In fact, natural rubber is usually toxin-free, whereas plastic toys can often contain chemicals like BPA and phthalates. This means your pup isn’t ingesting harmful substances when gnawing on a quality rubber toy.

  • No BPA or Phthalates: Parents worry about BPA (bisphenol A) and phthalates in toys for good reason – these chemicals, used to harden or soften plastics, can leach out and pose health risks. The good news is that natural rubber dog toys are free of BPA and phthalates. Multiple pet product companies emphasize that their rubber toys contain no phthalates or BPA. Natural latex doesn’t require these additives, so you can breathe easier knowing a true natural rubber toy won’t expose your dog to those toxins.

  • Durable Yet Safer Chewing: Rubber provides a strong but flexible chew. It bends rather than splinters, which means fewer sharp pieces compared to brittle plastic toys. This flexibility makes rubber toys safer for aggressive chewers – they’re less likely to break into shards that could cause internal injuries. Even if small bits of natural rubber are swallowed, they are generally safer to pass in small amounts (always supervise to be sure), whereas broken plastic can cause blockages or chemical exposure.

  • Long-Lasting and Eco-Friendly: Quality natural rubber toys often outlast cheap plastic ones. They can withstand lots of gnawing without cracking. For example, trusted brands like KONG and West Paw use proprietary durable rubber formulas for power chewers. While no toy is indestructible, a well-made rubber toy usually has a longer lifespan, meaning you replace toys less often. Fewer replacements not only save money but also reduce waste. And when it is time to toss a worn-out rubber toy, natural rubber is biodegradable, unlike plastic.

  • No Strange Odors or Coatings: Natural rubber has a mild, neutral “rubbery” scent as opposed to the strong chemical smell some plastic or vinyl toys have. Reputable rubber toys also avoid toxic paints or glues. (For instance, one brand hand-paints its latex toys with food-grade dyes and certified lead-free paint to ensure safety.) This attention to materials means a safer play experience for Fido – and peace of mind for you.

In summary, natural rubber offers a safer chewing experience thanks to its lack of industrial chemicals and its sturdy, dog-friendly properties. Of course, natural doesn’t automatically equal safe in every case – it’s important to consider allergies and quality control, which we’ll cover next.

Latex Allergy Concerns (Can Dogs or People Be Allergic?)

Because natural rubber is latex, anyone with a latex allergy should take note. Latex allergies are well-documented in humans – if you have a latex allergy, you could react to a natural rubber dog toy by just handling it. Symptoms might include skin irritation or hives. For dog owners with known latex sensitivity, choosing latex-free toys (such as those made from silicone or certain plastics) is a safer choice.

What about our dogs – can they be allergic to latex too? Canine latex allergies are possible, though relatively rare. Vets have found that dogs can develop allergies to natural rubber latex (or even to synthetic latex). A dog with latex allergy might show skin problems (itchy rashes, hives, or paw chewing) after contact with a rubber toy. In severe cases (extremely uncommon), more serious reactions could occur, but anaphylactic shock from latex is far less common in dogs than in humans. Often, a dog might simply have mild contact dermatitis at first, which could worsen with repeated exposure.

How to manage latex concerns: If you suspect your pup has a latex allergy (for example, redness around the mouth after chewing a rubber toy), discontinue use and consult your veterinarian. They may recommend allergy testing or simply avoiding latex products. The good news is that most dogs tolerate natural rubber well. But to be safe, monitor any new toy. Also, if you personally have a serious latex allergy, you may want someone else to handle washing or touching the dog’s rubber toy, or choose an alternative material.

For those who need it, some dog toy brands offer “latex-free” toys, often made of synthetic rubber (like thermoplastic elastomers). Just remember, while these avoid natural latex, they might be made of plastics that could contain other chemicals. Weigh the trade-offs based on your specific needs.

BPA and Phthalates: Are They Present in Natural Rubber Toys?

BPA and phthalates are two chemical red flags that pet parents and retailers often worry about. Let’s clarify what they are and why natural rubber toys are a smart choice if you’re concerned about them:

  • Bisphenol A (BPA): BPA is an industrial chemical used in hard, polycarbonate plastics and epoxy resins. It can leach out of plastic containers and has been linked to hormonal disruption in animals and humans. Many hard plastic dog toys or cheap food bowls could contain BPA. However, natural rubber contains no BPA – it’s not a component of latex from rubber trees. For example, West Paw (a U.S. pet toy company) notes that their proprietary rubber material does not include any Bisphenol A. So a 100% natural rubber toy is inherently BPA-free.

  • Phthalates: Phthalates are a group of chemicals used to soften PVC plastic (vinyl) and are found in some soft plastic toys or chew items. They are also known endocrine disruptors (hormone disruptors). Like BPA, phthalates can leach out when chewed. The advantage of natural rubber is that it does not require phthalates for flexibility – latex is naturally elastic. Thus, pure rubber toys should be phthalate-free. In fact, latex is often recommended as a safer alternative to plastic specifically to avoid phthalates and BPA. Many pet product makers proudly label their rubber toys as “phthalate-free” for this reason.

In short, if you choose a genuine natural rubber dog toy, you are avoiding the big chemical hazards that come with many plastic toys. Natural rubber dog toys generally do not contain BPA or phthalates by default. Just be sure the toy is actually made of natural rubber and not a vinyl look-alike. Low-quality or knock-off toys might be misrepresented – for example, a toy might be called “rubber” but in reality be made of PVC (which could have phthalates). To be safe, check that the product description says natural rubber/latex and that the brand emphasizes it’s non-toxic. Reputable brands often test their toys and adhere to safety standards, so they will transparently advertise “BPA & phthalate-free”. If in doubt, skip no-name bargain toys and invest a few extra dollars in a trusted brand.

Tips for Choosing Safe Natural Rubber Toys

Considering the above, natural rubber toys are a top choice for safety – provided you select the right products. Here are some expert tips for pet owners and retailers to ensure the toys on your shopping list (or store shelf) are truly safe and non-toxic:

  • Read the Labels: Look for 100% natural rubber or 100% natural latex on the label or description. Avoid toys that simply say “rubber” without clarifying the type, as they might be mixed with plastics. If a toy is a blend of rubber with other materials (like PVC or synthetic rubber), it could dilute the safety benefits. The safest choice is a toy made exclusively from natural rubber, with no PVC, vinyl, or mysterious “gel” components.

  • Check for Safety Claims: Reputable manufacturers will highlight safety features. Seek out phrases like “BPA-free, phthalate-free, non-toxic” in the product info. For instance, some brands explicitly state their rubber toys contain no phthalates or BPAs. Others might mention compliance with children’s toy safety standards, such as EN-71 or FDA compliance, which is a strong indicator of a toxin-free toy. Pet toy companies that hold themselves to kid-safe standards are going the extra mile to ensure quality.

  • Avoid Cheap, Unregulated Imports: Unfortunately, the pet toy industry isn’t tightly regulated. The FDA and Consumer Product Safety Commission mainly step in only if human safety is at risk. This means some cheaply made toys (often imports) may contain lead, cadmium, or other toxins without disclosure. In one case, a latex dog toy was found to be laden with lead, showing that not all “latex” toys are automatically safe. To protect your pup, buy from established brands or retailers that you trust. If a deal seems too good to be true (e.g. a bag of no-name rubber toys for a few dollars), it’s worth being cautious.

  • Observe Your Dog: When introducing any new toy, supervise play, especially at first. Watch how the toy holds up and how your dog reacts. A quality natural rubber toy should not have pieces easily breaking off. If your heavy chewer manages to shred a rubber toy and expose a inner layer or fragment, take it away – some companies even design toys with a safety indicator layer (like a colored core) to signal when a toy is compromised. Regularly inspect toys for cracks or damage and replace them as needed.

  • Consider Size and Hardness: To prevent choking or ingesting large chunks, choose the right size and toughness for your dog. Match the toy to your dog’s chewing style. Many natural rubber toys come in different durability levels (for puppies, moderate chewers, or power chewers). Selecting an appropriate toy ensures it lasts longer and keeps your dog safe during play.

For pet retailers, these tips are equally valuable. Stocking toys that are clearly labeled non-toxic and natural rubber can build trust with customers. Highlighting that a toy is latex rubber and free of harmful chemicals is a strong selling point for health-conscious pet parents. It can be worthwhile to carry brands known for stringent safety testing (some even advertise that their dog toys are tested to children’s toy standards). By curating safe products, retailers not only protect their customers’ pets but also enhance their own reputation for quality.

Safe Play with Natural Rubber Toys

Natural rubber dog toys are generally a safe and smart choice for your furry friend. When made from 100% natural latex with no nasty additives, these toys offer a non-toxic, durable alternative to plastic. They don’t contain BPA or phthalates, and they rarely cause issues unless a latex allergy is involved. By choosing well-made natural rubber toys, you provide your dog with engaging play while avoiding the hidden dangers of cheaper toys.

In conclusion, most dogs can chomp away on a natural rubber toy with tail-wagging enjoyment – and you can feel confident you’ve made a healthy choice. Always remember to pick toys from reputable, safety-conscious brands and to replace toys when worn. Doing so means your pet gets all the fun with none of the worry.

Custom silicone slow feeder bowls are innovative pet products designed with raised maze-like patterns to naturally slow down a pet’s eating pace. By forcing pets to nibble around ridges and channels, a well-designed slow feeder bowl can significantly reduce gulping, choking, and bloating during mealtime. For pet brands and wholesalers looking to develop a private-label slow feeder, understanding the manufacturing process is crucial. This article, from the perspective of a custom silicone slow feeder manufacturer, walks through each step – from initial concept design and material selection to molding, quality control, and final production. We will also discuss how design elements (like maze patterns and suction cups) affect feeding behavior and manufacturability, the role of Shore A hardness (usually 40–60A) in product performance, and key OEM/ODM considerations (MOQ, lead times, mold costs, etc.). By the end, you’ll know what it takes to bring a food-grade silicone OEM slow feeder bowl from idea to reality – and what to look for in a manufacturing partner.

Design and Prototyping of the Slow Feeder Bowl

Every successful custom project begins with thoughtful design and prototyping. Engineers use CAD software to create a 3D model of the bowl, defining its diameter, depth, wall thickness, and the intricate interior pattern (maze or ridges). A critical aspect of design is ensuring manufacturability – features must have appropriate draft angles and no extreme undercuts, so the silicone part can be molded and released without tearing. For example, each ridge in the maze should be slightly tapered and all sharp corners rounded, which prevents the silicone from getting stuck in the mold.

Once a CAD design is ready, prototypes are made to validate both the feeding performance and the manufacturability. Rapid prototyping methods like 3D printing (often in plastic) can produce a sample bowl to assess its size and how the maze pattern slows down feeding. Some manufacturers also create a single-cavity prototype mold or cast a sample in silicone to test the design. Prototyping is key – it allows the pet brand to field-test the bowl with actual pets to ensure it truly reduces eating speed, and it helps identify any design issues early. For instance, a prototype might reveal that certain narrow channels are too difficult to fill with kibble or that a pattern is so tight it frustrates the pet. These insights inform design refinements before investing in full production tooling. The design phase may also include adding features like an anti-skid base or a spot for a logo. The goal is to strike the right balance between an effective slow-feed design and one that can be produced reliably at scale. Simulation tools (like mold flow analysis) might even be used on the CAD model to predict how liquid silicone will flow into the maze pattern and to spot potential air traps or weak points before cutting the mold.

Maze Pattern Considerations: The hallmark of a slow feeder bowl is its maze or puzzle pattern on the interior. These raised ridges and channels intentionally make the pet work for their food, dramatically extending mealtime. From a manufacturing perspective, intricate maze patterns require precision engineering:

  • Impact on Feeding Behavior: The height, spacing, and complexity of the maze directly influence how much the feeder slows the pet’s eating. Tall, closely spaced ridges create more obstacles, significantly reducing gulping and turning meals into an engaging challenge for the animal. When designing a custom pattern, brands often consider the target pet (e.g. a pattern for a large dog might be more open than one for a small dog) so that it’s challenging but not discouraging. The silicone material is gentle on teeth and gums, so even if pets enthusiastically lick or nudge the maze walls, there’s no risk of chipped teeth as there might be with a hard plastic or ceramic bowl.

  • Maze Geometry and Demolding: Intricate maze designs affect how the mold is made and how easily the part comes out of the mold. Typically, one half of the steel mold forms the bowl’s interior maze (as a cavity) and the other half forms the exterior shape. The mold must be precisely machined so that when closed, the thin maze walls are formed with uniform thickness. Designers will incorporate a slight draft angle (a few degrees of taper) on these tall maze walls. The draft ensures that when the cured silicone is pulled out, the walls release smoothly instead of scraping or tearing. Undercuts are minimized – any backward-hooking features are avoided or kept very shallow. Silicone is flexible enough to handle minor undercuts by stretching, but too much of an undercut could cause the part to tear or deform during demolding. Often, maze patterns are rounded rather than having sharp hooks for this reason.

  • Filling and Venting: Complex maze patterns create many channels that the silicone must fill during molding. In liquid injection molding, the liquid silicone is injected under pressure, which helps push material into every nook and cranny of the maze. The mold is usually gated at the center of the bowl (or uses multiple gates) so that silicone flows outward evenly into the maze channels. Tiny vent holes are machined at the ends of long channels or at the tops of maze peaks to let air escape as silicone fills in. Without proper venting, air pockets could get trapped at the thin tips of the maze walls, causing incomplete filling (short shots). A well-designed mold ensures the maze pattern comes out fully formed without air bubbles.

  • Maze Pattern and Suction Effect: One interesting challenge is that maze patterns can act like suction cups during demolding. The spaces between ridges form small pockets of air. When the mold opens, each pocket may momentarily vacuum-lock onto the mold core. In practice, manufacturers counter this by polishing the mold surface (to reduce friction) and sometimes by adding ejector pins or an air eject assist in strategic locations. It’s not uncommon to have ejector pins that pop out in the middle of maze sections or a quick puff of air to break the vacuum and push the part free. The flexibility of silicone actually helps here: the part can deform a bit as it’s being ejected, breaking any suction, and then spring back to shape once out of the mold.

  • Material Hardness for Maze Walls: The Shore A hardness of the silicone is carefully chosen for maze-style feeders. If the maze walls are very thin and tall, a slightly firmer silicone (toward the upper end of the range, say 55–60A) might be used so the walls don’t flop over too easily. A stiffer silicone helps the bowl keep its shape, ensuring the ridges remain upright to do their job slowing the pet’s eating. However, if the material is too hard, the bowl could become difficult to flex during demolding and might feel less gentle (in extreme cases a very hard silicone could even be unpleasant for a pet to bite or could make the bowl brittle under stress). Most slow feeder bowls use a medium hardness around Shore A 50 ±10 – this provides a stable shape but still plenty of flexibility. For example, a Shore 50A silicone has a rubbery give that is comfortable for pets and allows easy bending to peel out of the mold, while still being firm enough to support the maze structure. The excellent tear strength of quality silicone means even thin maze walls won’t easily rip during normal use.

Overall, maze-pattern slow feeders are usually produced with injection molding for best replication of detail and production efficiency. It is technically possible to compression-mold a complex maze, but aligning a pre-cut silicone blank into all those tiny grooves is impractical and would generate a lot of flash between the walls. Injection’s precision and pressure-driven filling is preferred to perfectly form the maze without excess flash.

Mold Making and Tooling

Once the design is finalized, the next phase is mold making (tooling). The manufacturer creates a precision metal mold that will form the silicone bowl’s shape. Molds for silicone products are typically made of hardened steel (or sometimes aluminum for simpler or short-run molds) and fabricated via CNC machining. All the details of the bowl design – the maze ridges, logos, texture, and overall dimensions – are cut into the mold cavities with exacting accuracy. A high-quality mold is critical: it determines the accuracy, surface finish, and consistency of every slow feeder bowl produced.

Key considerations during tooling include:

  • Single vs. Multi-Cavity: Depending on the production volume needed, the mold may be built with multiple cavities to produce several bowls per machine cycle. For example, a multi-cavity mold might have 2 or 4 identical cavities if a brand needs tens of thousands of units, whereas a smaller run might use a single-cavity mold. Multi-cavity molds greatly improve output (making multiple bowls in one shot) but are more complex and expensive to manufacture, since each cavity must be machined and balanced to fill evenly.

  • Precision Machining and Finishing: The maze features and bowl shape must be machined to tight tolerances, often within ±0.1–0.3 mm for linear dimensions, to ensure each bowl comes out uniform. After machining, mold makers polish or texture specific areas of the cavity as needed. For instance, the interior maze surfaces might be highly polished to help the cured silicone release easily, since a glossy surface has less friction. Alternatively, the outer surface of the bowl might be bead-blasted or etched to add a matte texture or grip. If the design calls for a logo, the logo can be CNC-engraved or EDM-sunk into the mold so that it appears raised or recessed on the final product. Every detail must be mirrored correctly in the mold.

  • In-House Tooling Advantages: A manufacturer with in-house mold making capabilities offers a big advantage for custom projects. They can fabricate and tune the mold on-site, resulting in faster lead times and better quality control. Small adjustments (like adding a vent pin, tweaking a draft angle, or polishing a troublesome area) can be done rapidly without shipping the mold to a third party. In-house CNC machining also protects the confidentiality of a custom design – critical if you’re investing in a unique pattern that you want to keep proprietary.

  • Mold Costs and Lead Time: Creating a custom slow feeder mold is a one-time investment that typically ranges from a few thousand dollars for a simple, single-cavity mold up to $5,000–$10,000 or more for large or multi-cavity molds. Actual costs depend on complexity: a basic mold (simple shape, one cavity) might be $500–$2,000, an intermediate mold (medium complexity or size) about $2,000–$5,000, and a very advanced mold (intricate design or multiple parts) could reach $5,000–$15,000+. Experienced OEM manufacturers will provide a detailed tooling quote up front. Lead times for mold fabrication are commonly around 2–4 weeks. Some factories can fast-track a prototype or single-cavity mold in about one week for simple designs – for example, using a rapid CNC program to cut a test mold (“micromold”) and mold a few samples to validate design. Standard production molds with multiple cavities and complex features will take longer to machine, assemble, and test. It’s wise to budget a few weeks for tooling and first-shot samples. Once the mold is ready, it can be used to mass-produce thousands of identical bowls with high efficiency.

Before moving to full production, the manufacturer will usually do a test run with the new mold. They inject or press a small batch of bowls and inspect them closely, a step often called T1 sampling. The first-off samples are sent to the client for approval. This is the chance to see the actual product in your hands and verify details like dimensions, pattern effectiveness, logo appearance, color, and overall quality. If any issues are found (for instance, if the fit or finish isn’t perfect), the mold can be tuned or adjusted. Only after the sample is approved does the project advance to the main production run.

Food-Grade Silicone Material Selection (and Shore Hardness)

Choosing the right silicone material is just as important as the design. Slow feeder bowls must use food-grade, platinum-cured silicone that is safe for pets to eat from. Reputable manufacturers source high-quality silicone from established suppliers and provide material certification to confirm it meets regulatory standards like U.S. FDA 21 CFR 177.2600 and the stricter European LFGB standard. These standards test that no harmful chemicals leach out of the silicone even under conditions like hot or acidic food contact. Always ensure your OEM partner is using 100% food-grade silicone, free of BPA, phthalates, PVC, and other toxins. They should be able to supply documentation (FDA/LFGB compliance certificates or third-party lab test reports) for the specific silicone formulation used.

Shore hardness

Silicone comes in various durometers (hardness levels), measured on the Shore A scale. As noted earlier, slow feeder bowls typically use a medium hardness around 50 Shore A (with a usual range of about 40A to 60A being suitable). Hitting the right hardness is crucial:

  • A softer silicone (around 40A) will be very flexible and grip surfaces well (helpful for suction cups or anti-skid bottoms), but if it’s too soft the bowl might feel floppy or the internal ridges might bend excessively under a pet’s tongue or paws.

  • A harder silicone (60A) will be more rigid and hold its shape firmly, which keeps tall maze walls upright – but overly hard material could make demolding more difficult and might not provide the same gentle, springy feel that pet owners expect from silicone. Extremely hard silicone could also reduce the friction needed for suction cups to seal (since it doesn’t conform as easily to surfaces).

Manufacturers often balance hardness and thickness of the design. For example, if using a softer silicone for better suction on the base, they might slightly thicken the walls of the maze to compensate so they remain sturdy. Or if using a firmer silicone for durability, they ensure the edges and corners are rounded so the product is still safe and comfortable. The chosen Shore hardness also plays into durability and temperature resistance – food-grade silicone in the 40–60A range generally has excellent tear resistance and can handle a wide temperature range (typically from -40°C up to ~200°C) without degrading. This means the slow feeder bowl will remain intact even if a dog aggressively chews or bends it, and it also means the product is dishwasher-safe (it can withstand high heat washing and drying without warping). In fact, one selling point of silicone feeders over plastic ones is that silicone doesn’t crack or become brittle over time, and it doesn’t leach chemicals when heated.

Colorants and Additives: If a custom slow feeder bowl is to be produced in a specific brand color or a fun bright hue, the color is achieved by mixing food-safe pigments into the raw silicone before molding. Only FDA/LFGB-approved colorants are used, to ensure no heavy metals or harmful substances are present. The pigments are blended thoroughly with Part A or Part B of the silicone so that the final cured bowl has a uniform color that won’t rub off or fade. Virtually any Pantone or custom color can be matched by the manufacturer’s material team. Some brands even request dual-color slow feeders (for example, a bowl with a different colored maze vs. base). This can be done either by over-molding two silicones or by a two-shot molding process if the factory has the capability, or more simply by painting/printing a design post-molding (though embedded color is most durable). Aside from pigments, no other fillers should be in the silicone for pet products – reputable suppliers use pure platinum-cured silicone with no recycled content or unknown additives, ensuring the product is odorless, non-toxic, and compliant. Some manufacturers will do an extra post-cure bake of the molded parts (a few hours in a hot oven) to drive off any residual volatiles and ensure the silicone is fully cured and smell-free.

In summary, material transparency is a hallmark of a good silicone OEM. The factory should openly share the material specifications: Shore hardness, certification of food-grade compliance, and whether they do any additional post-curing or testing on the silicone. High-quality silicone (often platinum-catalyzed LSR for injection molding or high-consistency silicone rubber for compression) yields a feeder that is durable (withstands biting and pulling), heat-resistant (safe for dishwashers and sterilization), and resistant to mold or bacteria growth. These are important product benefits you can pass on to pet owners, and they all start with using the right raw material.

Molding Process: Compression vs. Injection Molding

The core manufacturing step is molding the silicone into the bowl shape. There are two main production methods for silicone slow feeders: compression molding and liquid silicone injection molding (LIM/LSR injection). Both processes involve filling the mold with silicone and heat-curing it (vulcanizing) into a solid elastomer, but the techniques differ:

Liquid Silicone Injection Molding (LSR Injection)

silicone-injection-molding-pocess

In LSR injection molding, a liquid silicone rubber is used. This method is ideal for high-volume production and designs with fine details (like complex maze patterns), because it offers excellent precision and repeatability. The process works as follows:

  • Metering and Mixing: Two liquid components of platinum-cure silicone (often called Part A and Part B) are stored in drums and fed into a metering unit in a 1:1 ratio. One part contains the platinum catalyst and the other contains a crosslinker and base polymer. The machine precisely pumps and mixes these components, sometimes adding a pigment at this stage for colored products. Once mixed, the silicone remains liquid for a short time before it begins to cure.

  • Injection and Curing: The mixed liquid silicone is injected under high pressure into the closed mold, which is heated (typically 150–175 °C) to accelerate curing. Thanks to the injection pressure, the silicone quickly flows into all areas of the cavity, capturing fine details like small ridges or logo text. The heat triggers rapid vulcanization – cycle times are often on the order of 30 seconds to 2 minutes for a part like a medium slow feeder bowl. In many cases, an LSR bowl can cure in about 60–90 seconds at temperature. This fast cure means injection machines can output a high number of parts per hour compared to compression. As soon as curing is complete, the machine opens the mold.

  • Demolding: Advanced LSR molds are designed for semi-automated demolding. Usually the cured bowl will stick to one half of the mold (by design, often the side with ejector pins). Ejector pins then push the part out of the cavity. Silicone is somewhat tacky, so if needed the mold might use air jets or have a very smooth finish to aid release. Sometimes a robotic arm or operator will grab the part if it doesn’t fully pop free. One advantage of injection molding is that it can incorporate a cold runner system, which delivers the silicone to each cavity with minimal waste. Many LSR molds separate the runner automatically (cold runners leave a tiny “gate” vestige on each part that is easy to trim). The result is little to no excess material attached to the bowl – a high-quality injection-molded slow feeder might only have a nearly invisible seam line and a small dot where the material was injected.

  • Advantages of Injection: LSR injection produces parts with excellent consistency and tight tolerances, due to the precision of machine controls and the closed molding environment. It’s well-suited to intricate designs – the injection pressure and automated mixing ensure even complex maze patterns are completely filled without voids. Injection molding is also highly efficient for large orders: cycle times are short and the process can be fully automated, reducing labor costs per part. In fact, even a single-cavity injection mold can often out-produce a multi-cavity compression setup in the same timeframe, thanks to fast curing and quick cycling. The process is clean (sealed from outside contaminants) and repeatable, which is important for maintaining quality. For these reasons, most high-end, private label slow feeder bowls for pets are made via LSR injection in modern facilities.

  • Typical Tolerances: With injection molding, dimensional tolerances on silicone parts are generally tighter than with compression. For example, for a bowl-sized part (100 mm+ diameter), you might expect on the order of ±0.3 mm variation or better in critical dimensions. Well-optimized processes can do even better on smaller features. The consistent pressure and dosing of material mean each part is very similar in weight and shape.

One consideration with injection molding is the upfront cost – the steel molds are more complex (often including cooling lines, multiple cavities, and injection runner systems) and thus higher cost, as discussed earlier. However, if your production volume is significant, the per-unit cost is lower and the quality is top-notch. Many OEM silicone manufacturers will recommend LSR injection for custom slow feeders, especially if the design has fine details or if you plan to scale to high volumes.

Compression Molding

Silicone-Compression-Molding-Process

Compression molding is a more traditional process using solid silicone rubber (often called HCR – high consistency rubber – which has a clay-like consistency). It can be a cost-effective choice for simpler designs, lower volumes, or very large parts:

  • Charging the Mold: The process is akin to making a waffle. A measured preform of uncured silicone is prepared – for instance, a chunk of raw silicone is weighed out and sometimes pre-shaped (like a disk or slab) close to the bowl’s size. This piece is placed into the open mold cavity by an operator. Properly measuring the silicone is important: too much material will lead to a lot of excess flash; too little will leave unfilled areas.

  • Pressing and Curing: The mold is then closed in a heated hydraulic press. The closing action squishes the silicone, forcing it to flow and fill the cavity (including the maze pattern). The mold is held closed under high pressure at curing temperature (again around 150–170 °C) for a longer time than injection – typically 5 to 10+ minutes depending on part thickness. During this dwell, the silicone vulcanizes into the shape of the bowl. Because there’s no injection nozzle, the mold often has small bleeder grooves or vents at the parting line to allow air and excess rubber to escape, preventing voids.

  • Opening and Demolding: After curing, the press opens and the operator manually removes the part by peeling it out of the mold. The new bowl will have a thin sheet or ring of flash – excess silicone that squeezed out between the mold halves – around its edges and possibly around any inserts or cores. Flash is expected in compression molding; the amount depends on mold fit and how precisely the material was dosed. The operator usually strips away the larger bits of flash by hand as they remove the part.

  • Advantages of Compression: Compression molding uses simpler, more affordable tooling since no injection system or runner channels are needed. A single-cavity compression mold can cost significantly less than an equivalent injection mold. This makes it attractive for low to medium volumes or startups who want to minimize initial costs. It’s also suitable for very large or basic parts that don’t have intricate detail – for example, a plain round slow feed mat or a simple ridged dish could be compression molded effectively, especially if only a few hundred or a couple thousand units are needed. Compression molding can be a good way to do a pilot run or market test for a new slow feeder design before investing in injection tooling. Additionally, compression presses generally exert less total force on the mold (since they’re not injecting at high pressure), which can allow molding of larger parts or multiple cavity molds with lower tonnage machines. However, compression is slower (curing each part takes minutes rather than seconds) and labor-intensive (each cavity must be manually loaded with material and the part manually demolded). This means the per-unit cost is higher when scaling up. Also, compression tends to have more variability in part weight and dimensions because it relies on manual material prep; each part might have slight differences based on how the operator placed the silicone, and flash trimming is required for every piece.

  • Typical Use Cases: If a slow feeder bowl design is relatively straightforward and the order volume is modest, a manufacturer might suggest compression molding to save cost. For example, an ODM slow feeder with a basic spiral or concentric ring pattern could be compression molded, especially if the brand wants a lower MOQ. That said, for complex maze designs, as noted, injection is generally preferred to ensure all details fill properly and to reduce the extensive flash that would result from pressing silicone into so many crevices.

Tolerances and Finish: Compression-molded parts often have slightly looser tolerances and require more post-mold finishing. Expect a more noticeable parting line and flash that needs trimming. Typical dimensional tolerances might be ±0.3–0.5 mm or more on a compression-molded bowl, versus ±0.2–0.3 mm on an injected one (exact numbers vary, but injection is inherently more precise). However, a well-made compression mold can still yield good quality – experienced manufacturers will design the mold with very tight parting surfaces and use techniques like preheating the silicone or vacuum degassing to improve consistency. The choice between injection and compression ultimately comes down to design complexity, volume, and budget. Many silicone OEMs have both capabilities and will choose the method that best fits the project’s needs.

Demolding, Trimming and Finishing

After molding (whether by injection or compression), the cured silicone bowl must be removed from the mold and finished. Demolding and trimming are crucial steps to ensure the final product is clean, safe, and cosmetically perfect:

  • Injection Mold Demolding: As described, injection molding often uses ejector pins to push the part out when the mold opens. Because silicone can stick, some molds include air poppet valves that puff air between the part and mold surface, or use extremely smooth finishes to minimize adhesion. High-end LSR molds can eject parts with very little manual intervention. Any leftover runner or gate vestige (the tiny nipple of material where the silicone entered the part) is cut off at this stage, though in many cases the mold design eliminates runners automatically. A well-optimized injection process produces minimal flash – often just a hairline seam around the parting line that’s barely visible. The operator might do a quick trim with a scalpel or send the parts for cryogenic deflashing, where they are tumbled in a freezing chamber so that any micro-flash freezes and breaks off. For most slow feeder bowls, manual trimming of a tiny seam and gate is all that is needed.

  • Compression Mold Demolding: In compression molding, once the press opens, an operator peels the part out. Silicone’s flexibility allows the bowl to be pulled off any cores (like pulling off a sock). As mentioned, compression parts will have more flash. The operator typically removes the large ring or sheet of flash by tearing it off along the edge. They then pass the part to trimming.

  • Trimming and Inspection: Trimming is the process of removing all excess silicone (flash, sprues, runner bits) and smoothing the edges. For injection-molded bowls, trimming might involve using a small knife or cutter to slice off the negligible flash line or gate nub. Often this is very quick. For compression-molded bowls, trimming is more laborious because there can be a larger flap of flash around the rim or even covering the entire parting area. Skilled workers use scissors, knives, or special trimming dies to cut away this flash without nicking the actual part. In some cases, a custom trimming tool is made – for instance, a circular punch that the bowl is placed into to cut the perimeter in one go, ensuring a clean round edge. Interior holes or suction cup areas also need to be carefully checked and trimmed. The team must be meticulous because even a tiny leftover flash edge can interfere with the product’s function (for example, a bit of flash on a suction cup lip can prevent it from sealing). After trimming, the bowl’s edges should be smooth to the touch and the shape exactly as intended.

  • Surface Finish and Cleaning: Silicone is forgiving in that cut edges can be very smooth (no fraying or sharpness once flash is removed). Manufacturers often give each bowl a final once-over such as a quick buffing, rinse, or wipe-down to remove any particles or dust from trimming. Because these products will be used for feeding, cleanliness is important. Some factories wash the bowls in clean water or a mild food-safe soap and then dry them completely before packaging. Any particulate or leftover trimming bits must be eliminated.

At this point, the slow feeder bowl is molded and physically complete – it looks like a finished product. All ridges are in place, edges are trimmed, and the bowl is functional for its intended use. The next steps focus on ensuring quality control and any custom finishing (like branding or packaging).

Quality Control and Testing

Quality control (QC) is vital in silicone pet product manufacturing. A reputable private label slow feeder bowl manufacturer will have multiple checkpoints for quality to ensure every batch meets safety standards and design specs.

Key QC activities include:

  • Visual & Tactile Inspection: Trained inspectors examine the bowls for any visible defects. They check the shape (no warping or deformation), verify that all molded features are present and correct (e.g., every maze ridge is fully formed, with none missing or short due to air bubbles). They also feel the surfaces, making sure there are no rough spots or residual flash that could harm a pet or feel sharp. The bowl’s interior and exterior should be smooth except for the intended texture. Any tacky or uncured spots in the silicone would be flagged (this is rare if molding was done properly, but tackiness could indicate under-curing).

  • Dimensional and Functional Checks: Critical dimensions may be measured with calipers or gauges – for example, overall diameter and height (to ensure the bowl will fit in any accessories or packaging), thickness of certain sections, etc. Because silicone is flexible, dimensional checks have some tolerance, but the goal is to catch any major deviations (perhaps due to mold wear or process drift). The hardness (durometer) of the silicone might be tested on a few samples to ensure the correct material was used and cured properly. A good QC practice is also to do a functional test: factory staff can sprinkle some dog kibble into a finished slow feeder and tilt or jostle it to see that the food lodges among the maze as intended. This simulates the user experience and confirms the design performs – kibble shouldn’t all immediately slide out of the bowl, for instance. If the product includes a suction base, QC will test that it actually sticks to a flat surface for a reasonable time.

  • Compliance Verification: Since these products contact food, manufacturers maintain strict compliance records. The QC team will ensure the materials used in that batch match the certified food-grade lot (traceability is often kept by recording material lot numbers). Many factories also do an additional post-curing oven bake for food-contact silicone products and then verify there’s no residual odor or bloom on the parts. Some will send random samples for third-party lab testing (for example, an extraction test to reconfirm FDA compliance or to ensure no lead in pigments, etc., especially if required by the client’s country regulations). An experienced silicone OEM can provide certificates of conformity or lab test results upon request to support your product safety claims. They will be familiar with international standards and can help navigate any testing needed for import/export.

  • Consistency and Lot Sampling: In mass production, typically not every single bowl is measured in detail (that would be very time-consuming), but the factory will sample a certain percentage from each batch or each cavity for large molds. For instance, they might fully inspect 5% of units and do a quicker check on the rest. Any detected defect can trigger a 100% check. Common issues they watch for are: air bubbles trapped in silicone (should be none visible), improper curing (very unlikely in a well-controlled process), contamination (no debris embedded in the silicone), or cosmetic flaws like big flow lines or discoloration (again rare if pigments are mixed correctly).

A manufacturer with ISO 9001 or similar quality certification will have documented procedures for these inspections. The bottom line is that quality control is woven throughout the process – from incoming material checks, to in-process inspection, to final QC before packaging – to ensure the slow feeder bowls are safe, compliant, and meet the brand’s specifications. This rigorous QC ultimately reduces customer complaints and returns, protecting the brand’s reputation and the manufacturer’s as well.

OEM/ODM Production Considerations (MOQ, Lead Times, Costs)

When partnering with a silicone manufacturer to create a custom or private label slow feeder bowl, there are important business logistics and project management aspects to consider. Below are key OEM/ODM details:

  • Minimum Order Quantity (MOQ): Silicone manufacturers typically set an MOQ for custom projects to make the production economically viable. For slow feeder bowls, MOQs can vary depending on the factory and the complexity of the item. Some specialized silicone pet product factories advertise low MOQs like 200 pcs for custom orders, especially if they are confident in selling that design or if they want to support small brands. More commonly, MOQs might be in the range of 500–1000 units for a first order of a custom bowl. The MOQ covers the cost of setting up the production (and often the custom packaging). Keep in mind that producing fewer units than the MOQ is usually possible but at a higher unit cost. If a manufacturer is willing to do a small initial run (hundreds of units), it’s a sign of flexibility – they may be hoping to grow with your brand long-term. Be sure to clarify MOQ expectations early.

  • Lead Time and Production Schedule: Custom manufacturing involves several stages each with its own timeline. Here’s a general scenario for a new silicone slow feeder project:

    • Design Finalization & Quotation: This can take a few days to a couple of weeks as you and the factory exchange ideas, 3D models, and finalize requirements.

    • Mold Fabrication: Typically 2–4 weeks as discussed. Some manufacturers can expedite a prototype mold in ~1 week, but standard lead time for a durable production mold is a few weeks.

    • Sampling (T1 sample): Once the mold is ready, initial samples are molded. You should expect samples about 1 week after mold completion (to allow time for molding and QC). Shipping the sample to you might add another few days if by express courier. Some factories quote 7–10 days for sampling after tooling.

    • Sample Approval: You should promptly test and review the samples. If changes are needed, mold adjustments could take a few extra days. Minor tweaks (like polishing a surface or venting a bit more) are usually quick. In case of a major design change, a new mold insert might be needed, which adds time.

    • Mass Production: Once the sample is approved, the factory will schedule the production run. Actual production of bulk quantities might take 2–3 weeks for a few thousand units, for instance. One manufacturer gives a guideline of 15–25 days for bulk production depending on order size. Production includes molding all units, performing trimming and QC on each, and preparing them for packaging.

    • Packaging & Consolidation: If you have custom packaging (boxes, labels, etc.), add time for those to be printed (often concurrently while molding happens). Final packing of products into their packaging and then into export cartons might add a few days.

    • Shipping: This is outside manufacturing but important for your timeline. Sea freight can take 3–6 weeks to the US or Europe; air freight takes days but is costlier. Factor this in to your go-to-market schedule.

    In total, a realistic timeline from project kickoff (after design lock and payment) to having goods ready to ship could be around 6–8 weeks (e.g., 3–4 weeks tooling + sampling, 2–3 weeks mass production, plus any buffer) for a straightforward project. Some manufacturers pride themselves on faster turnarounds – for example, “prototype new molds in about one week and move to production in roughly two weeks for straightforward designs” – but this is an optimized scenario. Always discuss lead times with your supplier and build in some cushion for unexpected delays.

  • Mold Fee and Payment: Most OEM manufacturers charge a one-time mold fee upfront. As outlined earlier, this can range widely (a few hundred to several thousand dollars). Some factories may agree to amortize the mold cost into the unit price for very large orders or waive the mold fee if you commit to certain volume. But typically, the mold is paid 100% (or 50% deposit, 50% on approval) before or during the sampling stage. This mold remains your property (in many cases) or at least dedicated to your production – ensure your contract clarifies that it won’t be used for other clients without permission. In many cases, if you reorder regularly, the mold can last for hundreds of thousands of cycles, effectively making the mold cost negligible per unit over time.

  • Per Unit Pricing: The unit cost for the slow feeder bowls will depend on order quantity, silicone weight, coloring, complexity, and any extras like packaging. Silicone material itself is not cheap (high-grade LSR might be $5–10 per kg or more), and a large bowl uses a significant amount of material, so expect a few dollars per unit just in silicone cost. Labor for trimming/packaging and any scrap factor also adds. Generally, larger orders get better pricing. It’s wise to get a price breakdown for different quantity tiers (e.g. 1k, 5k, 10k units). Don’t forget to account for packaging costs if you have custom boxes or inserts – those can add $0.20–$1.00 per unit depending on complexity.

  • Sample Policy: Most manufacturers will provide a couple of initial samples from the mold for free or at cost (sometimes charging only shipping). It’s important to thoroughly test these samples – check the fitting of lids (if any), try it with pet food, run it through a dishwasher, etc. If any issue arises in samples, communicate them clearly. Manufacturers are generally willing to adjust the mold or process to fix legitimate problems. After approval, if you require an official pre-production sample (from the first batch, with final packaging) that can usually be arranged too. Some brands also request a material swatch or color plaque ahead of production to approve the exact silicone color, since colors can appear differently in person than in digital renderings.

  • OEM Branding and Customization: In addition to the product itself, you’ll coordinate with the factory on branding elements: logo application (molded vs printed), labels, and packaging artwork. Good OEM partners often help with these details. For example, a cost-effective way to brand is to have your logo engraved in the mold so it appears raised or debossed on the bowl – this incurs no per-unit cost and looks professional. If you want a full-color logo, factories can do pad printing or apply a heat-transfer decal and ensure the ink is food-safe and durable. Discuss these during the design phase, as adding a molded logo must be done before the mold is finalized. For packaging, you might send them your artwork for boxes or ask their design team to help create a package that fits your brand style. Many silicone product manufacturers offer one-stop services, handling everything from product to packaging, which simplifies the supply chain for you.

  • Regulatory Testing and Certifications: If your market or distributors require specific certifications (for example, EU LFGB food-contact test, or US FDA documentation, or even reach/RoHS chemical compliance), let the manufacturer know upfront. Reputable factories are very familiar with these and often have in-house labs or partnerships to get products tested. They might have done basic FDA/LFGB testing on the material already (which covers the product in many cases). For a custom item, you can sometimes use a previous material certificate plus a written declaration. However, for full peace of mind, you may decide to commission a third-party lab test on the final product. A good manufacturer will assist with testing – they can send sample pieces to an accredited lab and provide you the reports, usually at your cost (few hundred dollars per test). This is well worth it to ensure your product meets all safety regulations. Top manufacturers will also be transparent about their quality control processes and certifications (look for ISO 9001, BSCI, etc., which indicate strong process and social compliance).

In summary, clear communication with your OEM partner is key to navigating MOQs, costs, and timelines. A professional silicone factory will guide you through these steps, from initial quote to final delivery, and make the process as smooth as possible. Many advertise features like low MOQs, in-house mold making, fast sampling, and certified materials – all signs that they cater to custom projects. Don’t hesitate to ask questions and have everything defined in the manufacturing agreement, including ownership of the mold, lead time guarantees, payment terms, and quality expectations. Developing a food-grade silicone OEM product is a collaboration – the factory’s expertise plus your market knowledge should result in a successful product launch.

What Sets a Good Silicone Manufacturer Apart?

Choosing the right manufacturing partner can make or break your custom slow feeder project. Beyond basic capabilities, great silicone manufacturers distinguish themselves in several ways:

  • Expertise in Material and Compliance: The best manufacturers prioritize using premium, transparent materials. They will gladly share the composition and source of the silicone they use, along with food-grade compliance certificates. If a supplier is hesitant or vague about material quality, that’s a red flag. Top-tier factories use platinum-cured silicones and can customize the formulation (hardness, color) as needed while still meeting FDA/LFGB standards. They stay up-to-date on global regulations (like EU REACH, CA Prop65, etc.) and proactively ensure products have no prohibited substances. This material expertise saves you from surprises down the line – such as a shipment held up in customs for missing test documents.

  • In-House Mold Tooling and R&D: As mentioned, in-house tooling capability is a major advantage. Manufacturers with their own CNC machines and mold engineers can iterate designs faster and control quality tightly. They might offer quick-turnaround prototype molds, which helps in refining the product design quickly. In-house mold making also tends to reduce costs and lead times for you. These manufacturers usually have an R&D team that can provide design for manufacturability feedback early – suggesting, for example, slight changes to a maze pattern to optimize flow or adding a feature like a suction base per their experience. A collaborative partner will treat your project as their own, investing engineering time to get it right rather than just “taking orders.” Look for factories that emphasize their engineering strength and have case studies of custom projects.

  • Quality Control and Certifications: A good manufacturer implements stringent QC processes as we detailed. Things to look for: ISO 9001 certification (ensures they have a formal quality management system), any factory audit reports or social compliance certifications (e.g., BSCI) if that’s relevant to you, and a track record of producing for reputable brands (which implies they passed those brands’ quality requirements). Ask if they do 100% inspection or how they handle defects. Leading suppliers might even invite you to see their QC process or provide a detailed QA report with your order. They stand behind their product quality, often promising to replace any subpar units. This commitment to quality reduces risk for your brand.

  • Ability to Assist with Testing and Compliance: Beyond making the product, a manufacturer that helps with testing, certification, and documentation is invaluable. They should be able to provide you with all the paperwork you need for customs and retailers – this might include food-contact safety declarations, material Safety Data Sheets, quality certificates, etc. The better ones often have a library of past test reports (for similar products or materials) and can quickly arrange any new testing you request. They understand pet industry standards and even specific retailer compliance (for example, if a large pet retail chain has its own testing protocol, a seasoned OEM supplier may have encountered it before). Essentially, they act not just as a production site but as a compliance consultant to ensure your slow feeder bowl meets all necessary standards in your target market.

  • Communication and Project Management: In B2B relationships, especially across continents, communication is key. The best manufacturers assign a dedicated project manager or account manager to your project. This person keeps you updated at each milestone – design, tooling, sample, production, etc. Look for suppliers who are responsive (reply within 24 hours typically) and who can understand your requirements (technical and aesthetic) clearly. Since you may be iterating on design, having someone who can provide photos, videos, or even live video calls from the factory floor is a huge plus for peace of mind. Top manufacturers are proud to show their process and keep you in the loop. This kind of transparency builds trust; you essentially have eyes on the ground watching over your project.

  • Value-Added Services: Finally, consider what other services a manufacturer offers. Many good silicone OEMs offer custom packaging, labeling, assembly, and logistics support. For example, if your slow feeder is part of a set (say, with a silicone lick mat or a stainless steel bowl), can they source or produce the other items and kit them together? Some have partnerships for mixed material products (like combining silicone with plastic or metal components). Others can warehouse or drop-ship if needed. While not every project requires these extras, having a versatile manufacturing partner can simplify scaling your business – you won’t need to coordinate multiple vendors if one factory can handle the majority of the work under one roof.

In essence, what sets a good manufacturer apart is their commitment to your product’s success. They will be proactive in improving the design, meticulous in production, honest and thorough in quality control, and supportive in achieving certifications. As the client, you should feel that the factory is an extension of your own team, not a black-box supplier. When you have that level of partnership, you can confidently develop innovative products like custom slow feeder bowls knowing that quality and compliance are in expert hands.

Conclusion

Developing a custom silicone slow feeder bowl – from initial concept to a market-ready product – is a complex but rewarding journey. We’ve explored how careful design (and maze geometry) can influence a pet’s eating habits and how those design choices translate into manufacturing considerations for mold making and demolding. We discussed why food-grade silicone (usually medium Shore A hardness) is the material of choice for its safety, durability, and dishwasher-proof resilience. And we compared compression vs. injection molding for production, noting why many brands opt for the precision of LSR injection for intricate private label slow feeder bowls.

For pet brands and wholesalers, partnering with an experienced custom silicone slow feeder manufacturer is crucial to navigate these technical details. The right OEM will help with everything: optimizing your design for manufacturability, prototyping samples, building high-quality molds, and ensuring each batch of bowls meets stringent quality and safety standards. They’ll also guide you through business aspects like MOQs, lead times, and certification so you can launch your product smoothly and confidently.

At the end of the day, a silicone slow feeder bowl is more than just a pet accessory – it’s a health and wellness product that reflects on your brand’s quality. By choosing a manufacturing partner that excels in material transparency, in-house tooling, and rigorous quality control, you set your product up for success in the market. Such a partner will not only deliver a great product but also act as a collaborator in innovation, perhaps suggesting new features (like better suction footing or collapsible designs) to keep your line cutting-edge.

OEM / ODM Silicone Manufacturing

Ready to Develop a Private Label Slow Feeder?

We support pet brands and wholesalers with custom silicone slow feeders and other silicone pet products.
From design and prototyping to certified mass production, we make the process simple and reliable.

What you get
Pattern + structure optimization for better feeding performance
Shore hardness, color matching, and food-grade silicone options
Fast prototyping and sample approval support
Consistent QC + compliance documentation for your market

Why Natural Rubber for Pet Chew Toys?

Natural rubber pet chew toys have become a go-to choice for pet brands seeking safe, durable products. Unlike hard plastics or brittle bones, natural rubber offers a tough yet flexible chew that can withstand gnawing without splintering. These toys are marketed as non-toxic, natural, and gentle on teeth, appealing to pet parents who demand higher safety standards for their “fur-kids”. For OEM buyers and wholesalers, understanding the science and standards behind natural rubber toys is crucial. This article dives into what natural rubber is (and how it differs from synthetic rubber or silicone), where it’s sourced, how manufacturers tame that “rubbery” smell, and the rigorous safety testing that ensures safe rubber pet toys reach the market.

A dog enjoying natural rubber chew toys. Natural rubber offers a safe and durable material for pet toys, balancing toughness with enough softness to protect dogs’ teeth. High-quality natural rubber chew toy OEM products are designed to be resilient against heavy chewing while remaining free of harmful chemicals, making them a preferred choice for pet brands.

What is Natural Rubber? (vs. Synthetic Rubber and Silicone)

Natural Rubber: Natural rubber is an elastic polymer harvested from the latex sap of rubber trees (Hevea brasiliensis). It is a renewable, plant-based material – farmers tap the trees to collect milky latex, which is then refined into rubber. Natural rubber (essentially polyisoprene) is prized for its resilience and chew-friendly elasticity. It’s biodegradable and has a lower overall environmental impact during disposal than synthetics. Importantly for pet toys, 100% natural latex rubber contains no petroleum-based plastics; reputable brands ensure it’s free of BPA, phthalates, and other toxins. The result is a non-toxic, “safe to chew” material that many consider the gold standard for pet toys. However, natural rubber can have a mild organic odor and will gradually age (becoming stiffer or brittle over years, especially if exposed to sunlight or heat).

Synthetic Rubber (TPR/TPE): Synthetic rubbers are man-made elastomers derived from petrochemicals (e.g. styrene-butadiene rubber, thermoplastic rubber compounds). They can be formulated for high durability, but there are trade-offs. Unlike natural latex, synthetic rubber is not biodegradable and its production can release pollutants. Cheap TPR (thermoplastic rubber) toys are common – they’re easy to mold and often cheaper than natural rubber. But unless carefully formulated and tested, synthetic rubber toys may contain residues of BPA, phthalates, or other chemicals, which can leach out over time. Inconsistent quality can also lead to toys becoming sticky or smelly as they break down. For aggressive chewers, many experts prefer natural rubber over TPR due to its reliable resilience and chemical stability. In short, synthetic rubber has its uses (extreme durability toys, treat dispensers that need to be very rigid, etc.), but OEM buyers should ensure any “rubber” toy advertised as such specifies if it’s natural or synthetic. If synthetic, it’s critical to confirm it’s free of harmful additives.

Silicone: Silicone is a different class of material – a synthetic elastomer made from silicon and oxygen (often derived from sand). Food-grade silicone is popular in baby teething toys and molds because it’s odorless, non-toxic, and highly heat-resistant. Unlike natural rubber, silicone is non-porous and doesn’t absorb smells or liquids. It can be sterilized at high temperatures and won’t degrade or leach chemicals easily. However, silicone tends to be softer and less tear-resistant than vulcanized natural rubber. For dog toys, pure silicone might not endure an aggressive chewer (it could tear if the dog has sharp teeth and bites down hard). Additionally, silicone is not biodegradable and typically more expensive. In the context of pet chew toys, silicone may be used in treat-dispensing toys or gentle chew toys, but it’s less common for heavy-duty chew products. Many pet brands stick to natural rubber for chew toys because it “gives” under a dog’s bite (preventing tooth damage) while still being tough to break. As one industry blog succinctly put it: natural rubber remains the safest and most reliable chew toy material for dogs.

Bottom Line: When comparing materials, natural rubber hits a sweet spot for pet toys – it’s natural, safe, and durable with the right design. Synthetic rubber (like TPR) can offer durability and cost benefits but must be scrutinized for safety (consistent formula, no toxic additives). Silicone is extremely safe and inert but may be better suited for light chewers or special applications. OEM buyers should ensure their supplier clearly specifies the material and its composition. Mislabeling a synthetic blend as “natural rubber” is unfortunately not unheard of, so insist on materials transparency (more on that later).

Sourcing Natural Rubber for Pet Toys

Tapping a rubber tree for latex sap. Natural rubber for pet toys is primarily sourced from rubber tree plantations in tropical regions. In fact, about 87% of the world’s natural rubber comes from Southeast Asia, with Thailand, Indonesia, and Vietnam being leading producers. Latex is harvested by tapping the trees – making a shallow incision in the bark and collecting the milky sap in cups (as shown above). For pet product manufacturers, this raw latex is then refined into solid rubber through processes of filtering, coagulating, and drying, before it’s shipped to toy factories for molding.

Majority of rubber plantations are small farms, so supply chain transparency is a key concern. According to industry sources, roughly 90% of natural rubber is produced in a narrow equatorial belt using one type of tree. This concentrated geography means ethical sourcing is important – unsustainable expansion can lead to deforestation in those regions. Responsible manufacturers today pay attention to sourcing: some partner with suppliers certified by the Forest Stewardship Council (FSC) or similar programs to ensure the rubber is harvested sustainably and with fair labor practices. While sustainability might not be every OEM buyer’s first concern, it often goes hand-in-hand with quality: plantations that follow modern standards are less likely to use harmful chemicals or adulterants in their latex.

From a practical standpoint, if you’re developing a custom rubber dog toy and working with an OEM, it’s wise to ask where their rubber comes from. A reputable natural rubber chew toy OEM will know their material’s origin (country or even plantation) and can often provide raw material specifications. Some use “medical-grade” or “food-grade” natural rubber which indicates higher purity (suitable for baby products or food contact items). For example, one U.S. manufacturer, Ruff Dawg, emphasizes that they use FDA-approved, high-quality rubber in all their toys. Likewise, Lucas b. Natural Dog Toys notes their products are made from 100% natural latex from Hevea brasiliensis trees, with no harmful chemicals added. As an OEM buyer, look for that level of material transparency – it signals that the supplier is sourcing real, pure natural rubber and not mixing in cheap fillers.

Managing the “Rubber Smell”: Odor Control Techniques

One common issue with natural rubber products is the distinctive smell. Raw natural latex has an odor often described as a sweet or vanillin-like rubber scent (thanks to organic compounds like isoprene in the material). Some pet toys – for example, a fresh Kong® toy straight out of the package – have a noticeable rubbery smell. While generally harmless (and even intriguing to many dogs), an overpowering odor is something manufacturers work to minimize to improve consumer appeal.

Why the Smell? The odor comes from volatile compounds inherent to natural rubber and from substances used in manufacturing (ammonia from latex preservation, sulfur compounds from vulcanization, etc.). If not properly treated, these can linger in the final toy. High-quality manufacturers address odor in several ways:

  • Material Purity and Washing: Starting with high-purity latex and thoroughly washing the rubber during processing can remove proteins and residues that cause smell. After molding the toy, factories often wash or boil the pieces to leach out any remaining processing chemicals. For example, natural rubber baby products are typically washed to remove latex proteins (which also reduces allergens and smell). Some manufacturers use a mild, pet-safe detergent wash or even an air-curing period to let the rubber off-gas before packaging.

  • Curing and Post-Curing: Proper vulcanization (the curing process that hardens rubber) is critical. Undercured rubber can smell more and even feel oily. Top OEMs carefully control curing temperature and time. They may also “post-cure” by baking the molded toys at a moderate heat for several hours to drive off volatile odors. This extra curing step can significantly reduce that latex smell.

  • Odor-Neutralizing Additives: There are natural odor absorbers like activated carbon or baking soda that can be used in the storage areas to absorb smell. Some industrial additives (marketed for rubber/plastics) can be mixed into the rubber compound to neutralize odors, though for pet toys any additive must be non-toxic. Many pet toy makers avoid adding unnecessary chemicals, so a common approach is to infuse a pet-safe flavor or scent instead. For instance, several brands infuse their natural rubber toys with vanilla extract – not only does this mask the latex scent, it also makes the toy more attractive to dogs (vanilla is a flavor dogs tend to like). You’ll see products advertising “vanilla-scented rubber” or even mint scents. These are usually achieved by mixing a tiny amount of food-grade flavoring into the rubber or by surface-coating the toy after molding.

  • Surface Coatings: In some cases, toys are coated with a light layer of food-grade oil or similar to seal the surface. Notably, Hevea (a natural rubber pet product brand) treats their toys with a bit of vegetable oil – this is harmless and helps the toys feel less sticky. Such a coating might also lock in some odor-causing compounds. Other toys might have a dusting of rice starch or baking soda from the molding process, which can be rinsed off and also helps neutralize odor.

As an OEM buyer evaluating samples, it’s a good practice to smell-test your supplier’s toys. A faint natural rubber smell is normal (often described as mildly sweet or “new toy smell”), but it shouldn’t be overpowering or chemical-like. If you detect strong petroleum or chemical odors, that’s a red flag – it could indicate the use of synthetic fillers or plastifiers in the “natural” rubber. A quality-focused OEM will be upfront about their de-odorizing process (e.g. “we soak our toys in warm water for 24 hours before drying and packing” or “we use a proprietary odor-neutralizer that is FDA compliant”). Ultimately, end consumers appreciate a product that doesn’t make the whole room smell like rubber, so investing in proper smell control is worthwhile. And if a slight scent remains, you can even market it: some brands highlight the natural latex smell as non-toxic and even vanilla-like, reassuring customers that it’s the sign of real rubber.

How Rubber Chew Toys Are Proven Safe

When developing a new chew toy, safety testing is paramount. Pet chew toys endure a lot of abuse – tugging, biting, gnawing, not to mention exposure to dog saliva and the occasional ingestion of small pieces. Responsible manufacturers put prototypes through rigorous tests to ensure they won’t pose hazards like choking, poisoning, or dental injury. Here are key aspects of safety testing for natural rubber toys:

  • Bite Resistance & Tear Strength: Chew toys must resist strong bite forces without breaking apart. Labs or in-house QA teams perform mechanical bite simulations. For example, one OEM describes using equipment-simulated dog bite tests – essentially a machine that applies bite pressure repeatedly to the toy’s surface to mimic a dog’s jaws. They also do tear tests by gripping parts of the toy with pliers and pulling or twisting to see if it tears easily. Measurements like tensile strength (psi) and tear strength (psi) can be quantified for rubber compounds. (One advanced toy brand, Bionic®, publishes that their proprietary rubber has a tensile strength of 2,100 PSI and tear strength of 440 PSI – extremely high values for an elastomer, giving an idea of how robust some toy materials are.) While you may not need the numbers in marketing, as a buyer you can ask if the OEM has tensile/tear data for their rubber formulation. High tear strength means a dog can’t easily rip chunks off, which is crucial for safety.

  • Tensile and Pull Tests: Beyond bite simulation, manufacturers perform tension/pull tests – this involves stretching the toy or its components to ensure they don’t snap under force. Petopia (an OEM) notes they do suspension pull tests with over 200 kg weight on their toys. This kind of test is especially important if the toy has appendages or parts (like a rope through a rubber toy) – they test that these won’t pull apart easily. A well-designed natural rubber toy should deform (stretch) under extreme force rather than shatter. If it does break, it ideally breaks into large pieces, not shards or tiny bits. These tests help validate that threshold.

  • Puncture and Chew Testing: Some labs use actual dog chew testing (with volunteer dogs or controlled setups) to see how real pets interact and where the product might fail. But more standardized is using metal probes or mandibles to attempt puncturing the toy’s surface at forces simulating dog bites. The goal is to ensure no sharp pieces break off that could cut gums or pose choking hazards. Many rubber toys are designed to be soft enough to dent with a fingernail – a common rule is that if you can’t make a slight dent with your nail, the toy might be too hard and risk tooth fractures. Thus, testing finds a balance between hardness and safety.

  • Chemical Safety (Non-Toxicity): Even the toughest toy is unsafe if it contains toxic substances. Lab chemical testing is a critical part of pet toy safety. Manufacturers will have their rubber (and any coatings or colorings on it) tested for things like heavy metals (lead, cadmium, etc.), phthalates, bisphenol-A (BPA), and other harmful chemicals. These tests are often the same as those for children’s toys. For instance, lead and cadmium levels should be below strict thresholds (often measured in parts per million) per standards like U.S. ASTM F963 or Europe’s EN 71-3 (which covers soluble heavy metals). Phthalates (plasticizers that can be toxic) are regulated under U.S. CPSIA and EU REACH – a quality OEM will ensure no phthalates are used in the rubber compound. In fact, many leading brands proudly state what’s not in their toys: “Phthalates? Never. Lead? Not acceptable. BPA? Nope.”. They’ll use only food-grade colorants and materials. For example, Lucas b. dog toys are colored with natural food-based dyes and painted with certified lead-free paint, specifically to meet child-safety standards.

  • Choking Hazard Assessment: Even though pet toys aren’t legally bound by child toy regulations, good manufacturers design with similar precautions. They avoid small detachable parts. If a toy includes a squeaker or rope, it’s embedded in a way that a dog can’t easily extract it. Some companies even include safety indicators – e.g., a toy with a colored core that shows when it’s been chewed down to a dangerous point (like Goughnuts’ “red indicator” core that signals it’s time to replace the toy). During testing, they simulate wear by abrading or chewing the toy and then checking for parts that could come off and be swallowed. Softness is also tested: a too-hard rubber toy can risk tooth damage, so many are formulated to have a bit of “give” under pressure.

  • Usage and Abuse Tests: Testing often goes beyond chew-specific scenarios. Labs may do drop tests (does the toy crack if dropped from a height?), compression tests (if a dog’s mouth or a heavy weight compresses the toy, does it deform and recover without breaking?), and even temperature tests (some toys are meant to be frozen for soothing gums, so they check that freezing and thawing doesn’t make the rubber brittle). If the toy doubles as a treat dispenser or has holes, they test for proper sizing of holes (to avoid tongues getting stuck, etc.). In one case, a poorly designed toy led to a dog’s tongue getting trapped, which highlights why these odd scenarios must be considered in design and testing. A thorough OEM will often have an internal “destruction test” lab where prototypes are intentionally beaten up in all the ways a pet or owner might abuse them.

In summary, as a buyer you should ask your OEM about their testing protocols. Do they do in-house mechanical tests? Do they use third-party labs for chemical testing? Ideally, they should provide you with test reports – for example, an SGS or TÜV certificate showing the toy passed relevant safety standards (more on those next). Pet product safety is increasingly under scrutiny, and while regulations lag behind human toy standards, the best practice is to meet or exceed the child toy standards for toxicity and durability. This ensures the toys are not only safe for pets, but also for any children who might handle them (since kids often end up playing with dog toys too).

Global Safety Standards and Regulations

One might be surprised to learn that pet toys are not strictly regulated by law in many countries. In the U.S., for instance, there are virtually no federal safety regulations specifically for pet toys – the Consumer Product Safety Commission only focuses on products that harm humans. That means it’s up to manufacturers to self-impose standards. Reputable pet product companies voluntarily comply with global toy safety standards to give customers peace of mind. As an OEM buyer, you should look for compliance with the following key standards and certifications:

  • FDA-Approved Materials (Food-Grade Rubber): In a pet chew toy context, “FDA compliant” typically refers to the U.S. Food and Drug Administration’s regulations for materials that can contact food (or be put in the mouth). Natural rubber intended for chewing should meet food-grade standards under FDA guidelines (for example, 21 CFR 177.2600 covers rubber articles for food contact). Many top brands use FDA-approved natural rubber and advertise that their toys are BPA- and phthalate-free. This gives confidence that if trace amounts of the material are ingested, it won’t harm the pet. As evidence, companies like Ruff Dawg and West Paw highlight that their rubber is FDA-compliant and free of harmful additives. When choosing an OEM, ask if their material has an FDA food-grade certificate or if they can supply a document stating the rubber compound complies with FDA or equivalent requirements. This is especially important if the toy will be sold as treat-holding or for puppies (who have sensitive tummies).

  • EN 71 (European Toy Safety Standard): EN 71 is a set of European standards for toy safety, originally meant for children’s toys. It has multiple parts; relevant ones for chew toys include EN 71-1 (mechanical and physical properties), EN 71-2 (flammability), and EN 71-3 (migration of certain elements – essentially heavy metal limits). Pet toy makers often test to EN 71 to ensure their products would also pass as baby-safe. For example, Lucas b. Natural Dog Toys explicitly states their toys “comply with the exact same safety standards as children’s toys: European Safety Standard EN 71”. Another brand, P.L.A.Y., notes their dog toys use AZO-free dyes and meet EN71 and ASTM F963 standards. For an OEM, having EN 71 compliance means they likely had a third-party lab test the toy for things like choking hazards and chemical safety. It’s a strong indicator of quality. Importantly, EN 71-3 will ensure no toxic heavy metals (lead, arsenic, etc.) are present beyond minuscule trace levels. EN 71-9 and others cover organic chemical compounds too (like nitrosamines, which can be an issue with some rubber – Lucas b. even mentions their toys are nitrosamine-free). If you aim to sell in the EU, EN 71 compliance may be required by distributors, even if not explicitly mandated for pet products.

  • ASTM F963 (U.S. Toy Safety Standard): ASTM F963 is essentially the U.S. counterpart to EN 71, specifying safety requirements for toys (primarily children’s toys). It covers mechanical hazards, flammability, and heavy metals similar to EN 71. While not law for pet toys, many manufacturers choose to test against it. For instance, high-end plush dog toy brands often say they meet “the same strict standards as children’s toys, including ASTM F963”. For rubber chew toys, ASTM F963 would ensure that lead content is under 100 ppm, no sharp points are present, etc. An OEM that does ASTM testing at accredited labs is demonstrating a commitment to human-grade safety. Ask your supplier if they have an ASTM F963 test report or Children’s Product Certificate (CPC) for the toy – even though a dog toy isn’t a child’s product, some will have it. At the very least, they should be knowledgeable about these standards.

  • REACH Compliance: REACH is the EU’s comprehensive chemical regulation (Registration, Evaluation, Authorization, and restriction of Chemicals). A pet toy sold in Europe should comply with REACH requirements, which among other things restrict hazardous substances (like certain phthalates, aromatic amines, etc.) and heavy metals. There have been instances where pet products were pulled from markets due to REACH violations – for example, a dog leash was removed in Germany for containing excessive chromium, which didn’t comply with REACH and could cause allergic reactions. Reassuringly, many dog toy listings will state “REACH compliant” or “tested to REACH SVHC standards”. In one Alibaba OEM listing, the supplier highlighted that their rubber dog toy was compliant with EN71, REACH, and U.S. 16 CFR standards, effectively “adhering to global safety and eco-friendly standards.”. As a buyer, ensure your OEM can provide a REACH SVHC (Substances of Very High Concern) compliance statement or test. This indicates the toy has no prohibited chemicals above 0.1% that are on the SVHC list (which is regularly updated with things like certain plasticizers, flame retardants, etc.).

  • Other Standards and Marks: Depending on your market, you might also look for CPSIA compliance (the U.S. Consumer Product Safety Improvement Act, which enforces lead and phthalate limits for children’s products – not required for pet toys, but many manufacturers conform to it voluntarily). If selling in California, being CA Prop 65 compliant (no chemicals known to cause cancer/birth defects beyond safe harbor levels) is important – many will test for this as part of chemical safety. Some international standards include ISO 8124 (similar to EN71/ASTM, for toy safety globally) and specific country regulations (e.g., Japan Food Sanitation Act for pet toys that might contact food). While it’s not necessary to cite every standard, the key point is: choose an OEM who is proactively testing and certifying their products to recognized safety benchmarks. This not only protects end-users (pets and any people around them), it also protects your brand from liability and recalls.

Finally, remember that documentation is key. An ethical OEM will furnish you with test reports or certificates for each batch or at least each product design. For example, they might provide an SGS test report showing the toy passed EN71-3 for heavy metals and EN71-1 for mechanical safety, and perhaps an FDA raw material certificate for the rubber. Some may even have an SGS Performance Tested mark on their products, with a QR code linking to test details. Don’t be shy about asking for these documents – it’s standard due diligence in B2B product development. If an OEM cannot supply any lab test results or claims “we self-certify our rubber is safe” without evidence, that should give you pause. When it comes to safe rubber pet toys, transparency and proof are the name of the game.

Choosing a Natural Rubber Chew Toy OEM: What to Look For

Selecting the right manufacturing partner for your custom chew toy is critical. You’re not just buying a product design – you’re entrusting the OEM with your brand’s reputation for safety and quality. Here are key factors and questions to consider when choosing a custom rubber dog toy supplier:

  • Materials Transparency: Ensure the OEM openly specifies the material and its quality. Is it 100% natural rubber latex? Do they add any fillers or recycled content? Do they use natural dyes or any paint/coating? A trustworthy OEM will proudly state, for example, “made from 100% natural rubber, no PVC or synthetic additives”, and be able to back it up. They should also disclose how they color the toys – the safest method is using non-toxic color compounds mixed into the rubber or food-safe dyes. (Some lower-end makers might paint the toy after molding with cheap paint – avoid that, as paint can chip off and often contains heavy metals. Ideally, choose an OEM that can produce vibrant colors without any paint or glue.) Ask if they have certifications for the raw rubber (e.g., an SDS or a compliance letter stating it’s BPA-free, etc.). If an OEM sources ethically (say, FSC-certified rubber or has an organic latex source), that’s a bonus sign of quality. Tip: Request a sample piece of the raw rubber or a test slab – you can have this independently lab-tested if needed to verify purity.

  • Design & Tooling Experience: Look for an OEM with a proven track record in mold design and product engineering for pet toys. Chew toys might seem simple, but subtle design choices make a huge difference in durability and safety. An experienced manufacturer will have in-house design engineers and mold technicians who know how to avoid weak points (like too-thin sections) and how to optimize shapes for chewing fun and longevity. For instance, they’ll know how thick a toy’s wall should be for a given rubber hardness to prevent easy tearing, or how to design grooves/ridges that clean teeth but don’t compromise strength. During vetting, ask how many years they’ve been making pet chew toys and for which markets. If they’ve been producing for leading pet brands or have references, that’s a good sign. Evaluate their tooling capabilities: Do they make their own molds? High-quality steel molds and precise molding processes (like compression or injection molding of rubber) will yield consistent products. Some OEMs can also assist with 3D prototyping. Petopia, for example, emphasizes a data-driven design approach – using an extensive database of dog bite force and tear strength data to inform product development. An OEM with this level of expertise can guide you in refining your design (e.g., recommending a thicker tether on a tug toy for larger breeds, or adjusting the rubber hardness for a puppy toy vs a power chewer).

  • Safety Testing & Documentation: As discussed in the previous section, the OEM should have robust testing protocols. Inquire about their quality control and testing: “What tests do you perform to ensure the toys are durable and safe?” The answer should reference mechanical tests (bite/chew simulations, tension tests) and chemical tests (third-party lab certifications). Preferably, they should be able to supply test reports for EN71, ASTM F963, REACH, or similar. Also ask about ongoing quality control – do they batch test each production run? Do they have ISO 9001 or other quality management certifications for their factory? A good OEM partner will not only design to safety standards but also consistently produce to those standards. It’s worth checking if they work with well-known labs like SGS, TÜV, or Intertek for certifications – an OEM that invests in reputable lab testing shows professionalism. In short, demand test documentation. In this industry, any serious OEM expects that and will have a ready folder of certifications to share.

  • Manufacturing Capacity and Reliability: While not explicitly about safety, the OEM’s production capability and reliability matter. You’ll want a partner who can scale production to your needs and deliver on time. Indicators include the number of production lines, monthly output (e.g., Petopia advertises 300,000+ monthly toy production capacity), and how long they’ve been in business. An OEM with 25+ years of experience and dozens of professional molds and machines has likely encountered and solved many manufacturing challenges. This reduces the risk of defects in your order. Also, discuss what warranties or guarantees they offer on quality – for example, if you receive a batch with an issue, will they replace it? The best suppliers stand behind their work.

  • Compliance and Certifications: Beyond product tests, check if the factory has any relevant audits or certifications. Some buyers might require BSCI or SEDEX social compliance audits, or environmental certifications especially if promoting eco-friendly toys. If your brand angle is sustainability, see if the OEM offers recycled rubber options or participates in recycling programs (some do grind and reuse their rubber waste in non-toy items). A forward-thinking OEM might also be developing biodegradable formulations or have upcycling initiatives for old toys – aligning with trends can be a marketing plus for you. At minimum, ensure the OEM complies with local manufacturing laws (no forced labor, etc.), as any scandal in the supply chain can hurt your brand.

  • Communication and Development Support: Since you may be engaging in custom development, the ease of communication and technical support from the OEM matters. Do they offer material sampling (sending you rubber material samples of different hardnesses or colors to choose from)? Will they assist in rapid prototyping or provide CAD files for your design? A cooperative OEM will help optimize your concept for manufacturability and may even suggest improvements. Look for one that is willing to collaborate on iterations and provide insight from their past projects.

Ultimately, choosing the right OEM comes down to a partner that can deliver safe, high-quality rubber pet toys consistently, while being transparent and supportive. Don’t hesitate to vet multiple suppliers – ask each the same tough questions about materials and testing, and compare responses. The OEM that ticks all the boxes – clear about their natural rubber sourcing, has tooling expertise, provides test documentation, and communicates well – will give you confidence as you develop your custom chew toy line.

Partnering for Safe & Successful Chew Toys

Natural rubber pet chew toys offer a winning combination of safety, durability, and pet appeal – but realizing a great product from concept to store shelf requires deep material knowledge and strict quality standards. As we’ve covered, understanding the nuances of natural vs synthetic materials, addressing raw rubber odors, and rigorously testing for chew resistance and toxins are all part of delivering a premium product. OEM buyers should leverage this knowledge to ask the right questions and demand the highest standards from their manufacturing partners.

The good news is, the industry is moving towards greater safety and transparency. Forward-thinking manufacturers already treat pet toys with the same care as baby toys, adhering to FDA, EN71, ASTM, REACH and beyond. By choosing an OEM who does the same, you protect your brand and your end customers (both the pets and the humans who love them).

Ready to turn your pet product idea into reality? Contact our factory to kickstart your custom chew toy development. With years of experience as a leading natural rubber chew toy OEM, we offer end-to-end support – from material selection and prototyping to final safety testing and production. We can provide material samples of our premium, food-grade natural rubber and show you our library of test reports for peace of mind. Whether you need a durable dental chew for power chewers or an engaging treat-dispensing toy with your unique design, our team has the tooling expertise and technical know-how to deliver. Let’s work together to create safe rubber pet toys that delight your customers and keep tails wagging.

Contact us today to request samples, discuss your project requirements, or see our safety certifications. We’re excited to partner with you in bringing outstanding, safe, and fun chew toys to the global pet market – complete with custom development, material transparency, and full safety testing support every step of the way. Your brand and our manufacturing can be the perfect pairing for success in the pet industry. Let’s make something pawsome, safely!